Soil Preparation for Roses in Western Washington
Pets & Toxicity
Recorded toxicity for plants linked in this guide. An unknown status is not a safety assessment.
No linked plant is recorded as toxicDetailsHide
— Image © PlantReference.org 2026
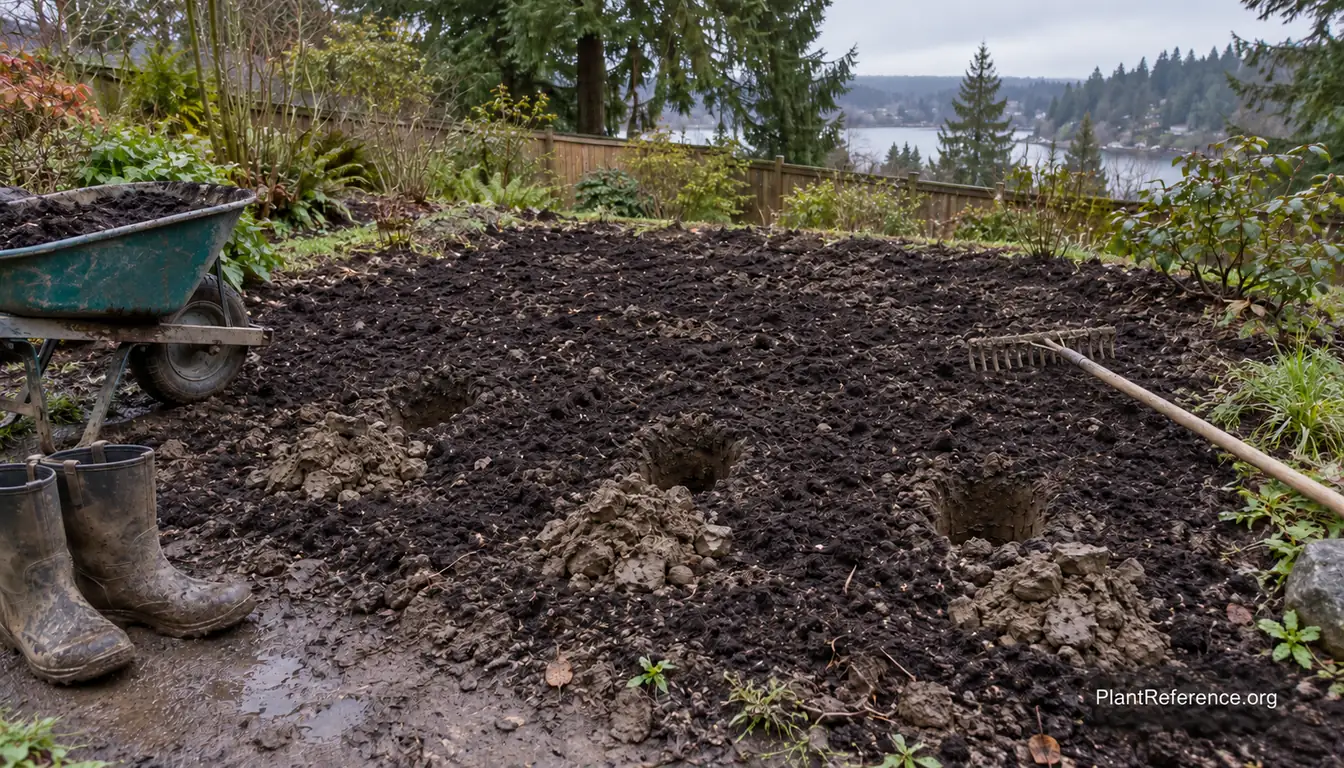
Soil preparation for roses in clay soil begins with diagnosis, not a shopping list. Western Washington beds can contain compacted topsoil, Puget Sound glacial till, construction debris, or a seasonal water table, and each condition needs a different response. Roses 🌿Rosa spp. (ROH-zuh) need oxygen around their roots as much as they need water, so correcting drainage and compaction matters more than enriching one planting hole.
Aim for well-drained loam with organic matter and a pH of 6.2–6.8. That target does not mean replacing native soil. It means improving the connected root zone so water, air, roots, and soil organisms can move through it without hitting an abrupt clay wall.
Diagnose the Clay Before You Amend It
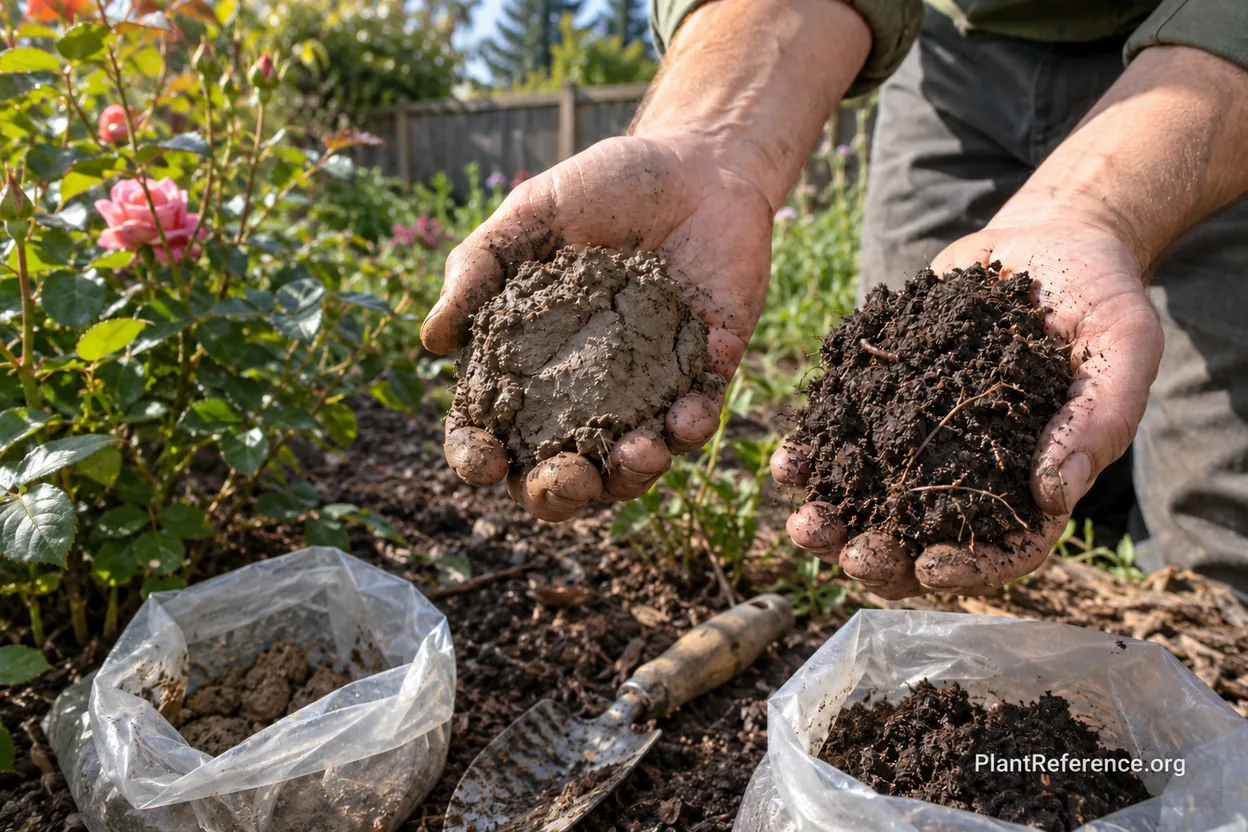
Clay describes particle size, not a complete diagnosis. Clay particles are tiny and carry electrical charges that hold water and nutrients. A well-aggregated clay loam can be fertile and productive, while the same mineral fraction compacted without pore space can exclude oxygen and stop roots.
Begin when the soil is moist but not saturated. Squeeze a handful. If it forms a ribbon and smears across your palm, clay content is substantial. If a shovel leaves shiny walls, the soil is too wet to work; digging then destroys aggregates and creates smooth surfaces that roots and water struggle to cross.
Next, examine the profile at least 12–18 inches (30–45 cm) deep. Look for abrupt color changes, gravel bands, dense gray layers, roots turning sideways, or standing water. A compacted layer only 6 inches (15 cm) below grade cannot be repaired by mixing compost into the top 4 inches (10 cm).
Ask what happened before you arrived. Construction traffic compresses soil far deeper than ordinary foot traffic. Imported topsoil may cover glacial till. Downspouts, retaining walls, and neighboring grades can direct water into the bed. Fix PNW Garden Drainage: Glacial Till, Hardpan & Raised Beds provides a regional framework for separating soil texture from site hydrology.
Western Washington's rainfall also encourages a familiar mistake: assuming every wet bed contains too much clay. Shade, roof runoff, a low grade, or a perched water table can saturate even a reasonable loam. Diagnose the source before changing the soil.
Compare Common Rose-Bed Soil Conditions
Use observable evidence to decide which intervention fits. Adding the same compost depth to every condition can waste money or make drainage worse.
Soil condition | Field evidence | Primary limitation | Best first response |
|---|---|---|---|
Aggregated clay loam | Crumbs when moist, many fine roots, drains after rain | Slow spring warming and surface compaction | Protect structure, add light organic matter, and mulch |
Compacted clay | Shiny shovel walls, dense clods, few deep roots | Little air-filled pore space | Relieve compaction across the bed when moisture is workable |
Glacial till or hardpan | Dense stony layer, roots turn sideways, water perches above | Restrictive subsoil blocks drainage and rooting | Regrade, raise the bed, or professionally address the layer |
Seasonal wet pocket | Gray mottling, standing winter water, water-loving weeds | High water table or incoming runoff | Redirect water or relocate the rose bed |
Sandy imported fill | Gritty texture, drains quickly, dries unevenly | Low water and nutrient retention | Add measured finished compost across the root zone |
Isolated amended hole | Loose dark pocket surrounded by dense clay | Water collects at the abrupt texture boundary | Rework a broad bed and reconnect drainage pathways |
The table is a triage tool, not a laboratory analysis. Two conditions can occur together. A site may have compacted clay above glacial till, plus runoff from a driveway. Solve water movement at the landscape scale before refining fertility.
For context on the region's broader soil and climate patterns, see Pacific Northwest Gardening Guide: Climate, Soil & Plant Selection. Use the regional pattern to form questions, then use tests and observations from your bed to answer them.
Test Drainage and Find the Restrictive Layer
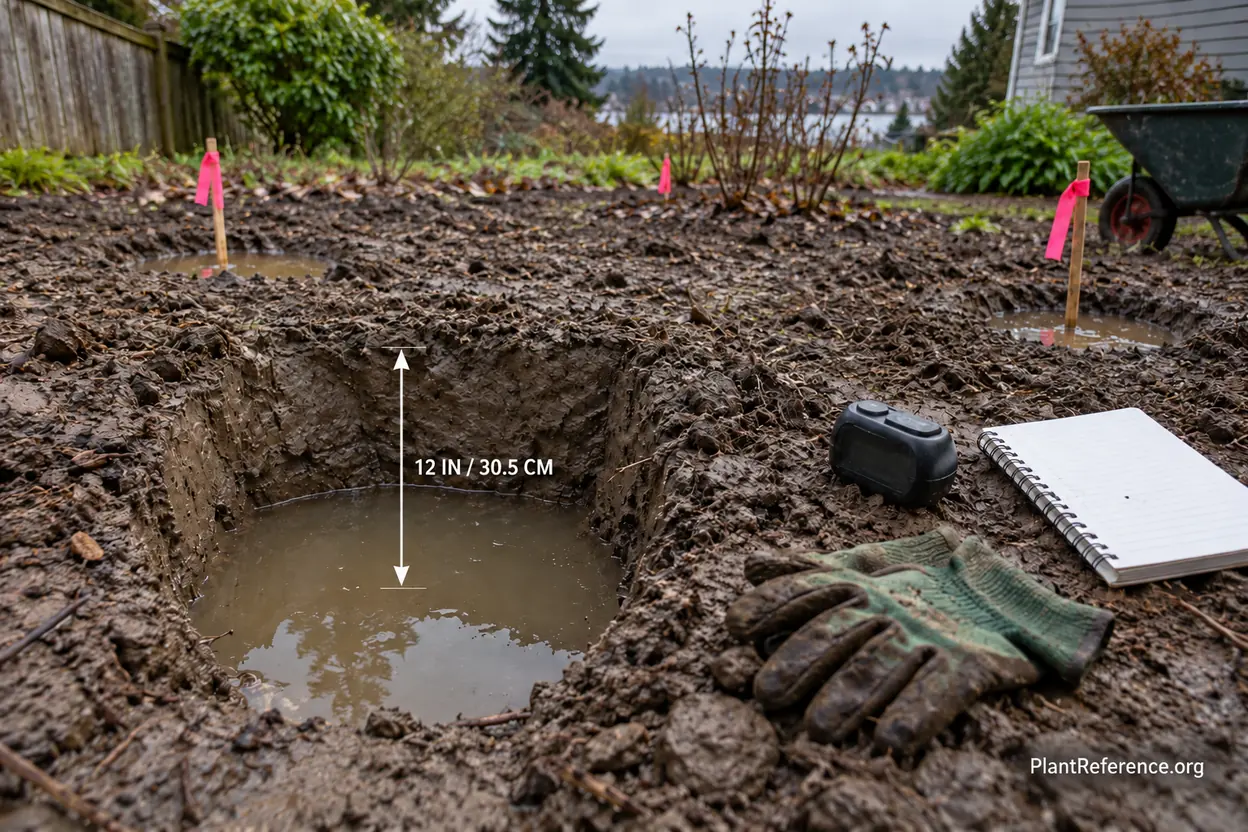
Dig a hole about 12 inches (30 cm) deep and 6–12 inches (15–30 cm) wide. Fill it with water, let the soil saturate and drain once, then refill it. Mark the water level and measure the drop over the next several hours.
Water that remains near the starting level after a day signals a serious limitation. A rapid initial drop followed by a stop often means the upper soil drained until water reached a dense layer. Repeat the test in several locations because one old post hole or buried utility trench can give a misleading result.
Do not assume gravel in the bottom of a planting hole will help. Water does not eagerly cross from fine-textured soil into a coarse gravel layer until the fine soil is highly saturated. The result can be a perched wet zone above the gravel. Gravel in Bottom of Pots for Drainage: Why It Backfires explains the same capillary principle in containers.
If compaction is limited to the upper bed, loosen it when moisture is correct by lifting and fracturing the soil without pulverizing it. A broadfork can help in accessible beds, but it cannot fix a high water table or solid construction hardpan. Avoid rototilling wet clay, which creates small structural fragments that later collapse into a dense mass.
Where water has no safe outlet, moving the rose bed upslope or building a genuinely raised bed may be more reliable than repeated amendments. The bed must connect to a drainage route; a raised island surrounded by saturated soil can still receive lateral water.
Measure pH Before Adding Lime or Sulfur
Roses absorb nutrients most efficiently around pH 6.2–6.8. Western Washington soils often trend acidic because rainfall leaches base-forming cations, but past liming, concrete debris, irrigation water, or imported soil can shift a specific bed.
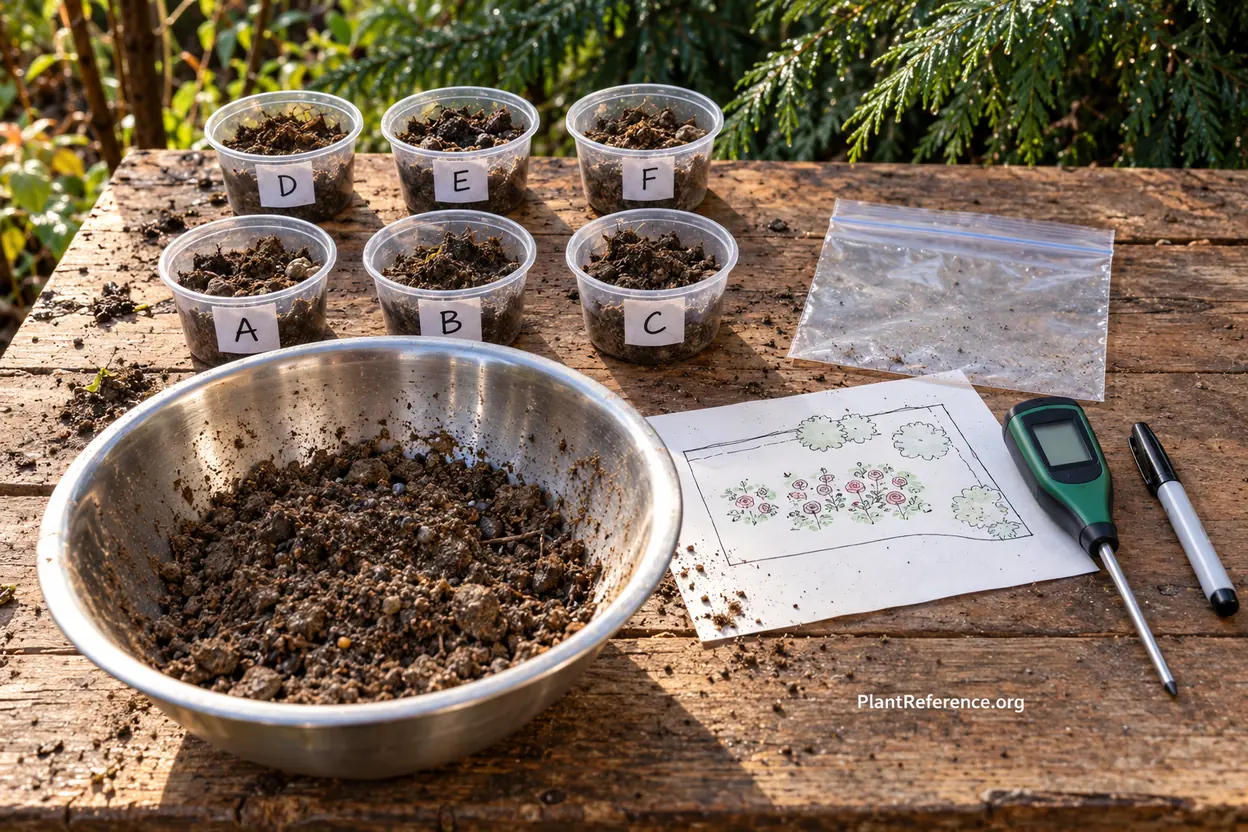
Collect multiple subsamples from the future root zone, mix them in a clean container, and submit a representative sample to a laboratory or extension service. A home probe can screen for large differences, but a laboratory report provides calibrated pH plus nutrient and amendment guidance.
Do not add lime simply because the region is rainy. Excess lime can raise pH beyond the rose's preferred range and reduce iron, manganese, or phosphorus availability. Plants can then show nutrient deficiency even when the element is present because root chemistry limits uptake.
Why Pacific Northwest Soil Is Acidic + How to Fix It explains the mechanisms behind regional acidity. Raised Bed Soil pH Problems: Testing, Adjusting, and Maintaining Balance offers a useful process for measuring, making one controlled change, and retesting rather than alternating between lime and sulfur.
If testing recommends lime, calculate the rate for the bed's actual area and soil texture. Clay buffers pH change more strongly than sand, so it usually needs more amendment for the same shift. Incorporate the specified material evenly and allow time for reaction; pH does not change safely overnight.
Amend the Entire Rose Bed, Not Individual Holes
The planting-hole bathtub forms when porous amended material sits inside much denser clay. Water moves rapidly through the loose backfill, then slows at the clay boundary. During wet periods, the hole fills while nearby soil remains comparatively resistant.
Prevent that boundary by preparing the full bed. Spread 2–3 inches (5–8 cm) of finished compost across the surface, then blend it into the upper 8–12 inches (20–30 cm) only when the soil is workable. Retain native mineral soil; compost should improve aggregation, not replace the structural fraction.
Compost quality matters. Use finished material with an earthy smell, stable temperature, and no recognizable feedstock that could tie up nitrogen. Avoid thick additions of immature woody material in the root zone. Surface wood chips work as mulch because decomposition occurs mainly at the soil interface; buried fresh chips behave differently.
For a new bed, improve an area at least several feet wider than the intended planting line so roots do not encounter a narrow wall. Roses explore horizontally well beyond the original hole. The connected bed also distributes irrigation and nutrients more evenly.
Do not add sand casually to clay. Small amounts of sand can occupy existing pores without creating a sandy loam, producing a concrete-like mixture. Changing texture requires impractically large volumes and careful grading. Organic matter, roots, and protected aggregation usually provide a safer path.
Best Soil Mix for Raised Beds: Creating the Perfect Growing Medium explains the distinct jobs of mineral soil, organic matter, pore space, and moisture. Raised Bed Soil Settling and Compaction: Prevention and Solutions shows why excessive fluffy material shrinks and loses structure after repeated wetting.
Build Grade and Drainage That Last
Surface grade should carry excess water away without eroding soil or sending runoff toward a foundation. A gentle crown or slope across a broad bed often helps more than a deep hole. Keep mulch and soil below siding, vents, and weep paths.
Raised beds are appropriate when native drainage cannot be corrected economically, but they need adequate depth and width. For roses, aim for at least 18–24 inches (45–60 cm) of prepared rooting depth where site conditions permit, with a broad footprint that resists drying and temperature swings.
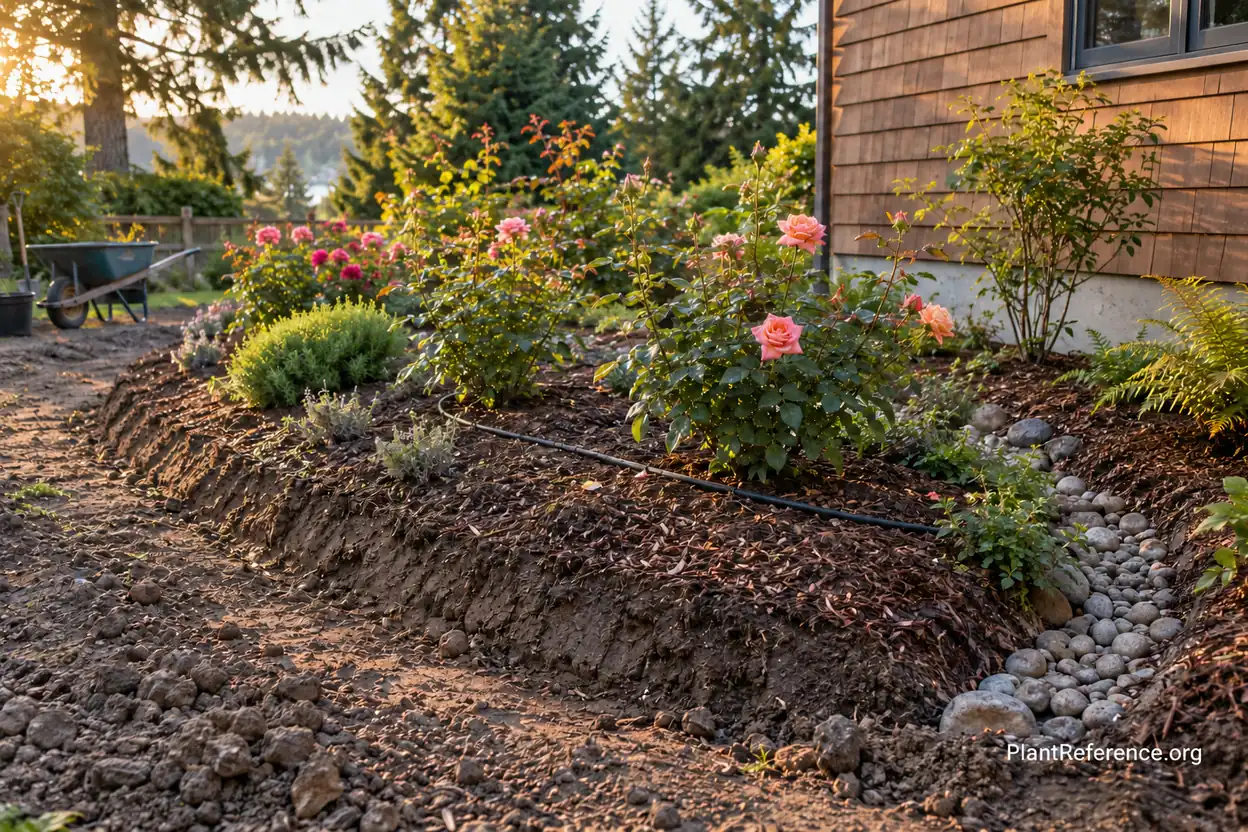
Do not line the bottom with plastic or create a sealed planter unless you are intentionally building a container with engineered drainage. Roots need a continuous path to air and water. An open-bottom bed over fractured, draining subsoil behaves differently from a box placed over an impermeable depression.
Plan irrigation before planting. Soaker hose or dripline below mulch supplies the root zone while keeping foliage dry. Raised Bed Irrigation Systems: Watering Solutions for Consistent Growth covers pressure regulation and even delivery principles that apply equally to a rose border.
Plant Roses Without Recreating a Bathtub
Plant bare-root roses in March when soil is workable and near 40°F (4°C) or warmer. Soak roots in clean water for 2–24 hours and remove only broken tissue. Container roses can be installed later, but summer planting requires careful water management.
Dig a hole wide enough to spread roots naturally, not a deep narrow shaft. Roughen glazed sides. Form a low mound for bare roots, arrange them without bending upward, and backfill with the prepared bed soil rather than a separate premium mix.
In the maritime Northwest, place a graft union at soil level or 1–2 inches (2.5–5 cm) above grade. In a colder exposed microclimate, 2–4 inches (5–10 cm) below grade can protect it. For own-root plants, preserve the nursery soil mark unless the grower specifies otherwise.
Backfill in stages and water midway to settle air pockets. Do not stomp wet clay around roots. Finish to grade, water again, and spread 2–3 inches (5–8 cm) of coarse organic mulch while keeping several inches clear around the crown.
The root-volume discussion in How Much Soil Do Urban Trees Actually Need? The Root Volume Guide addresses larger plants, but its central principle applies here: long-term performance depends on connected usable soil, not the dimensions of the original hole.
Maintain Soil Structure After Planting
Healthy soil is not a one-time construction project. Roots, fungal hyphae, soil animals, wetting, drying, and organic residues continually rebuild or weaken aggregates. Your maintenance either protects those processes or interrupts them.
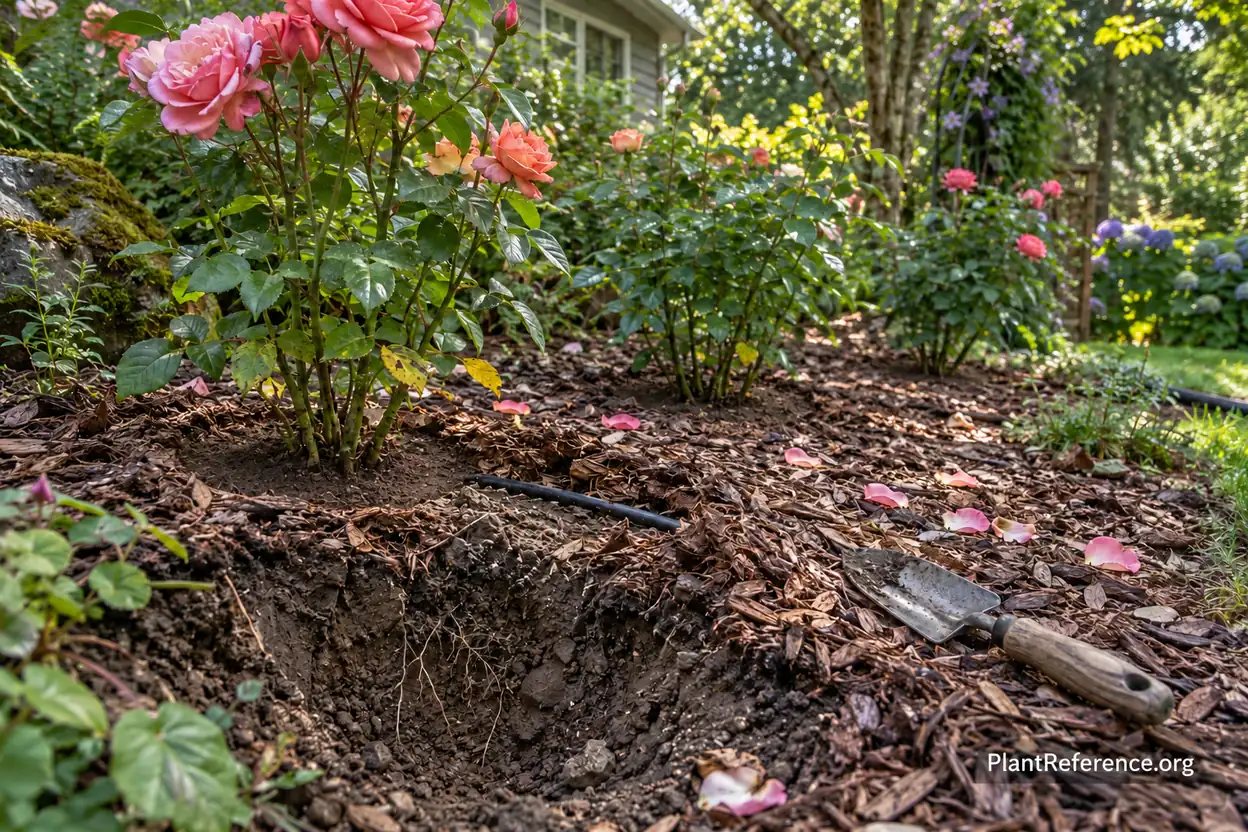
Avoid walking on wet beds. Use permanent paths and place stepping stones only where access requires them. Top-dress with 1–2 inches (2.5–5 cm) of finished compost when testing and observation justify it, then renew mulch without burying the crown.
Check drainage each winter, especially after construction, root growth, or changes to neighboring grades. Watch for water standing longer than before, roots exposed by erosion, and downspouts redirected toward the bed. Correct small hydrology problems before they become root decline.
Use this annual soil review:
Observe ponding and runoff during the wettest weather.
Pull mulch back and inspect the crown and upper soil structure.
Check moisture 2–3 inches (5–8 cm) deep during summer irrigation.
Retest pH and nutrients on the laboratory schedule, not after every symptom.
Add only the amendment supported by evidence.
Restore mulch while leaving canes and graft unions clear.
Yellow foliage can reflect waterlogged roots as easily as fertilizer shortage. Diagnose moisture and oxygen before feeding. Nutrient Deficiencies in Raised Beds: Visual Diagnosis and Treatment helps separate symptom patterns, but a soil or tissue test remains stronger evidence than leaf color alone.
Soil preparation for roses in clay soil succeeds when the whole system works: water has an exit, roots have oxygen, pH supports nutrient availability, and organic matter improves rather than replaces mineral structure. Build a broad connected root zone once, then protect it from compaction and excess amendment. That approach costs less and lasts longer than rescuing roses from beautifully enriched bathtubs.
Frequently Asked Questions
Reading about plants and recognising them are different skills. These three build the second.
- Daily PlantIdentify the day’s mystery plant from a close-up photograph.
- Keyed OutWork a dichotomous key, lead by lead, to name a hidden specimen.
- Name That PlantName a specimen from botanical clues dealt hardest first.
Free to play, no account needed
Tagged with
Priya is a soil scientist at an agricultural extension office who gardens on a quarter-acre suburban lot in Indianapolis. Her professional work focuses on soil health and nutrient management, which gives her a perspective most gardening writers don't have—she thinks about what's happening underground before worrying about what's happening above it. Priya maintains a large pollinator garden, grows herbs and vegetables, and is slowly converting her conventional lawn to a mix of native grasses and low-growing groundcovers. She writes about soil health, composting, fertilizer use, and building the kind of foundation that makes plants thrive without constant intervention.