How to Grow Climbing Roses in the Pacific Northwest
— Image © PlantReference.org 2026
Learning how to grow climbing roses starts with one practical fact: a climbing rose is not a vine. It has no tendrils, adhesive pads, or twining stems. Instead, it produces long, flexible canes that a gardener must attach to wires, a trellis, an arbor, or a pergola. If the support is undersized or the canes are left upright, the plant becomes harder to manage and flowers mostly near the top.
In the Pacific Northwest, support design matters as much as soil preparation. Wet foliage and winter wind add weight and leverage to mature canes, while mild winters allow the framework to become substantial. Build for the plant you will have in ten years, not the nursery plant you carry home.
Understand How Climbing Roses Actually Grow
Climbing roses typically reach 6–12 feet (1.8–3.7 m), and vigorous plants can exceed that range. Those dimensions describe cane length, not a self-supporting trunk. New basal canes rise from the crown, remain flexible while young, and harden as they age. Your job is to guide those young canes into the permanent framework before they become brittle.
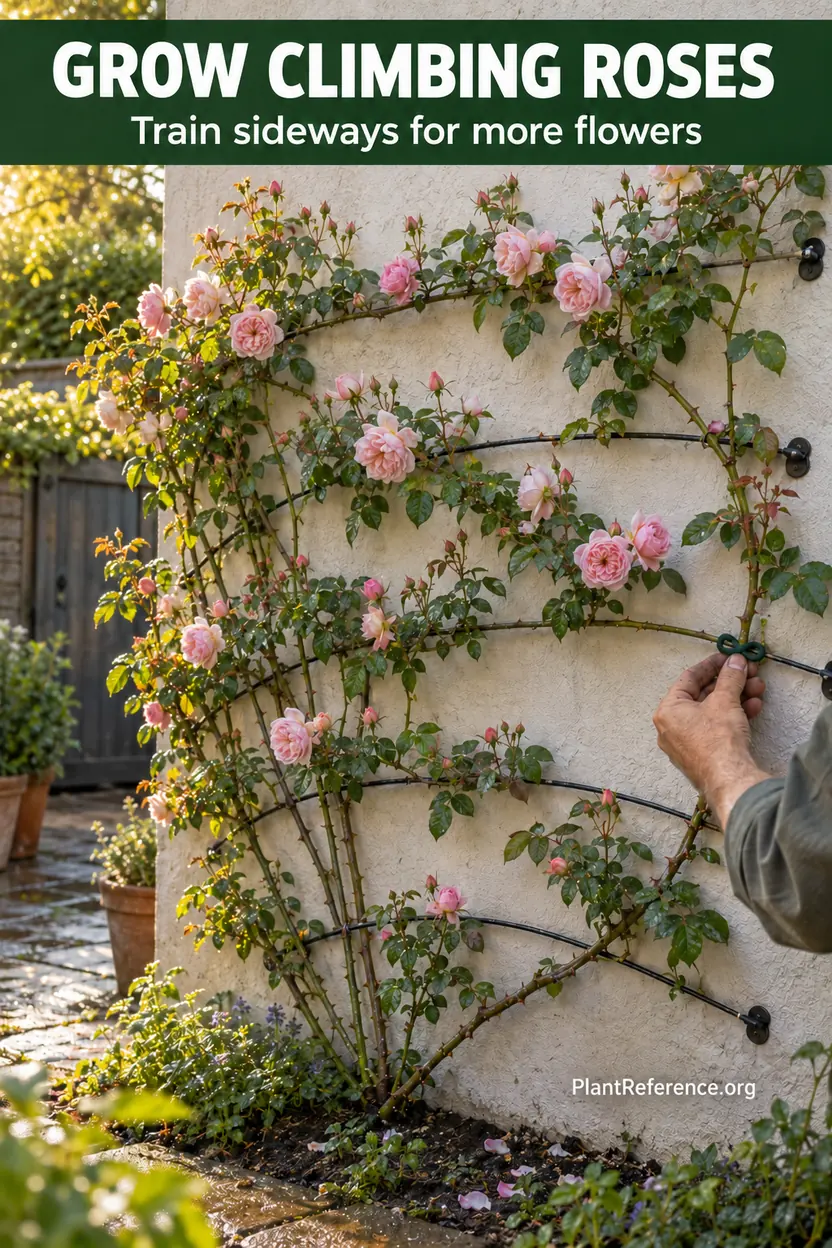
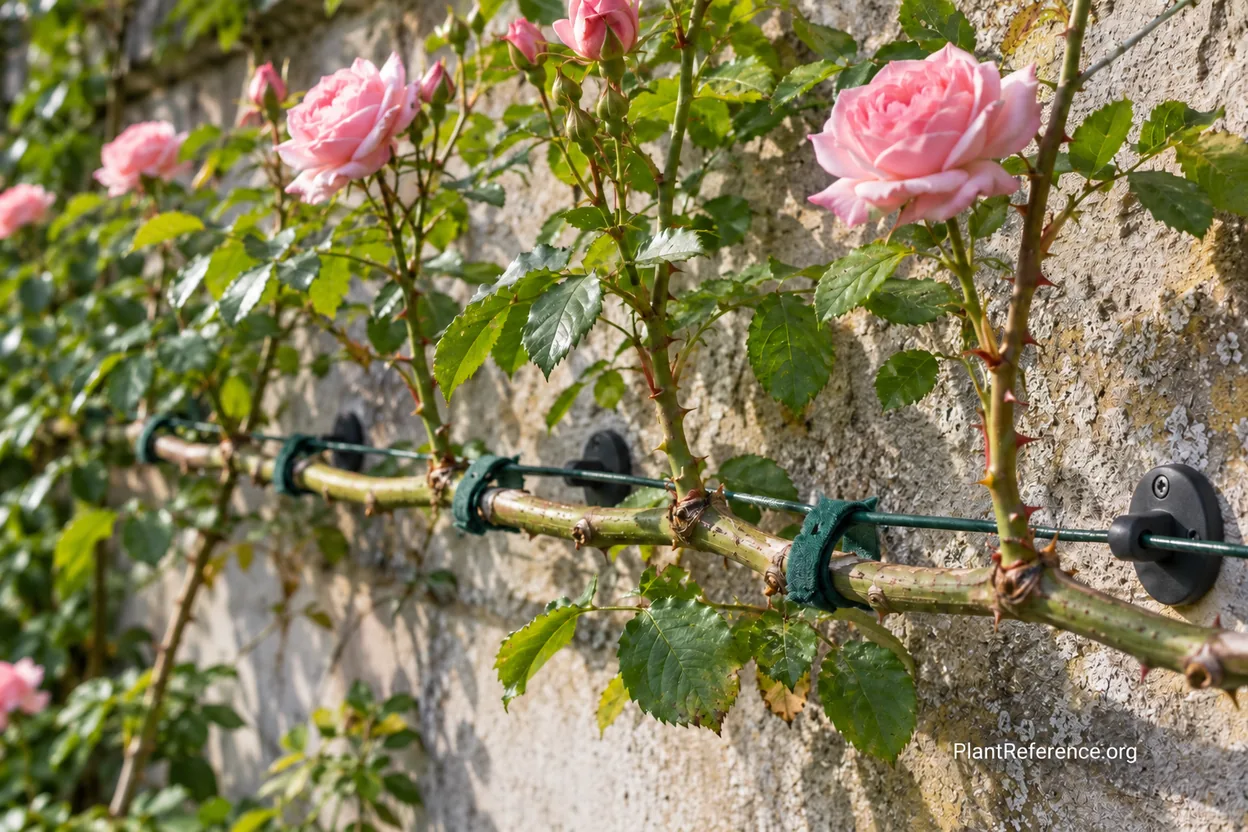
An upright cane concentrates flowering near its upper end because the highest buds receive the strongest growth signal. Bending that cane to roughly 30–60 degrees from horizontal, or into a broad fan or shallow arc, reduces top dominance. Buds along more of the cane then develop into short flowering laterals. This is why a trained rose can bloom from knee height to the top of a wall while an untrained one forms a green ladder with flowers only overhead.
Keep structural canes and flowering laterals mentally separate. Structural canes create the permanent skeleton. Laterals arise from that skeleton, flower, and can be shortened during annual pruning. Cutting every long cane back as though it were a hybrid tea destroys the framework you spent years building.
The regional background in Pacific Northwest Gardening Guide: Climate, Soil & Plant Selection helps explain why airflow, summer irrigation, and winter attachment all deserve attention. A cool damp spring favors fungal disease, a dry summer tests newly planted roots, and winter storms exploit every loose cane.
Choose a Support That Will Last
Select the support before planting. A mature climbing rose carries woody canes, wet foliage, flowers, and sometimes hips. Wind turns that mass into a moving load. Thin decorative lattice stapled to a fence may look adequate in year one and tear loose just as the rose becomes valuable.
Support type | Best use | Construction notes | Main limitation |
|---|---|---|---|
Wall wires or cable trellis | Training a broad fan against a house or masonry wall | Use corrosion-resistant anchors and stand wires 4–6 in (10–15 cm) off the wall for airflow and tying access | Fasteners must suit the wall material and avoid waterproofing damage |
Heavy wood trellis | Fence line or freestanding screen | Use rot-resistant lumber, exterior-rated fasteners, and posts set for mature wind load | Thin lattice and untreated ground contact fail early |
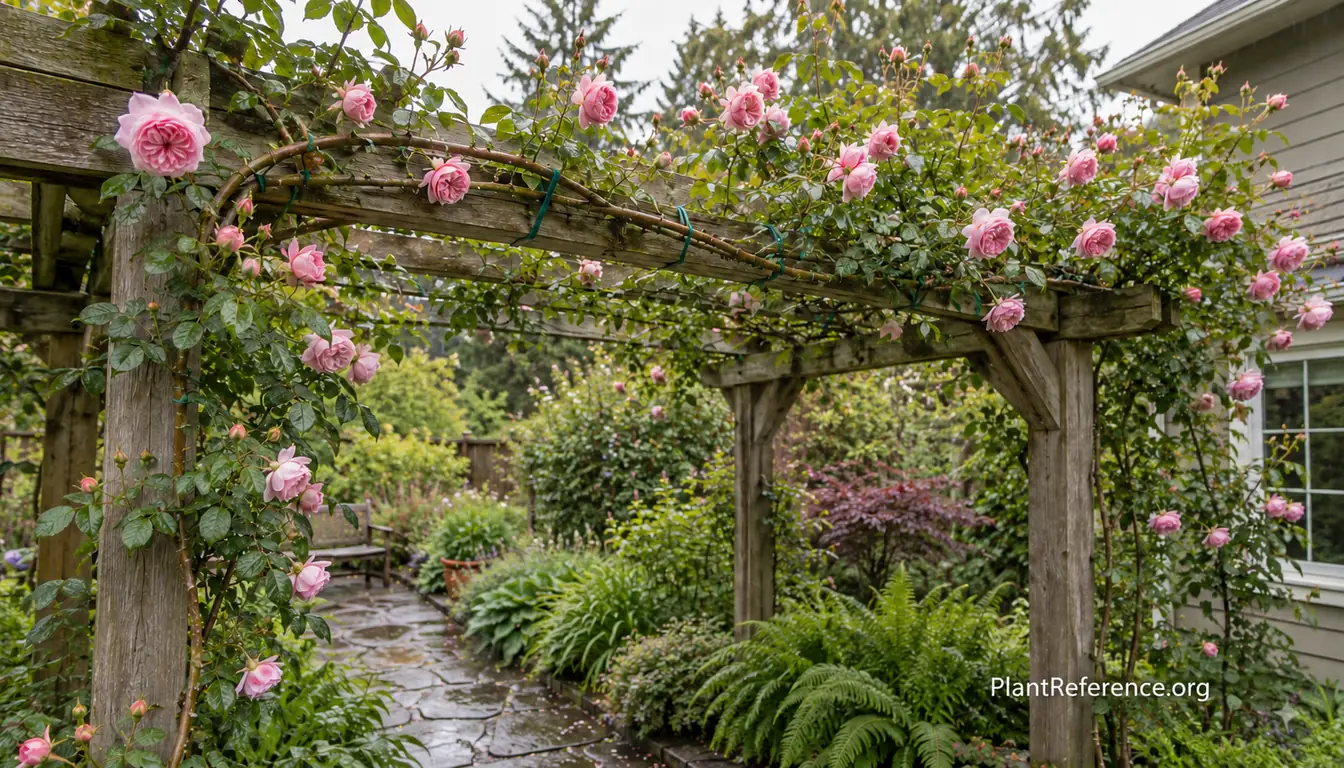
Arbor | Framing a gate or path | Anchor both legs, keep headroom clear, and train one plant from each side where width allows | Top-heavy growth can narrow the passage and catch wind |
Pergola | Covering a seating area or long walkway | Size beams and footings for wet mature growth; provide reachable tie points | Annual pruning requires safe access above shoulder height |
Metal obelisk | Compact vertical accent | Choose welded, galvanized, or powder-coated steel at least 6–8 ft (1.8–2.4 m) tall | Too narrow for large mature climbers and difficult to repair inside the plant |
For wood construction, durability depends on species, grade, drainage, and fasteners. Best Wood for Raised Garden Beds: Material Comparison and Longevity Test compares common outdoor materials and the tradeoffs behind rot resistance. The same principles apply to a trellis: keep end grain and post bases from holding water, use compatible corrosion-resistant hardware, and make replaceable parts accessible.
Mount a wall system 4–6 inches (10–15 cm) away from siding or masonry. The gap permits air circulation, gives your hand room to pass a tie behind a cane, and keeps thorns from grinding against the finish. Never screw through flashing, roofing, or a waterproof membrane without a building-appropriate detail. If the wall assembly is unfamiliar, ask a qualified contractor where structural attachment can be made safely.
An arbor or pergola needs more than stiffness. It needs a training route. Provide horizontal rails or wires every 18–24 inches (45–60 cm), starting low enough to create flowers near eye level. Keep a 7-foot (2.1-m) clear walking height under arches after allowing for hanging growth.
Plant at the Right Distance from the Structure
Choose a site with at least six hours of direct sun. Morning sun is especially useful because it dries dew and rain from foliage. Avoid a narrow, roofed corridor where the roots stay dry but leaves remain humid, and avoid a low point that holds winter water.
Roses prefer well-drained loam with organic matter and a pH of 6.2–6.8. Pacific Northwest soils often trend acidic, but test before adding lime. Why Pacific Northwest Soil Is Acidic + How to Fix It explains why rainfall history is only a clue, not a substitute for a measurement.
Improve a broad planting area rather than filling one isolated hole with compost. In clay, a highly amended hole can become a bathtub. Dig a 12-inch (30-cm) test hole, fill it with water, let it drain, refill it, and observe. Standing water a day later points to compaction, hardpan, grading, or a high seasonal water table. Correct the profile with guidance from Fix PNW Garden Drainage: Glacial Till, Hardpan & Raised Beds before installing the rose.
Set the crown about 18–24 inches (45–60 cm) from a wall or post. That distance keeps the main root zone beyond dry roof overhangs, improves airflow, and gives you room to inspect the crown. Angle the plant slightly toward the support and guide canes back to it; do not jam the crown against concrete or a post footing.
Plant bare-root roses in March when soil is workable and about 40°F (4°C) or warmer. Soak roots for 2–24 hours, remove only broken tissue, and spread roots over a low mound. In mild maritime conditions, set the graft at soil level or 1–2 inches (2.5–5 cm) above grade. In a colder exposed pocket, 2–4 inches (5–10 cm) below grade offers more protection.
Backfill with the improved native soil, water midway to settle voids, finish to grade, and water again. Mulch 2–3 inches (5–8 cm) deep while keeping several inches clear of the crown. Tie the first canes loosely enough that a finger fits beneath the tie.
Train Main Canes Horizontally
Begin training while shoots are green and flexible. Wear gauntlet gloves and eye protection, then bend each cane a little at a time. Never force a cold, stiff cane into a sharp corner. A gradual curve distributes stress; a kink becomes a break.
On a wall, arrange three to six main canes like an open fan. On an arbor, lead canes up the posts, then turn them across the top in opposite directions. On a pergola, run canes along beams rather than bunching them at one post. Each route should leave room for laterals to grow and for your hand to reach ties.
Use soft, adjustable ties rather than bare wire. Make a loose figure eight so the tie crosses between cane and support; this reduces rubbing and keeps the stem from pressing directly against the structure. Check ties in spring and midsummer because canes thicken quickly. Replace any tie cutting into bark.
Space attachment points about 12–18 inches (30–45 cm) apart and add one near every direction change. Do not rely on a single tie at the cane tip. A winter gust can whip the whole length, split bark, or lever the attachment from the wall.
Where several canes compete for the same route, keep the healthiest and redirect the others while young. Crossing structural canes create rubbing wounds and a dense pocket that stays wet. A clear fan looks sparse initially, but it fills as flowering laterals develop.
Treat the space below the rose as part of the design. Low perennials can shade soil and extend bloom, but leave inspection and watering access around the crown. Plan a Perennial Garden That Blooms Spring to Fall can help sequence surrounding color without burying the support base in inaccessible foliage.
Build the Framework During Years One to Three
Do not hard-prune a young climbing rose during its first 2–3 years. That rule is easy to repeat and easy to misunderstand: you should still remove dead, diseased, damaged, or clearly broken growth. What you should not do is shorten healthy structural canes simply because they look long or untidy.
The first seasons are construction years. The rose is establishing roots, producing basal canes, and occupying the support. Preserve the best long canes, spread them into open routes, and tie them as they extend. Remove a weak shoot only when it has no useful place or competes with a stronger framework cane.
Use this establishment sequence:
Plant beside a completed support and water the full root zone.
Select the strongest new basal canes as the future framework.
Guide canes outward before they harden, using broad bends rather than sharp turns.
Add ties every 12–18 inches (30–45 cm) and at every change in direction.
Remove only the Three Ds: dead, diseased, and damaged wood.
Review the route twice each growing season and loosen constricting ties.
Flowers may be limited while the framework develops. That is not failure. A well-distributed skeleton built over three years produces far more bloom and much safer maintenance than repeated hard pruning followed by vertical regrowth.
Water consistently during the first dry summer. Check soil beneath mulch rather than assuming surface dryness tells the whole story. The root zone should become evenly moist and then partly dry before the next deep watering, never remain saturated.
Prune Established Climbing Roses
Once the structural framework fills the support, annual pruning shifts from construction to renewal. Work in late February or early March as buds swell and Forsythia begins flowering. Start by removing dead, diseased, damaged, and rubbing canes. Then identify old structural canes that have lost vigor and remove only one or two at the base when younger replacements are available.
Shorten the flowering laterals growing from main canes to 2–3 healthy buds, usually leaving about 6 inches (15 cm). Make a clean 45-degree cut about 1/4–3/8 inch (6–10 mm) above an outward-facing bud. This concentrates growth without sacrificing the long horizontal framework.
Do not untie the entire plant at once. Work section by section: release one cane, inspect it, prune its laterals, reposition it, and retie it before moving on. That method prevents a heavy mass from falling forward and makes the final arrangement easier to read.
Remove stems thinner than a pencil where congestion is severe, but do not chase an arbitrary cane count. The objective is a healthy open structure with lateral spacing, not a bare geometric diagram. How to Prune Roses: When and How to Prune Every Type of Rose explains the larger pruning principles behind clean cuts, renewal, and timing.
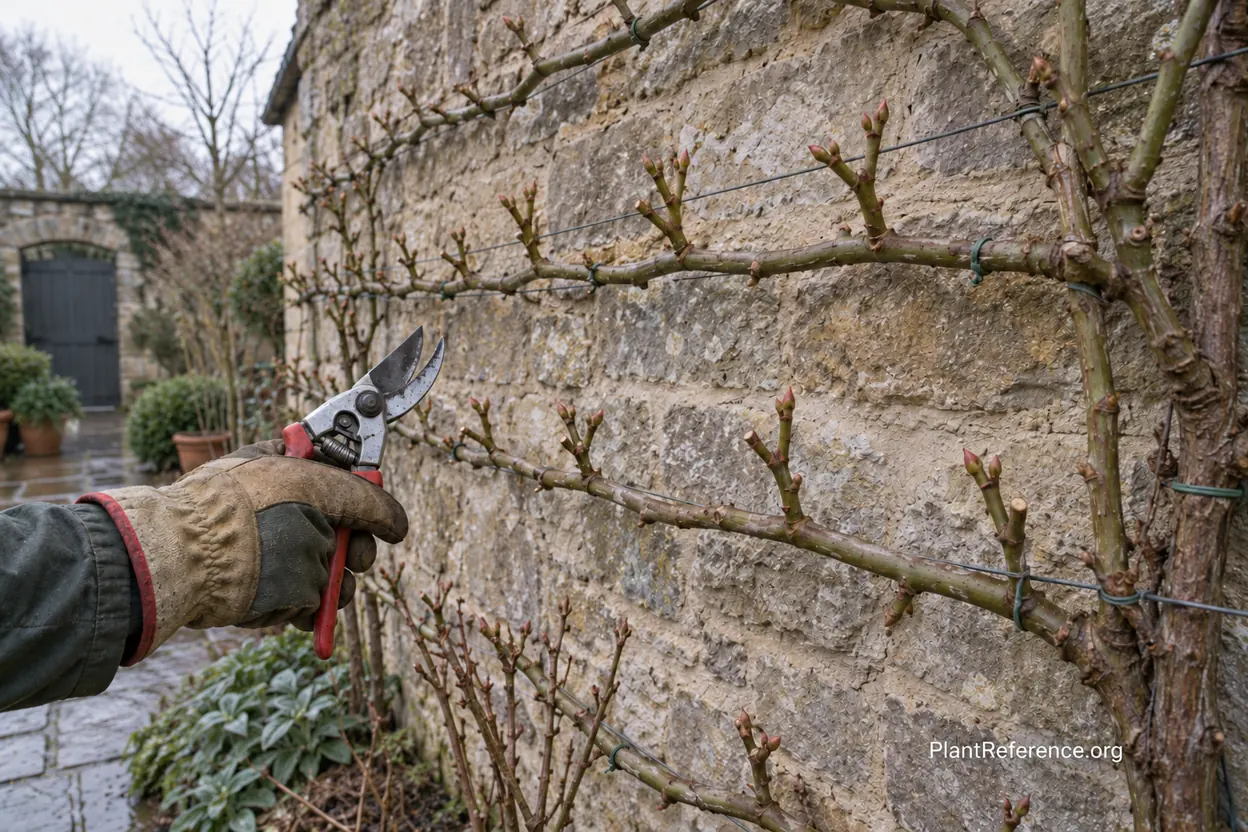
Sanitize the pruner before starting and after cutting suspicious tissue. Use bypass blades on living growth because they slice cleanly rather than crushing the cane. For thick old wood beyond the tool's rated capacity, use loppers or a pruning saw instead of twisting the pruner.
Water, Feed, and Prevent Disease
Root-zone watering is the simplest disease-prevention upgrade. A soaker hose or dripline beneath mulch keeps leaves comparatively dry and delivers moisture where roots are growing. Raised Bed Irrigation Systems: Watering Solutions for Consistent Growth explains pressure regulation, zoning, and even delivery principles that also apply to an ornamental bed.
Black spot spores generally need about seven hours of leaf wetness to infect tissue. Give the plant morning sun, prune congested growth, and avoid overhead irrigation late in the day. Powdery mildew thrives with humidity even without free water, while rust appears as orange pustules on leaf undersides. Remove fallen and infected leaves, then distinguish the disease before choosing any treatment.
Feed established roses in proportion to growth. About 2 cups of alfalfa meal or pellets in mid-March can encourage basal breaks. A balanced rose fertilizer may be applied monthly from April through August at its labeled rate when the plant or soil test indicates a need. Stop nitrogen by mid-September so new growth can harden before storms and cold.
Mulch moderates summer moisture and reduces soil splash, but keep it away from the crown. If leaves yellow while soil stays wet, investigate drainage before adding fertilizer. Oxygen-starved roots cannot use nutrients normally, and more fertilizer will not repair a saturated planting hole.
Inspect the structure whenever you inspect the plant. Tighten loose hardware, replace damaged ties, and clear foliage from gutters, roofing, vents, and siding joints. A healthy rose should not conceal building maintenance problems.
Secure Canes for Pacific Northwest Winter
In lowland maritime Zone 8b, climbing roses rarely need the deep soil mounds used in very cold regions. Apply 2–3 inches (5–8 cm) of organic mulch in late November, leaving the crown clear. The more important winter task is securing every long cane against wind whipping.
Walk the framework before the first major storm. Add ties near cane ends, at bends, and wherever two canes could rub. Remove or shorten laterals that project into a path, gutter, or gate. Replace brittle ties and confirm that anchors have not loosened in wet wood or masonry.
Do not perform the main prune in autumn. Retain healthy canes through winter, limiting work to damage prevention and sanitation. The late-winter pruning window makes it easier to identify winter injury and avoids stimulating tender new growth before cold weather.
How to Prepare Perennial Gardens for Winter by Species provides a useful reminder that winter preparation should be plant-specific. For a climbing rose, secure structure, clean foliage, sound drainage, and measured mulch matter more than indiscriminate cutting.
Growing a climbing rose well is closer to building and maintaining a living structure than managing a loose shrub. Install a durable support, give the crown sun and drainage, guide flexible canes sideways, and preserve that framework through the first 2–3 years. Once established, prune laterals instead of demolishing the skeleton. That sequence produces more flowers, safer maintenance, and a rose that belongs on its support rather than merely leaning against it.
Frequently Asked Questions
Reading about plants and recognising them are different skills. These three build the second.
- Daily PlantIdentify the day’s mystery plant from a close-up photograph.
- Keyed OutWork a dichotomous key, lead by lead, to name a hidden specimen.
- Name That PlantName a specimen from botanical clues dealt hardest first.
Free to play, no account needed
Tagged with
Mike's been designing residential landscapes in the Seattle area, with a particular focus on Pacific Northwest natives and sustainable practices. He's a Washington State Master Gardener and worked in construction before landscaping, which gives him a practical edge when it comes to building raised beds and hardscaping projects. He runs a small side business propagating and selling unusual perennials at farmers markets on weekends. His property serves as a testing ground for low-maintenance, wildlife-friendly garden designs. Mike's philosophy: if it requires weekly maintenance, it's not sustainable.