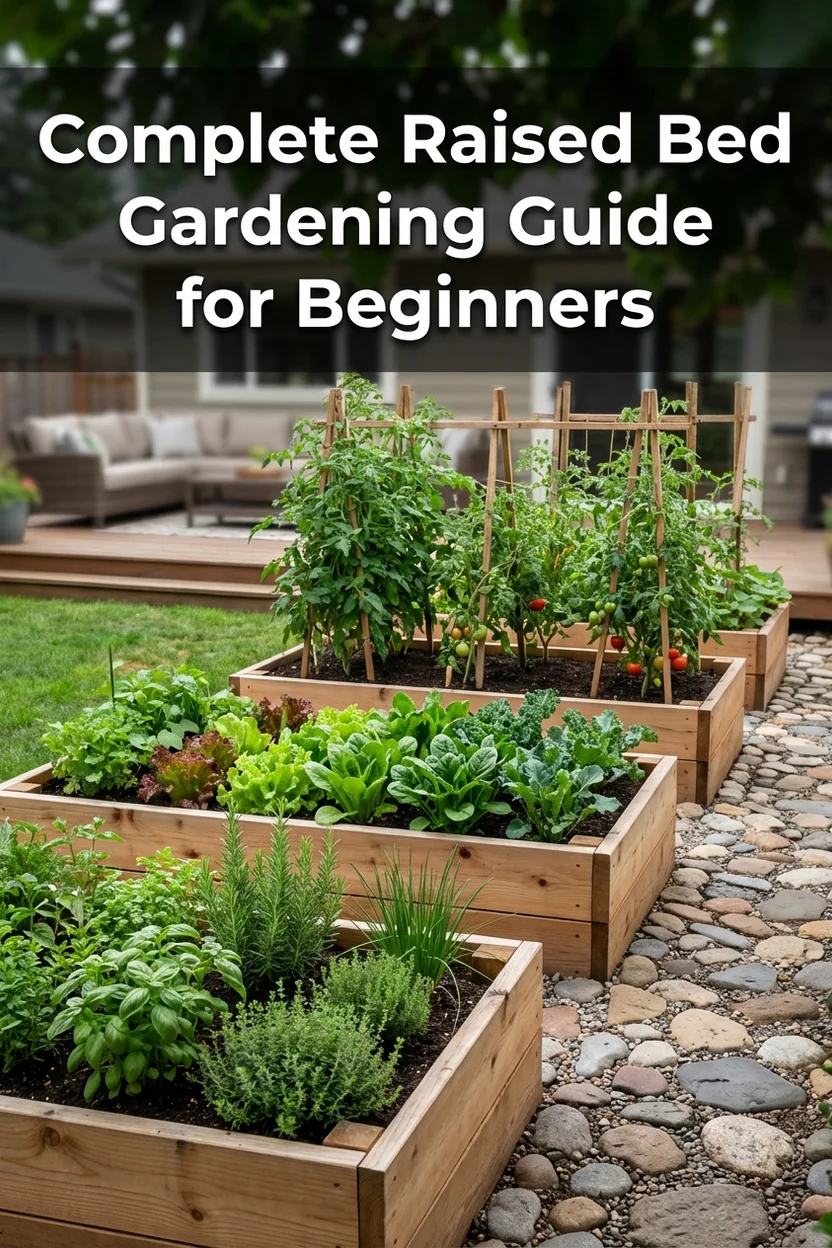
The Complete Guide to Raised Bed Gardening for Beginners (2026)
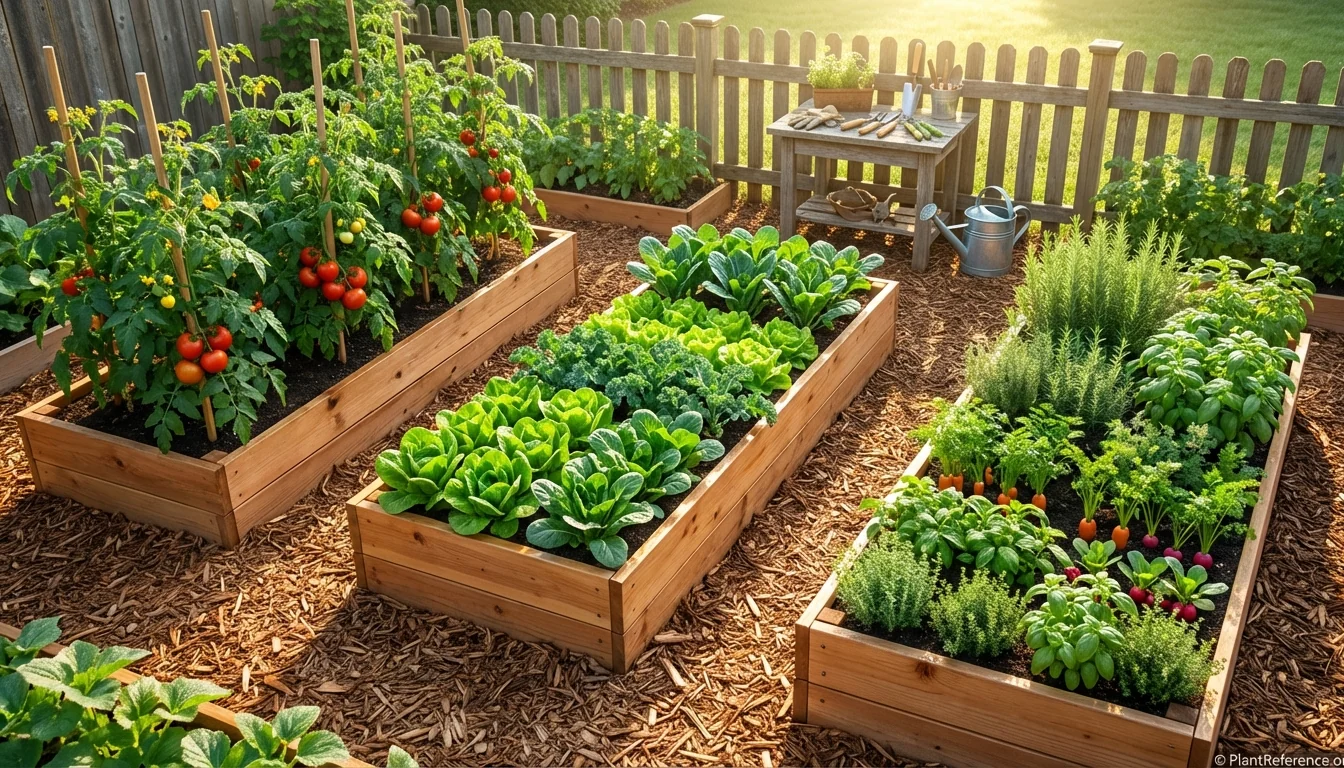
— Image © Plant Reference 2026
Starting a raised bed garden might seem overwhelming, but it's actually the smartest way for beginners to grow vegetables successfully. Raised bed gardening eliminates most of the guesswork and common failures that frustrate new gardeners, while delivering higher yields in less space than traditional ground gardens.
After twenty years of building and maintaining raised beds, I can tell you this: raised bed gardening gives you complete control over your growing environment. You'll never fight with rocky, clay, or poorly-draining soil again. Instead, you create perfect growing conditions from day one, leading to healthier plants, bigger harvests, and far fewer problems.
This guide covers everything you need to know to build, plant, and maintain productive raised beds that will feed your family for years. We'll walk through bed construction, soil preparation, crop selection, and ongoing care—all with the practical details that make the difference between success and frustration.
Why Choose Raised Bed Gardening?
Raised bed gardening offers compelling advantages that make it the preferred method for both beginners and experienced gardeners. Let me explain why these elevated growing spaces consistently outperform traditional ground gardens.
Superior drainage ranks as the top benefit. Raised beds drain excess water quickly, preventing the root rot and fungal problems that plague ground-level gardens. Even during heavy rain periods, your plants' roots stay healthy because water moves through the elevated soil profile efficiently.
Better soil quality comes automatically when you fill beds with quality growing medium. Unlike ground soil that may be compacted, rocky, or nutrient-poor, raised bed soil stays loose and fertile. You control exactly what goes into your beds, ensuring optimal growing conditions from the start.
Extended growing season happens naturally because raised soil warms faster in spring and drains better during wet periods. I've harvested lettuce two weeks earlier from raised beds compared to ground gardens in the same yard. The elevated position also improves air circulation around plants, reducing disease pressure.
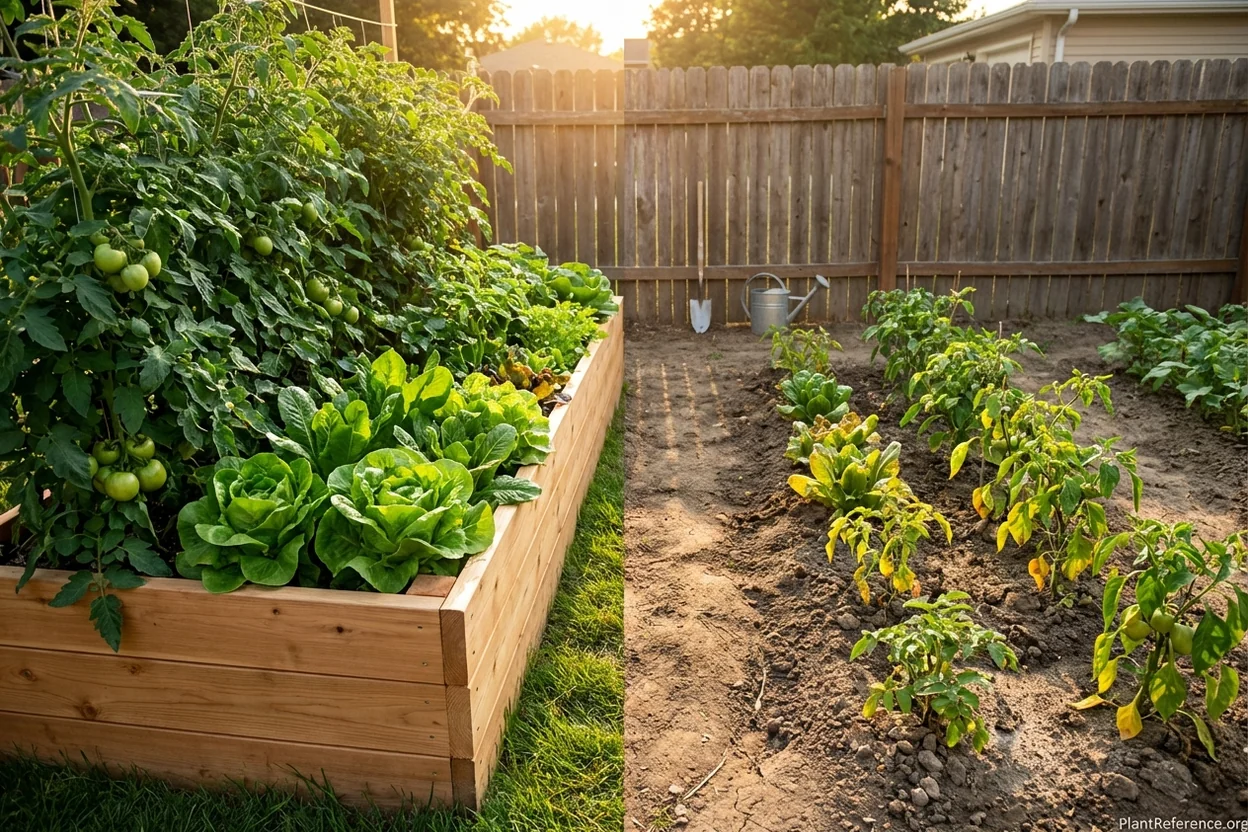
Easier maintenance saves hours of work compared to traditional gardens. Raised beds require no tilling, minimal weeding (when properly mulched), and comfortable working height that reduces back strain. The contained space also makes crop rotation, succession planting, and harvest timing much more manageable.
Higher yields per square foot result from intensive planting methods that work perfectly in raised beds. Square foot gardening techniques, which rely on excellent drainage and loose soil, produce 2-3 times more vegetables than row planting in ground gardens.
Pest and weed control becomes significantly easier. Physical barriers like row covers install quickly on raised beds. Copper tape around bed edges deters slugs effectively. Mulching prevents most weeds, and the ones that do appear pull easily from loose soil.
Planning Your Raised Bed Layout
Smart raised bed gardening starts with thoughtful planning before you build or buy anything. The decisions you make about location, size, and layout determine your success for years to come.
Location selection requires 6-8 hours of direct sunlight daily for most vegetables. Morning sun is essential, but afternoon shade (especially in hot climates) can actually benefit heat-sensitive crops like lettuce and spinach. Avoid low-lying areas where cold air settles, and ensure good air circulation around beds.
I always recommend starting with south-facing exposure if possible. North-south bed orientation gives plants even sun exposure throughout the day, while east-west orientation can create shaded spots for taller plants behind shorter ones.
Size and accessibility matter more than you might think. I build beds 3-4 feet wide when accessible from both sides, or 2-2.5 feet wide when placed against fences or walls. You should reach the center comfortably without stepping on the soil. Length can be whatever fits your space, but 8-12 feet works well with standard lumber dimensions.
Pathway width between beds needs 18-24 inches minimum for comfortable walking and tool maneuvering. I prefer 24 inches for wheeled carts and comfortable kneeling space. Cover pathways with wood chips, gravel, or landscape fabric to prevent weeds and mud.
Start with 2-3 beds maximum for your first season
Position beds where you'll see them daily from your house
Ensure water access within 50 feet of all beds
Check for underground utilities before digging
Consider prevailing wind direction for plant protection
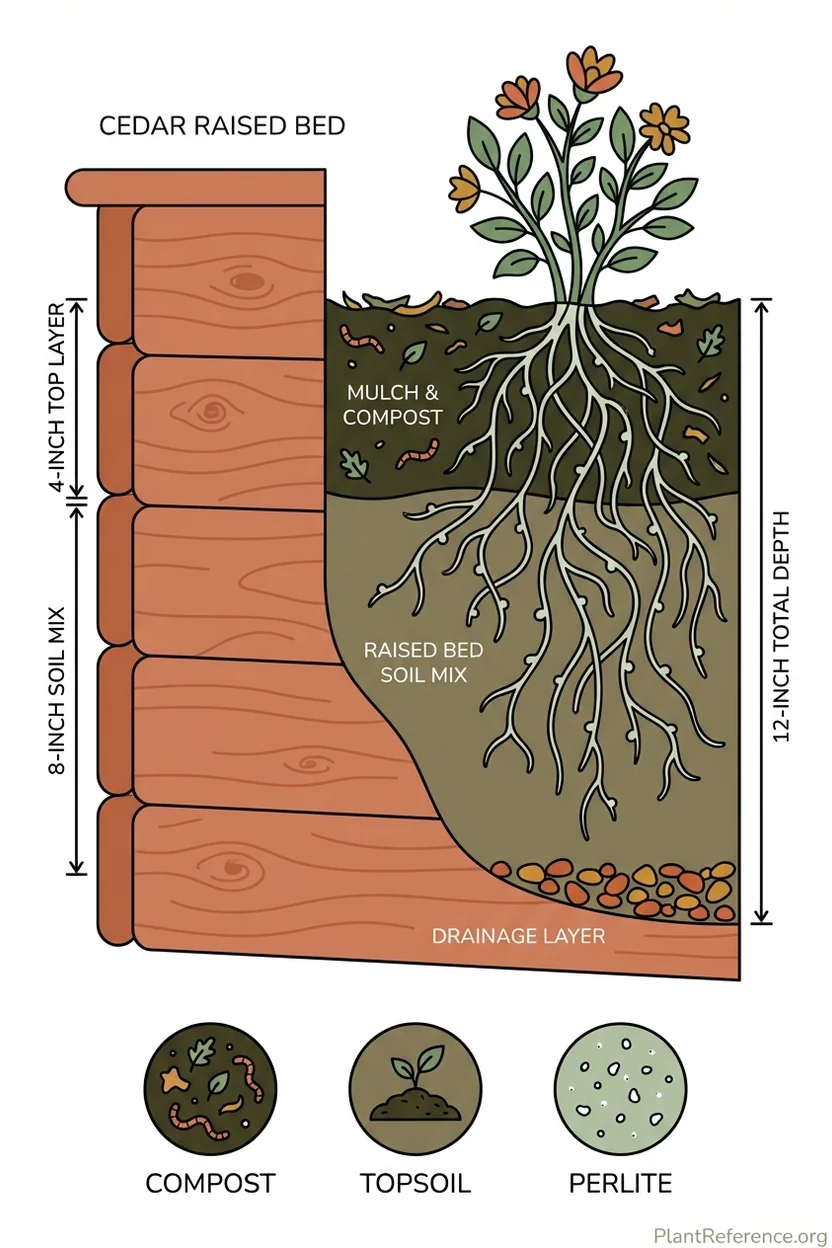
Bed depth depends on what you're growing. Shallow-rooted crops like lettuce, herbs, and radishes thrive in 6-8 inches of soil. Most vegetables need 12 inches minimum, while deep-rooted crops like tomatoes, carrots, and parsnips perform best with 18-24 inches. I recommend 12-inch depth as the versatile standard for beginners.
Choosing the Right Materials for Your Beds
Material selection for raised beds involves balancing longevity, cost, and safety. After building hundreds of beds, I can guide you through the options that actually work long-term.
Cedar remains my top recommendation for most situations. Untreated cedar boards naturally resist rot and insects for 15-20 years without any chemical treatment. Yes, cedar costs more upfront—expect $25-30 for a 2x8x8' board—but you build once instead of rebuilding every few years with cheaper wood.
Redwood offers even better longevity than cedar in many climates, lasting 20+ years when properly maintained. However, availability is limited outside western states, and costs run significantly higher at $30+ per board foot.
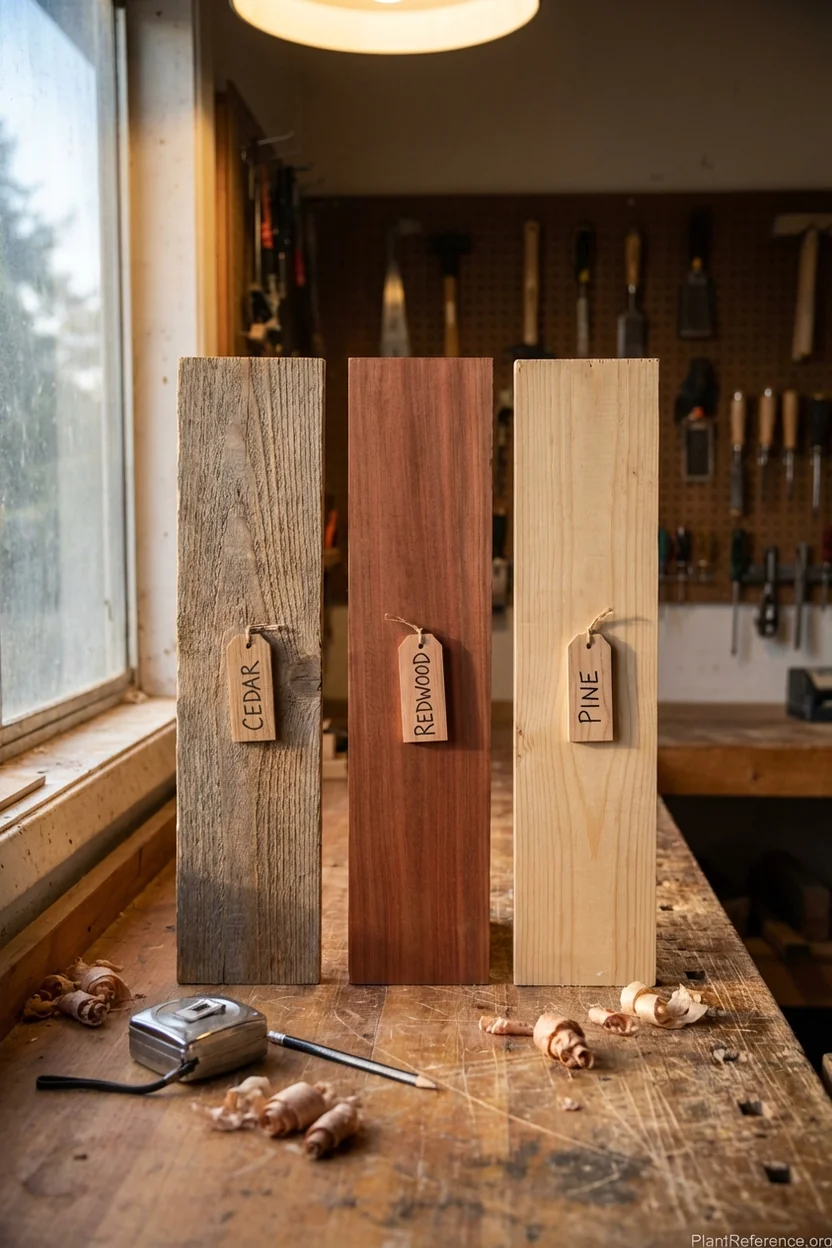
Composite materials made from recycled wood and plastic offer 25+ year lifespan with zero maintenance. While expensive initially ($6-8 per linear foot), composite eliminates replacement costs and looks consistent year after year. Some gardeners prefer natural wood aesthetics, but composite performs exceptionally for those prioritizing longevity.
Treated lumber sparks safety debates, but modern ACQ (Alkaline Copper Quaternary) and CA (Copper Azole) treatments contain no arsenic and are approved by EPA for food gardens. Oregon State University research confirms safety for vegetable growing. However, organic certification programs prohibit treated lumber, so use untreated wood if pursuing organic certification.
Metal beds (galvanized steel) offer different advantages. They're lightweight, rust-resistant, and heat soil faster in spring. However, metal conducts heat, which can stress plant roots during summer. Corten steel develops an attractive rust patina while remaining structurally sound for decades.
Avoid these materials entirely: railroad ties (creosote contamination), tire planters (chemical concerns), pressure-treated lumber manufactured before 2004 (arsenic content), and thin boards under 1.5 inches thick (bow and rot quickly).
Essential Tools and Supplies
Successful raised bed gardening requires specific tools and supplies that make construction, planting, and maintenance efficient. I'll share the essential items that actually get used versus nice-to-have tools that often sit unused.
Construction tools start with basics you might already own. A power drill with bits, circular saw or miter saw for cutting lumber, and 4-foot level for keeping beds square and level. Add a wheelbarrow for moving soil and compost, plus a garden rake for spreading materials evenly.
Hardware for bed assembly should be galvanized or stainless steel for longevity. I use 3-inch galvanized screws for most connections, corner brackets for easy assembly ($15-40 per set), and landscape fabric or hardware cloth if pest protection is needed.
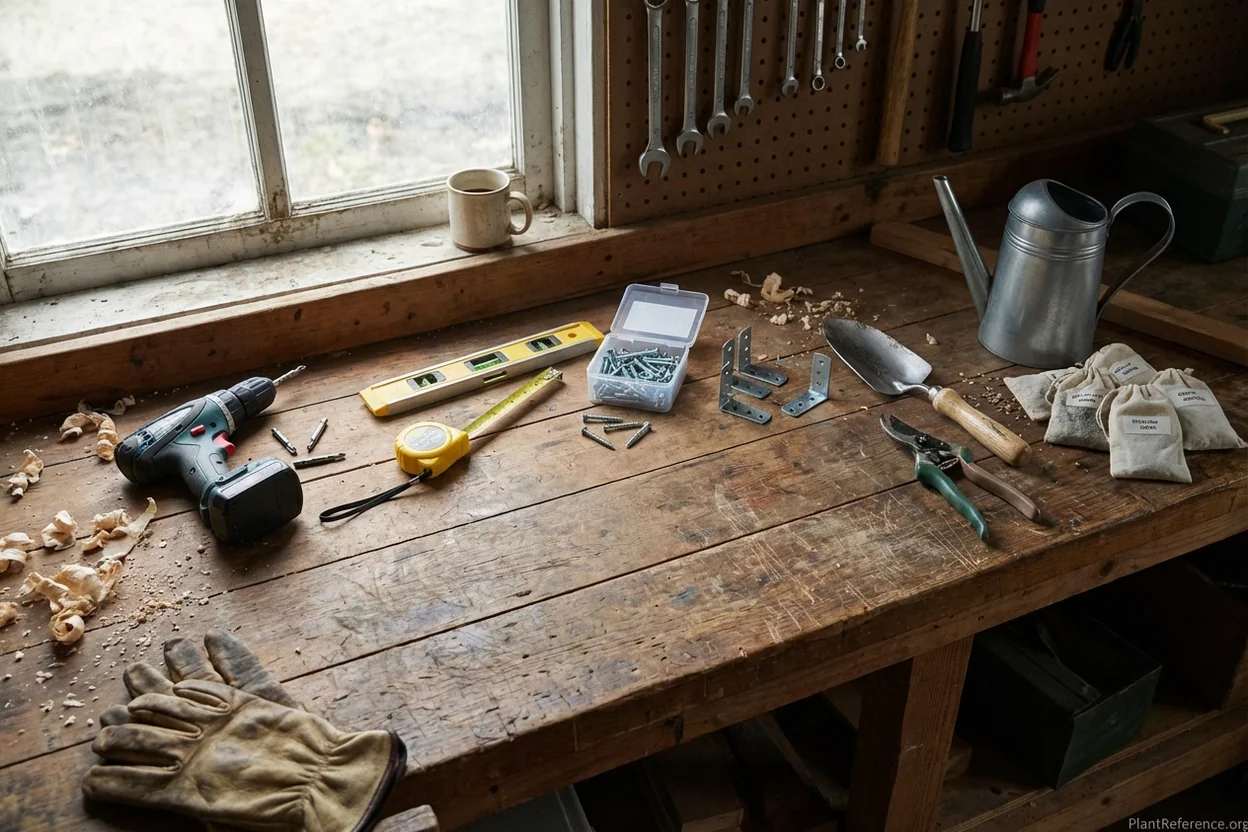
Soil and amendments represent your largest expense but also your most important investment. Calculate cubic feet needed by multiplying length × width × depth in feet. A 4x8x1-foot bed requires 32 cubic feet of soil. Budget $50-150 per bed depending on soil source and bed size.
Planting supplies include quality hand tools (trowel, cultivator, pruning shears), watering equipment (hose, sprinkler, or drip system), and mulching materials (straw, wood chips, or shredded leaves). Don't cheap out on hand tools—quality tools with lifetime warranties cost only slightly more than disposable versions.
Measurement and planning tools keep your garden organized. A measuring tape, garden journal for tracking planting dates and varieties, and plant markers for identifying crops prevent confusion during the growing season.
Building Your First Raised Bed
Building raised beds requires basic carpentry skills but nothing complicated. I'll walk you through constructing a standard 4x8-foot bed using cedar boards—the size and material combination that works best for most beginners.
Materials list for one 4x8x12-inch bed:
Two 2x12x8' cedar boards (for long sides)
Two 2x12x4' cedar boards (for short sides)
Four corner brackets or 3-inch galvanized screws
One roll landscape fabric (optional)
32 cubic feet of raised bed soil mix
Ground preparation starts with selecting level ground when possible. Remove grass and weeds from the bed footprint plus 6 inches on all sides for pathways. I spray stubborn weeds with 30% white vinegar solution two weeks before building, which kills them without soil residue concerns.
Assembly process begins with laying out your boards on level ground. If using corner brackets, drill pilot holes and attach brackets to inside corners with provided screws. For screw-only assembly, drill pilot holes and drive 3-inch screws at angles through board faces into adjacent boards.
Leveling matters more than most beginners realize. Use a 4-foot level to ensure bed sits evenly. On sloped ground, dig out the high side rather than building up the low side. Uneven beds cause water to pool in low areas and drain too quickly from high spots.
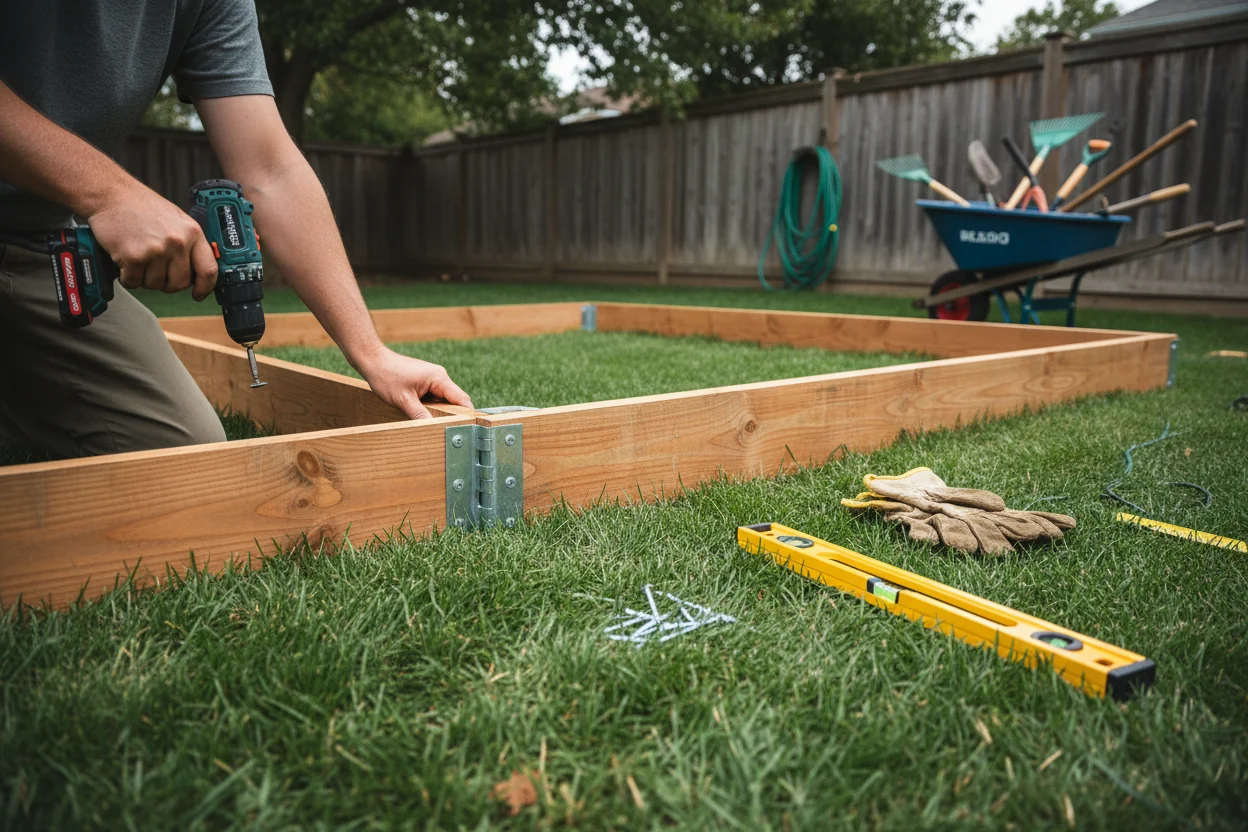
Stabilizing the completed frame prevents shifting over time. I drive 2-foot wooden stakes or metal rebar into the ground at each corner, then attach to bed sides with screws. This simple step prevents frost heaving and settling from moving your beds.
Weed barrier installation (optional but recommended) involves laying cardboard or landscape fabric over the ground inside the bed frame. Cardboard works excellently and decomposes naturally over 6-12 months. Avoid plastic sheeting, which prevents drainage and creates anaerobic soil conditions.
Creating the Perfect Soil Mix
Raised bed soil makes or breaks your gardening success. After testing dozens of soil combinations and commercial mixes, I can save you from the common mistakes that create expensive problems later.
Never use garden soil or topsoil alone in raised beds. These materials compact quickly in the confined space, creating the drainage problems you're trying to avoid. Garden soil also introduces weed seeds and may contain residual herbicides from previous lawn treatments.
The proven formula that works consistently contains three equal parts: 1/3 compost, 1/3 quality topsoil, and 1/3 coarse amendment (perlite, vermiculite, or aged bark). This combination provides nutrition, structure, and drainage that vegetables need.
Commercial raised bed mixes offer convenience but vary widely in quality. Look for products specifically labeled "raised bed mix" rather than generic "potting soil." Quality mixes cost $8-12 per cubic foot and list ingredients clearly on packaging.
Miracle-Gro Organic Raised Bed Soil: Proven performance, widely available
Back to the Roots Organic Mix: Excellent drainage, sustainable ingredients
Local nursery blends: Often the best value and suited to your climate
Bulk suppliers: Most economical for multiple beds
DIY soil mixing saves money when filling multiple beds. Rent a small concrete mixer or use a wheelbarrow for combining ingredients. Mix thoroughly to prevent layering that creates drainage problems. I mix in small batches rather than trying to blend entire bed volumes at once.
Soil testing helps optimize your mix for specific crops. Basic pH test strips cost under $10 and reveal whether your soil falls in the ideal 6.0-7.0 range for most vegetables. Extremely acidic or alkaline soil limits nutrient availability even in otherwise perfect mixes.
Volume calculations prevent ordering mistakes that leave you short of soil or with expensive overages. Multiply bed dimensions in feet to get cubic feet needed. A 4x8x1-foot bed requires exactly 32 cubic feet of soil. Add 10% extra for settling and future top-dressing needs.
Settling expectations help you plan properly. All raised bed soil settles 4-8 inches during the first season as organic matter decomposes and particles compact naturally. This is normal and beneficial—don't panic when soil level drops. Simply top-dress with compost or additional soil mix each spring.
Best Vegetables for Beginner Raised Beds
Choosing the right crops for your first raised bed gardening season determines whether you feel successful or frustrated. Some vegetables practically grow themselves in raised beds, while others challenge even experienced gardeners.
Tomatoes top my recommended list because raised beds solve their two biggest problems: poor drainage and soil-borne disease. Cherry tomato varieties like 'Sun Gold' and 'Black Cherry' produce continuously from summer through first frost. Determinate varieties like 'Roma' and 'San Marzano' work perfectly for sauce making.
Lettuce and leafy greens thrive in raised bed conditions and mature quickly for near-instant gratification. Plant lettuce every 2-3 weeks for continuous harvest. 'Black Seeded Simpson', 'Red Sails', and 'Buttercrunch' varieties handle heat better than most. Spinach, kale, and Swiss chard provide nutrition and color diversity.
Herbs offer the highest value per square foot of any raised bed crop. A small basil plant yields $30+ worth of fresh herbs over the season. Start with basics: basil, oregano, thyme, parsley, and cilantro. Most herbs prefer slightly alkaline soil that raised bed mixes provide naturally.
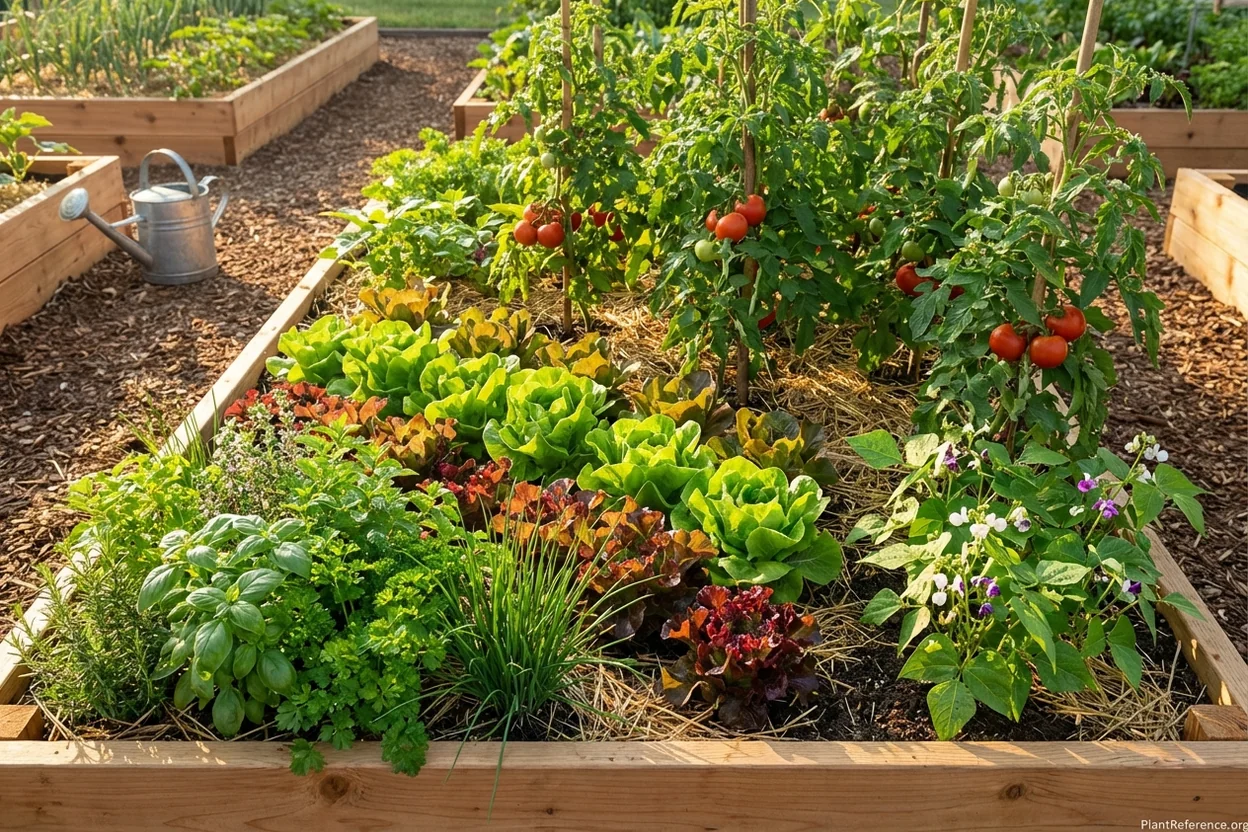
Bush beans produce heavily in small spaces and fix nitrogen to benefit following crops. 'Bush Blue Lake' and 'Contender' varieties mature in 50-60 days and don't require trellising like pole beans. Plant beans after soil warms to 60°F (16°C) to prevent seed rot.
Radishes and carrots make excellent use of bed edges and spaces between larger plants. Radishes mature in just 30 days, making them perfect for impatient beginners. 'Cherry Belle' and 'White Icicle' varieties handle various weather conditions. For carrots, choose short varieties like 'Paris Market' that don't require deep soil.
Avoid these challenging crops during your first season: corn (space inefficient), large squash (sprawling growth), artichokes (long growing season), and specialty crops like Brussels sprouts that require precise timing. Master the basics before attempting advanced vegetables.
Watering Systems and Irrigation
Proper watering makes the difference between thriving raised beds and struggling plants. Raised bed gardening changes watering requirements compared to ground gardens because elevated soil drains faster and heats up quicker.
Hand watering works fine for 1-2 beds but becomes tedious with larger gardens. Water deeply 2-3 times per week rather than daily light sprinkling. Shallow watering encourages shallow root development, making plants more susceptible to heat stress.
Drip irrigation offers the most efficient watering method for raised beds. Initial setup costs $40-100 per bed but saves hours of labor weekly while using 50% less water than overhead sprinklers. Plants stay healthier because leaves remain dry, reducing fungal disease pressure.
Installation basics for drip systems start with a timer and pressure regulator at the water source. Run 1/2-inch main line around bed perimeters, then connect 1/4-inch emitter tubing or individual drip emitters every 12-18 inches throughout the bed. Sandy soils need closer emitter spacing than clay-heavy soils.
DIG Raised Bed Kit: Complete system for beds up to 150 sq ft ($43-50)
Rain Bird Garden Kit: Perfect for single 4x8' beds ($40-50)
DripWorks Medium Kit: Covers multiple beds professionally ($100-150)
Bluetooth timers: Control watering remotely ($60-120)
Mulching reduces watering needs significantly while suppressing weeds and moderating soil temperature. Apply 2-3 inches of organic mulch (straw, shredded leaves, wood chips) around plants, leaving 2-inch clear space around plant stems to prevent pest problems.
Moisture monitoring helps prevent both under and overwatering. Stick your finger 2 inches into the soil—if dry at that depth, it's time to water. Moisture meters ($10-30) provide more accurate readings and help beginners develop proper watering instincts.
Seasonal adjustments keep plants healthy as weather changes. Spring requires lighter, more frequent watering as small plants establish. Summer demands deep watering sessions to penetrate hot soil. Fall watering should taper off as growth slows and rain increases.
Planting and Spacing Guidelines
Proper spacing maximizes your raised bed gardening yields while preventing overcrowding problems that lead to disease and pest issues. The intensive planting methods that work perfectly in raised beds require different spacing than traditional row gardens.
Square foot gardening principles work exceptionally well in raised beds. Divide your bed into 12-inch squares and plant according to mature size: large plants (tomatoes, peppers) get one per square, medium plants (lettuce, herbs) get four per square, small plants (radishes, carrots) get nine or sixteen per square.
Succession planting extends harvest periods and maximizes bed productivity. Plant lettuce, radishes, and bush beans every 2-3 weeks for continuous harvest rather than all at once. This prevents gluts of produce and ensures fresh vegetables throughout the growing season.
Companion planting works naturally in raised beds because you control soil conditions precisely. Classic combinations like tomatoes with basil, lettuce with chives, and carrots with onions help deter pests while making efficient use of space.
Vertical growing multiplies growing space in raised beds through trellises, cages, and stakes. Indeterminate tomatoes, pole beans, cucumbers, and peas all benefit from vertical support. Position tall plants on the north side of beds to prevent shading shorter crops.
Transplants versus direct seeding depends on crop type and timing. Tomatoes, peppers, and eggplants almost always perform better as purchased transplants or greenhouse-started seedlings. Beans, carrots, radishes, and lettuce typically perform better when direct seeded into prepared beds.
Timing matters more in raised beds because they warm up faster in spring but also heat up quicker in summer. Plant cool-season crops (lettuce, peas, broccoli) 2-3 weeks earlier than ground garden timing. Heat-sensitive crops may need afternoon shade during peak summer.
Seasonal Maintenance and Care
Year-round raised bed care maintains soil health and prevents problems that could destroy entire seasons of work. Proper maintenance actually reduces workload over time while increasing yields and extending bed lifespan.
Spring preparation starts 4-6 weeks before last frost date. Remove winter mulch, add 1-2 inches of fresh compost, and gently turn soil without destroying beneficial soil structure. Install irrigation systems and check bed structural integrity after winter freeze-thaw cycles.
Summer management focuses on consistent watering, pest monitoring, and harvest timing. Mulch heavily to conserve moisture and suppress weeds. Prune tomatoes and provide support for vining crops. Harvest regularly to encourage continued production.
Fall preparation includes planting cool-season crops for extended harvest, collecting seeds from best-performing plants, and preparing beds for winter. Many crops like kale, Brussels sprouts, and carrots actually improve in flavor after light frost exposure.
Winter protection varies by climate but generally involves mulching beds heavily with straw or shredded leaves, covering tender plants with row covers, and planning next year's garden layout. Cold frames extend the growing season significantly in northern climates.
Soil renewal happens annually through compost addition and organic matter incorporation. Raised bed soil needs replenishment because intensive growing depletes nutrients faster than ground gardens. Plan to add 10-20% new soil volume each year through compost and amendments.
Troubleshooting Common Problems
Problem prevention beats crisis management in raised bed gardening. Recognizing early warning signs and understanding common issues helps you address problems before they destroy crops or damage soil health.
Drainage issues appear as standing water after rainfall or consistently soggy soil. Solutions include adding coarse sand or perlite to improve soil structure, installing drainage holes in bed sides, or creating French drains beneath beds. Prevention involves proper soil mix ratios from the beginning.
Nutrient deficiencies show up as yellowing leaves, poor growth, or unusual coloration despite adequate watering. Soil testing reveals specific deficiencies, while visual diagnosis helps identify nitrogen (older leaves yellow), phosphorus (purple leaf edges), or potassium (brown leaf margins) problems.
Pest problems concentrate more intensively in raised beds because plants grow closer together. Early detection through daily observation, physical barriers like row covers, and beneficial insect habitat creation provide organic control methods. Avoid broad-spectrum pesticides that harm beneficial insects.
pH imbalances limit nutrient availability even in otherwise perfect soil. Most vegetables prefer 6.0-7.0 pH range. Add lime to raise pH if soil tests acidic, or sulfur to lower pH if alkaline. Adjust gradually over several months rather than dramatically all at once.
Wood rot in bed walls indicates moisture problems or poor material selection. Cedar and redwood naturally resist rot, while treated lumber and composites last longer than untreated pine. Proper drainage and air circulation around beds prevent premature rotting.
Frequently Asked Questions

Reading about plants and recognising them are different skills. These three build the second.
- Daily PlantIdentify the day’s mystery plant from a close-up photograph.
- Keyed OutWork a dichotomous key, lead by lead, to name a hidden specimen.
- Name That PlantName a specimen from botanical clues dealt hardest first.
Free to play, no account needed
Mike's been designing residential landscapes in the Seattle area, with a particular focus on Pacific Northwest natives and sustainable practices. He's a Washington State Master Gardener and worked in construction before landscaping, which gives him a practical edge when it comes to building raised beds and hardscaping projects. He runs a small side business propagating and selling unusual perennials at farmers markets on weekends. His property serves as a testing ground for low-maintenance, wildlife-friendly garden designs. Mike's philosophy: if it requires weekly maintenance, it's not sustainable.