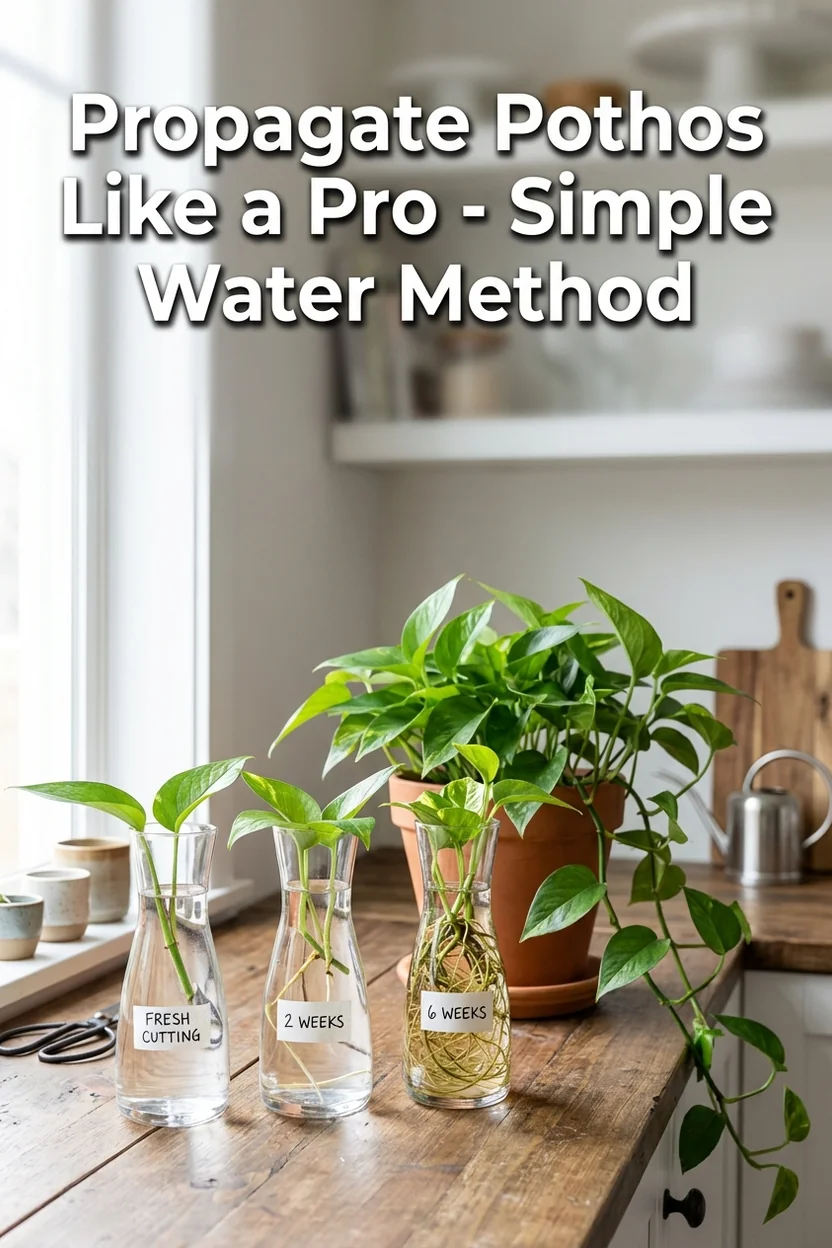
Pothos Propagation: Water Method Step-by-Step (With Photos)
Pets & Toxicity
Recorded toxicity for plants linked in this guide. An unknown status is not a safety assessment.
Toxic to pets: golden pothosDetailsHide
Epipremnum aureum — Toxicity Warning
Toxic to pets and humans. All parts contain insoluble calcium oxalate crystals that cause mouth pain, swelling, and drooling if ingested.View Epipremnum aureum plant profile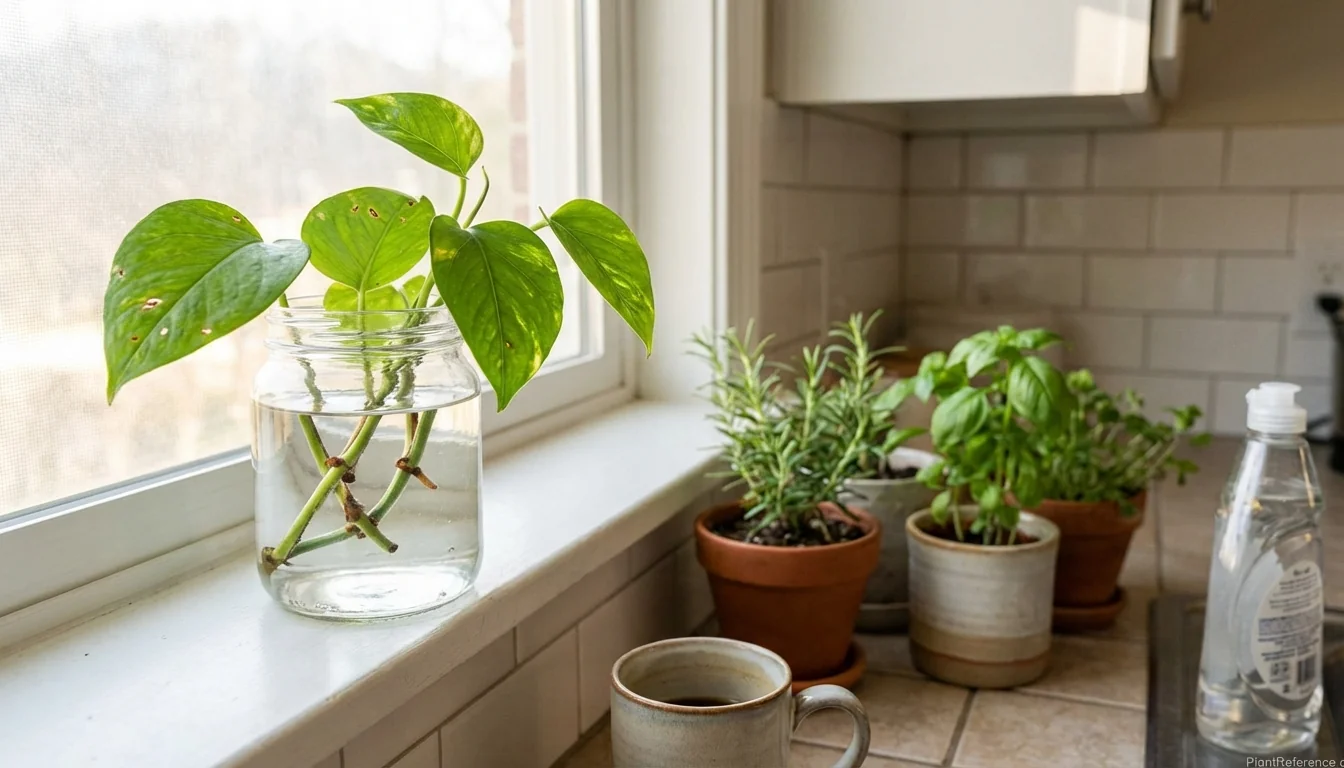
— Image © Plant Reference 2026
If you've ever wanted to multiply your pothos collection without spending a penny, you're in for a treat. How to propagate pothos in water is hands-down the easiest plant propagation method I've ever tried—and I say this as someone who once killed a succulent cutting by overthinking it.
The golden pothos 🌿Epipremnum aureum (ep-ih-PREM-num AW-ree-um) is practically designed for propagation success. Those bumpy nodes along every vine? They're root factories waiting to happen. Unlike finicky plants that need rooting hormone, perfect timing, or specific soil mixtures, pothos cuttings are happy to develop roots in plain water sitting on your kitchen counter.
I started propagating pothos three years ago when my original plant from Home Depot had grown so long I was tripping over the vines. Instead of just trimming it back, I learned to turn those cuttings into new plants. Now I have pothos trailing from seven different spots in my apartment—and I've gifted dozens more to friends who thought they couldn't keep plants alive.
Why Water Propagation Is Perfect for Beginners
Water propagation takes all the guesswork out of starting new plants. You can see exactly what's happening with the roots, there's no soil to go moldy, and if something goes wrong, you haven't wasted any potting supplies.
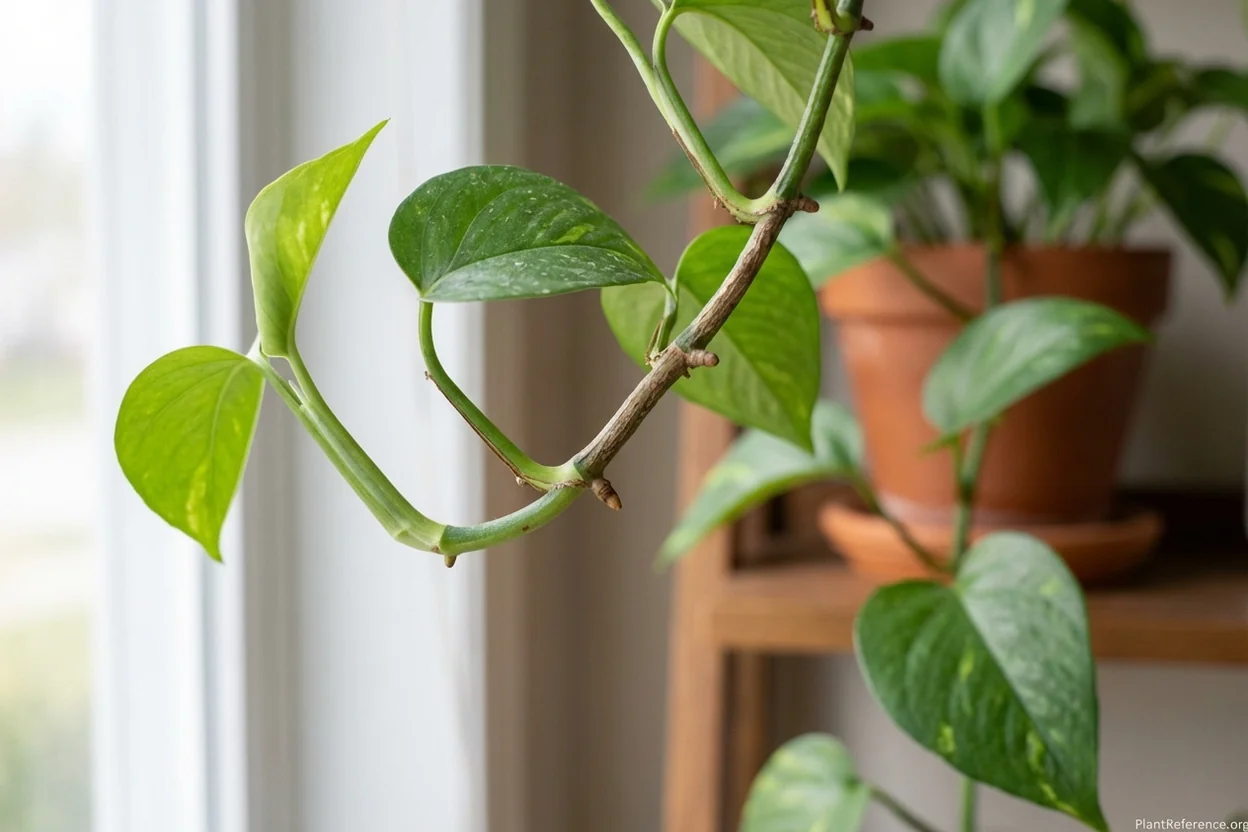
The pothos 🌿Epipremnum aureum produces aerial roots from nodes specifically to climb trees in its native habitat. When you place these nodes in water, those same root-producing cells activate and start growing. It's not a delicate process requiring perfect conditions—it's the plant doing what it's naturally programmed to do.
Here's why water propagation beats other methods for beginners:
Visible progress: Watch roots develop week by week
No soil mess: Perfect for apartment dwellers and small spaces
Immediate feedback: You'll know within days if the cutting is viable
Forgiving timing: Start cuttings any time of year
Zero cost: Uses materials you already have at home
High success rate: 95%+ success rate with healthy parent plants
Gift potential: Create new plants to share with friends and family
The only real disadvantage? Once you see how easy this is, you'll want to propagate everything. Trust me, I've tried propagating plants that definitely don't root in water. Stick with pothos—it's your gateway to becoming the friend who always has plants to give away.
What You Need for Pothos Propagation
The beauty of pothos propagation lies in its simplicity. You probably have everything you need already sitting around your home. Here's your complete supply list:
Essential supplies:
Sharp, clean scissors or pruning shears
Glass jar, cup, or vase (clear is best for monitoring roots)
Fresh water (filtered or tap water left out 24 hours)
Healthy parent pothos plant
Optional but helpful:
Small propagation station with multiple vessels
Rooting hormone (speeds things up but not necessary)
Labels if propagating multiple varieties
→ Mkono 3-Tiered Propagation Tubes ($15-20) - Wall-hanging with 15 glass test tubes for multiple cuttings
This wall-mounted propagation station features 15 individual glass test tubes perfect for starting multiple pothos cuttings simultaneously. The transparent tubes allow easy root monitoring while the wooden frame adds aesthetic appeal. Each tube holds individual cuttings securely, preventing overcrowding that can lead to rot. Includes wall mounting hardware and rotates for optimal light exposure. The vertical design saves counter space while creating an attractive living wall display.
The key is using clean tools to prevent bacterial infections that could kill your cuttings. I learned this the hard way when I used dirty scissors and lost three beautiful marble queen cuttings to stem rot. A quick wipe with rubbing alcohol on your cutting tools takes thirty seconds and saves heartbreak later.
How to Identify Nodes on Your Pothos
Before you can successfully propagate pothos, you need to understand nodes—the small bumps along the vine where new roots emerge. Every single cutting must include at least one node, or it will never develop roots no matter how long you wait.
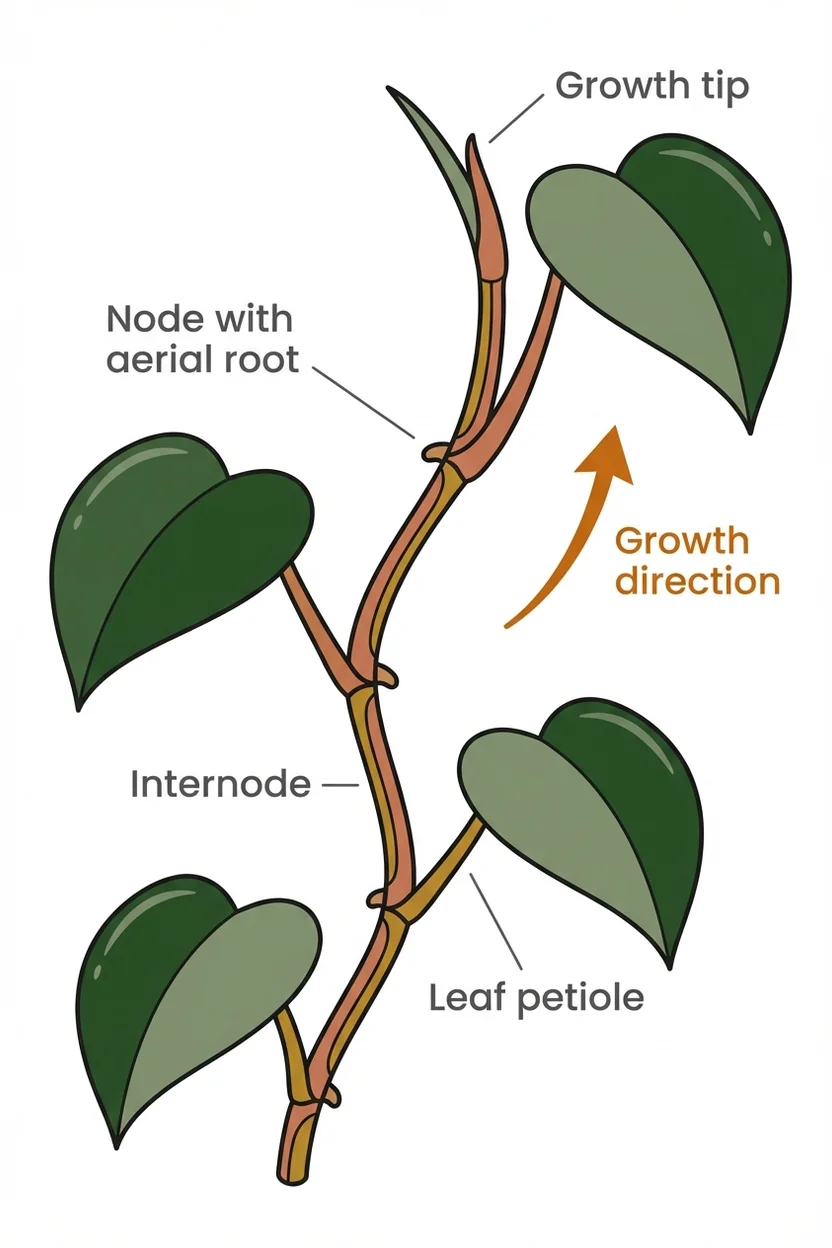
What nodes look like:
Small, raised bumps along the vine (usually brown or green)
Located at the base of each leaf stem attachment
May have tiny root nubs already visible
Appear every 2-4 inches along healthy vines
Sometimes called "joints" where the vine segments connect
What are NOT nodes:
Leaf attachment points without raised bumps
Aerial roots that have already elongated (though these work too)
Random bumps or scars on the vine surface
The growing tip of the vine
Run your finger along any pothos vine and you'll feel these little bumps. Healthy, mature vines often have small aerial root nubs already emerging from nodes—these are propagation gold. The presence of visible root nubs means that node is ready to explode with growth once placed in water.
For the most reliable propagation success, choose vine sections with 2-3 nodes. This gives you backup root production sites in case one node fails, and typically results in more robust root systems that transplant better to soil.
Step-by-Step Water Propagation Method
Now for the fun part—actually creating your new plants. I've propagated dozens of pothos cuttings using this exact method, and the success rate is incredible when you follow these steps.
Step 1: Select your vine section (2-3 minutes) Choose a healthy vine that's at least 6 inches (15 cm) long with 2-3 clearly visible nodes. Avoid any sections with yellowing leaves, brown spots, or soft stems. The vine should feel firm and look vibrant green.
Step 2: Make your cut (30 seconds) Using clean, sharp scissors, cut the vine about ¼ inch (0.6 cm) below a node. Make the cut at a slight angle to increase surface area for water absorption. If you're taking multiple cuttings from one long vine, cut ¼ inch above the next node to leave growing points on the parent plant.
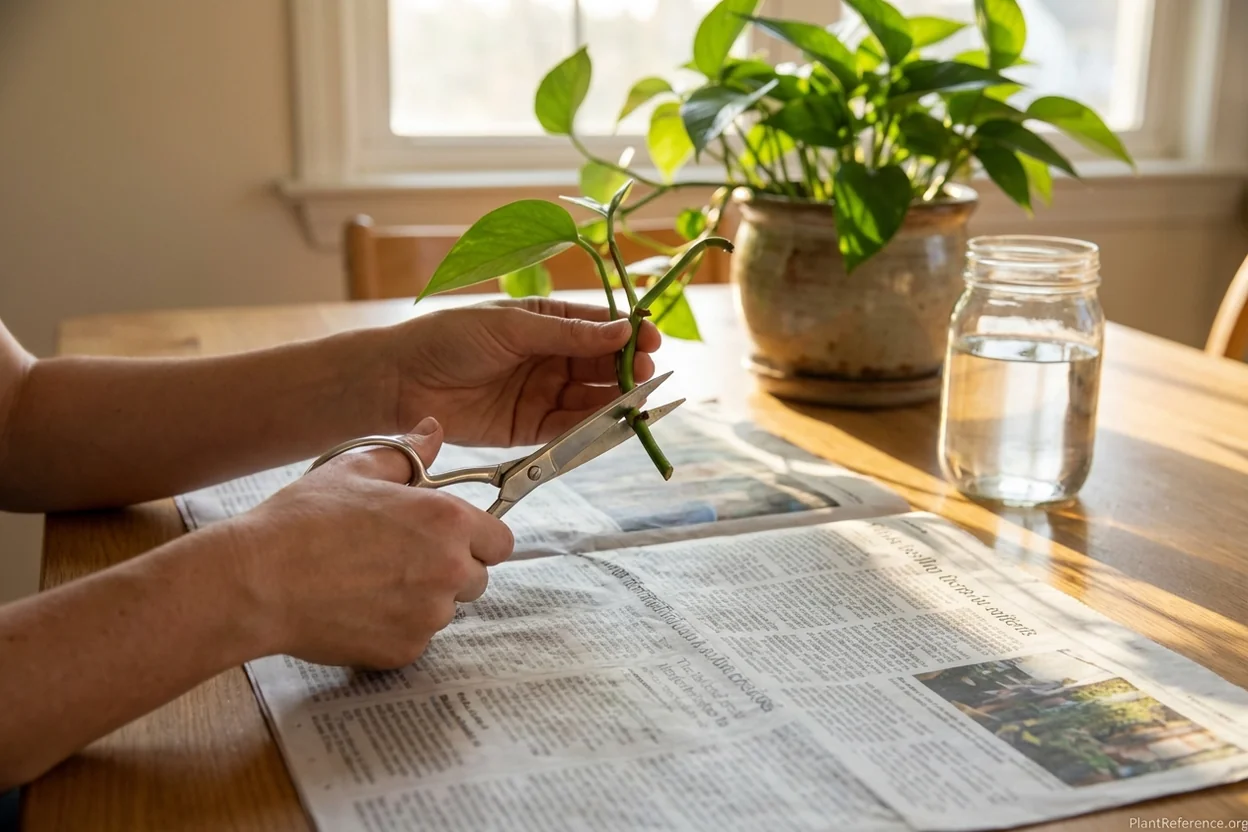
Step 3: Remove lower leaves (1 minute) Strip off any leaves that would sit below the water line in your vessel. Submerged leaves will rot and turn your water murky within days. Leave 2-4 healthy leaves above the water line for photosynthesis.
Step 4: Place in water immediately (30 seconds) Fill your glass jar with room temperature water and place the cutting so at least one node (preferably 2-3 nodes) sits submerged. The water should be deep enough to cover nodes but not touch the remaining leaves.
Step 5: Find the perfect spot (2 minutes) Place your cutting in bright, indirect light. A north-facing window is ideal, or set it 3-4 feet (90-120 cm) away from a south or west window. Avoid direct sunlight which can overheat the water and stress the cutting.
What to expect in the first week:
Days 1-3: The cutting may look droopy as it adjusts to water
Days 4-7: Small white root nubs appear at nodes
Some leaves may yellow and drop (normal adjustment stress)
Timeline for root development:
-
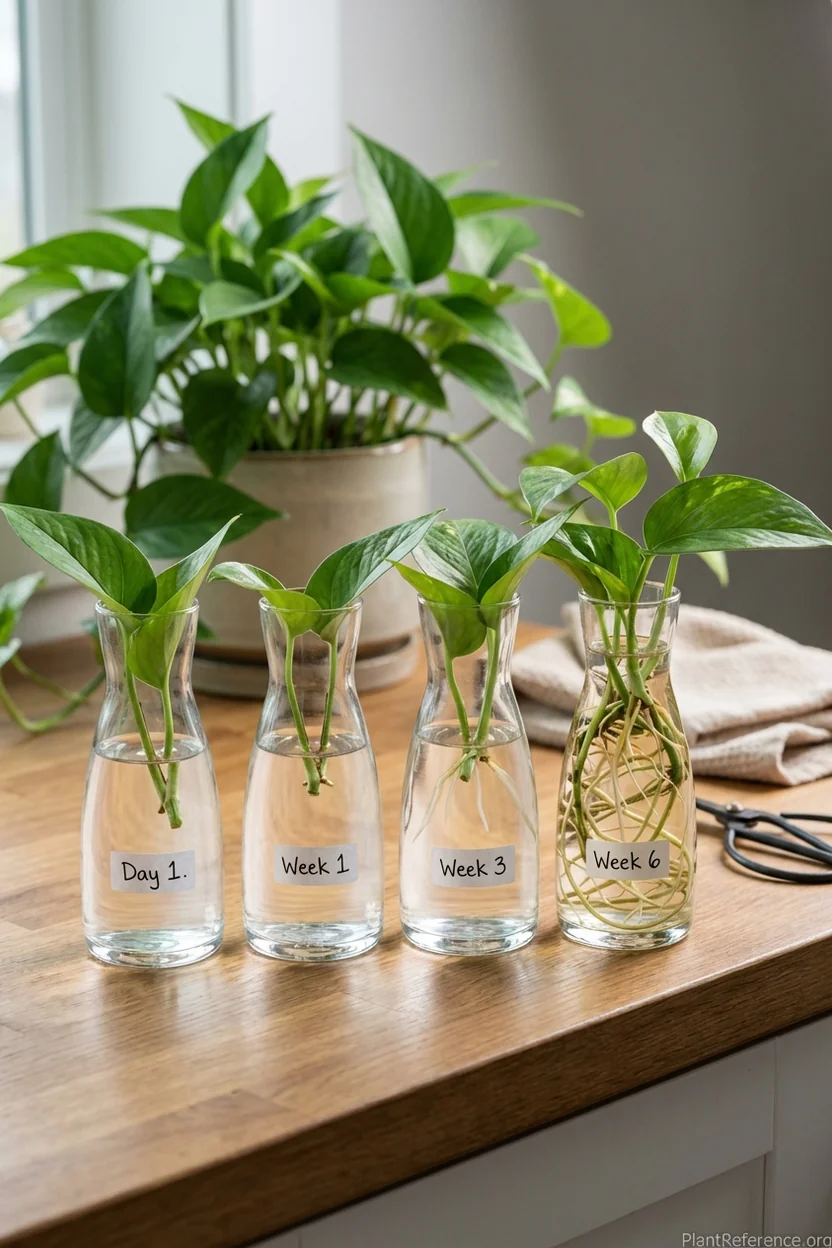
Week 1: Initial root nubs emerge from nodes
-
Week 2: Roots extend to ½ inch (1.3 cm) long
-
Week 3-4: Root systems reach 2-3 inches (5-7.5 cm)
-
Week 4-6: Ready for soil transplanting with established root network
Caring for Your Pothos Cuttings
Once your cuttings are sitting in water, caring for them is refreshingly simple. The key is maintaining clean water and providing consistent conditions while roots develop.
Water management: Change the water completely every 5-7 days to prevent bacteria buildup. Use room temperature water—cold water shocks the developing roots while hot water can cook them. If your tap water is heavily chlorinated, let it sit out 24 hours before using or switch to filtered water.
Signs of healthy development:
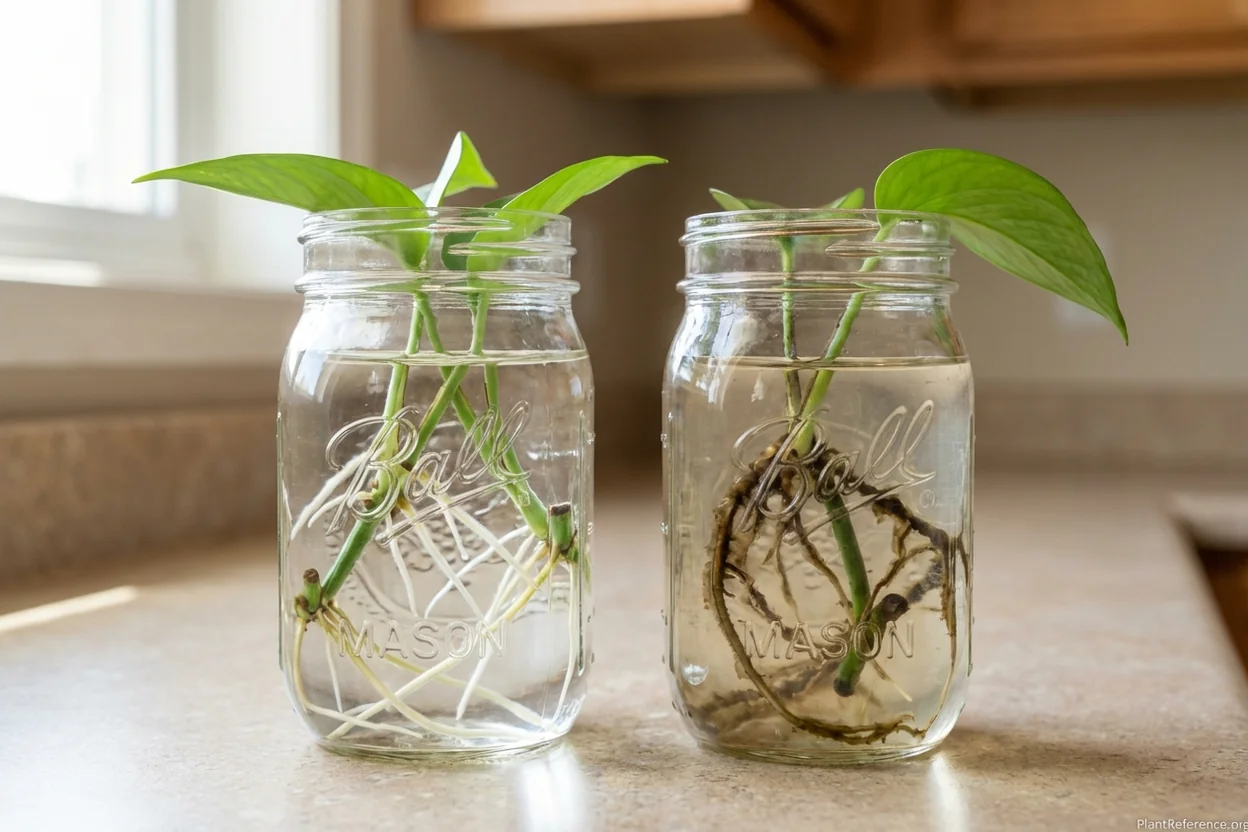
Clear to slightly cloudy water (murky water indicates problems)
White or cream-colored roots (brown/black roots signal rot)
Firm, plump-looking stems
New leaf growth from the growing tip
Roots that feel firm when gently touched
Warning signs requiring immediate attention:
Foul-smelling water with slimy texture
Black, mushy roots that fall off easily
Stems becoming soft or translucent
Leaves turning yellow and dropping rapidly
Water turning dark brown or green
If you notice any warning signs, immediately trim away affected roots with clean scissors, rinse the cutting under running water, and place in fresh water in a clean vessel. Sometimes catching problems early saves the cutting.
For the Best Fertilizer for Pothos information, you can add a drop of liquid fertilizer to the water once roots reach ½ inch long, but it's not necessary for successful propagation. The cutting has enough stored energy to develop a basic root system without additional nutrients.
When to Transplant to Soil
The most common question I get about pothos propagation is "When do I know it's ready for soil?" The answer depends on your goals and growing conditions, but there are clear visual indicators for optimal transplanting success.
Ideal transplanting conditions:
Root system 2-3 inches (5-7.5 cm) long
Multiple roots from different nodes
Roots appear white/cream and feel firm
New leaf growth visible on the cutting
Minimum 4-6 weeks in water
Visual root assessment checklist: Look for a branching root system rather than just one long root. Multiple shorter roots (1-2 inches each) transplant better than single long roots. The roots should fill roughly 1/3 of your water vessel's volume.
Primary root development: 3-5 main roots from different nodes
Secondary branching: Smaller roots growing off main roots
Root density: Enough roots to anchor plant in soil
Root health: White/cream color with firm texture
Length requirement: 2-3 inches minimum for most roots
Transplanting process: Choose a pot 2-3 inches larger than your root system with drainage holes. Use well-draining potting mix—regular houseplant soil works perfectly. Create a planting hole slightly larger than the root system and gently place the rooted cutting without forcing or bending roots.
Water thoroughly after transplanting and place in the same lighting conditions where you propagated. Don't fertilize for the first month as the roots adjust to soil nutrients.
→ BUYMAX Ceramic Pots with Drainage 4-Pack ($18-25) - Perfect size for newly propagated pothos
These 5-inch ceramic pots provide the perfect size for transplanting rooted pothos cuttings. Each pot includes proper drainage holes to prevent root rot, plus matching saucers to protect surfaces. The modern white ceramic design complements any home decor while the slightly tapered shape allows for healthy root development. Set of four means you can transplant multiple propagated cuttings at once. Quality construction resists cracking and the neutral color works with any plant.
Alternative: Extended water growing Here's something many guides don't mention—pothos can live in water indefinitely. If you love the look of your propagation setup, just keep changing the water weekly and add liquid fertilizer monthly. I have a marble queen that's been living in water for over two years and still produces new growth.
For more details on permanent water growing, check out Can Pothos Grow in Water Permanently.
Common Propagation Problems and Solutions
Even with pothos being incredibly forgiving, things can occasionally go wrong during propagation. Here are the issues I've encountered personally and exactly how to fix them.
Problem: Cutting wilts immediately after placing in water This usually indicates the cutting was already stressed or you cut too close to damaged tissue. The solution is to take a fresh cutting from healthier vine section, ensuring your cut is well below any yellowing or damaged areas.
Problem: Water turns cloudy and smells bad within 2-3 days Bacterial contamination from dirty scissors, contaminated water, or leaving too many leaves submerged. Change to fresh water immediately, trim any rotting roots, clean your vessel with diluted bleach, and remove submerged leaves.
Problem: Roots appear but then turn brown and fall off Usually caused by inconsistent water changes or water temperature fluctuations. Stick to weekly water changes with room temperature water. If you've been inconsistent, trim affected roots and start fresh water routine.
Problem: No root development after 3+ weeks Your cutting likely lacks viable nodes or the nodes are damaged. Examine the submerged stem sections carefully—you should see small bumps or aerial root nubs. If absent, take a new cutting ensuring 2-3 clear nodes are included.
Problem: Leaves keep yellowing and dropping Some leaf loss is normal as the cutting adjusts to water propagation. If you're losing more than 1-2 leaves per cutting, check that your lighting isn't too intense and water temperature remains consistent. Move further from windows if needed.
Problem: Roots grow but stay very thin and weak This often indicates insufficient light. Pothos cuttings need bright, indirect light to develop robust root systems. Move to a brighter location but avoid direct sun which can overheat the water.
Problem: New leaf growth but minimal root development The cutting is putting energy into leaves instead of roots. Reduce light slightly and ensure water covers 2-3 nodes completely. Sometimes pinching off new growth redirects energy to root development.
The key with any propagation problems is acting quickly. Pothos cuttings can recover from most issues if you catch them early and adjust conditions promptly.
Advanced Propagation Tips and Tricks
Once you've mastered basic water propagation, these advanced techniques can improve your success rate and expand your propagation possibilities.
Node selection for faster rooting: Choose vine sections where aerial roots are already visible emerging from nodes. These cuttings typically root 50% faster than nodes without visible root nubs. The plant has already started the root development process.
Seasonal timing considerations: While pothos propagate year-round, spring and early summer cuttings establish faster due to increased daylight hours and natural plant growth hormones. Winter propagation takes 2-3 weeks longer but still succeeds reliably.
Water temperature optimization: Room temperature water (68-72°F or 20-22°C) produces the fastest root development. Water below 65°F (18°C) slows root growth while water above 75°F (24°C) encourages bacterial growth. Use a basic thermometer to check initially.
Rooting hormone for reluctant cuttings: While unnecessary for most pothos, rooting hormone can help stressed or older cuttings establish roots faster. Dip the cut end briefly in liquid rooting hormone before placing in water.
→ Garden Safe Take Root Rooting Hormone ($5-8) - Liquid formula for difficult cuttings
This liquid rooting hormone contains the optimal concentration of growth hormones to encourage faster root development in plant cuttings. The liquid formula makes application simple—just dip the cut end for 5 seconds before placing in water. Works particularly well with older pothos cuttings or vine sections that seem reluctant to root naturally. One bottle treats hundreds of cuttings and stores for years. Safe for indoor use and won't harm established plants.
Product link unavailable
Propagating multiple varieties together: When propagating different pothos varieties (golden, marble queen, neon), keep them in separate vessels. Different varieties can have slightly different rooting speeds, and it's easier to track progress individually.
Creating fuller transplanted plants: Instead of transplanting single cuttings, root 3-4 cuttings and plant them together in one pot. This creates an immediately full, bushy appearance rather than waiting months for a single cutting to branch.
Propagation station setup: Dedicate a specific area with consistent lighting for ongoing propagation. I use a north-facing kitchen windowsill where I can monitor progress daily during coffee preparation. Having a designated space encourages regular propagation activity.
Gift timing strategy: Start gift propagations 6-8 weeks before needed occasions. This allows time for full root development and 2-3 weeks of soil establishment before gifting. Include care instructions with your propagated plants.
For detailed variety-specific propagation advice, see our comprehensive Pothos Varieties Guide.
Creating Your Propagation Station Setup
Building a dedicated propagation area transforms occasional cutting into a regular plant-multiplying habit. Here's how I designed my propagation station that produces 15-20 new plants per year.
Location requirements: Choose a spot with bright, indirect light that you pass by daily. Kitchen windowsills work perfectly because you'll notice changes during meal preparation. Avoid locations near heating vents, air conditioners, or areas with temperature fluctuations.
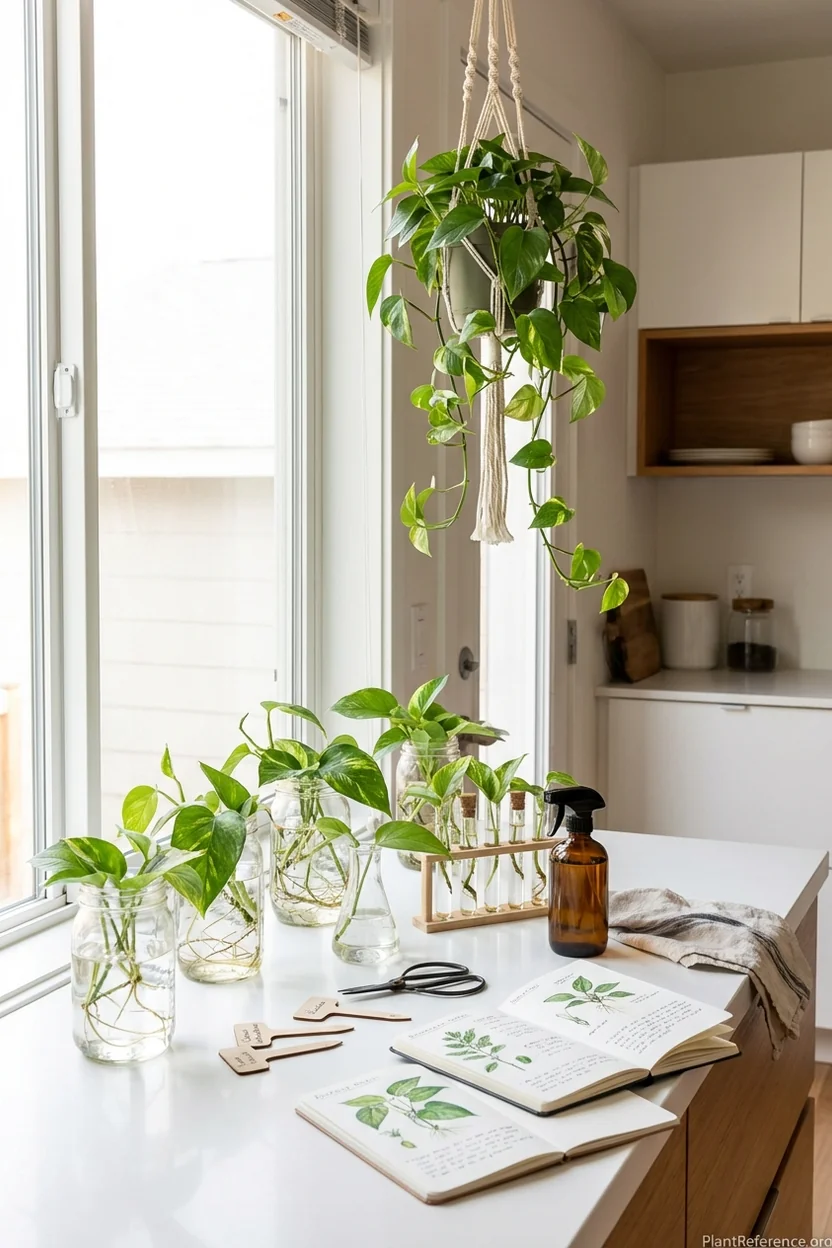
Essential propagation station supplies:
Multiple glass vessels: Various sizes from shot glasses to mason jars
Sharp scissors or pruners: Dedicated cutting tools kept clean
Labels and waterproof marker: Track varieties and cutting dates
Small towel: For cleanup during water changes
Notebook: Record which cuttings succeed for future reference
Spray bottle: Mist leaves if humidity drops below 40%
Organization system: I arrange vessels left to right by cutting date, with newest cuttings on the left. This makes it easy to identify which need water changes and which are ready for transplanting. Small adhesive labels on each vessel show the variety name and cutting date.
Maintenance routine: Every Sunday morning, I change water in all vessels, check root development, and remove any yellowing leaves. This weekly routine takes 15-20 minutes but prevents most propagation problems before they start.
Scaling your operation: Start with 2-3 vessels and expand as you gain confidence. I began with mason jars and gradually added specialized propagation vessels as my collection grew. The key is starting simple and adding equipment only when you need it.
→ Kingbuy Glass Propagation Station ($12-18) - Desktop setup for beginners
Perfect starter propagation station featuring three glass bulb terrariums mounted on a rotating wooden stand. Each bulb holds individual cuttings while the rotating base allows you to turn toward optimal light throughout the day. The wooden stand adds aesthetic appeal while keeping vessels stable and organized. Glass bulbs provide excellent root visibility and are easy to clean between uses. Compact design fits on any windowsill or desk while holding multiple cuttings safely.
Seasonal adjustments: During winter months, I move the propagation station closer to windows to compensate for reduced daylight hours. In summer, I pull it back slightly to prevent overheating. These small adjustments maintain consistent growing conditions year-round.
Documentation benefits: Keeping simple records helps identify which parent plants produce the most successful cuttings and which varieties root fastest. I note cutting date, parent plant location, and transplant success rate for each propagation attempt.
For more advanced propagation techniques and variety-specific tips, check out our detailed Pothos Care Guide and Pothos Varieties Comparison.
The beauty of creating a propagation station is how it transforms plant propagation from occasional project into ongoing hobby. You'll find yourself noticing potential cutting opportunities and always having gifts ready for plant-loving friends. Plus, there's something deeply satisfying about watching tiny root nubs develop into full root systems week by week.
Start simple, be consistent with care, and prepare to be amazed at how quickly your single pothos can become a whole collection.
Frequently Asked Questions
Reading about plants and recognising them are different skills. These three build the second.
- Daily PlantIdentify the day’s mystery plant from a close-up photograph.
- Keyed OutWork a dichotomous key, lead by lead, to name a hidden specimen.
- Name That PlantName a specimen from botanical clues dealt hardest first.
Free to play, no account needed
Jessica transformed her small Brooklyn balcony into a thriving container garden after moving to New York City. What started as a pandemic hobby turned into a plant care consulting business serving urban apartment dwellers across the city. She specializes in small-space gardening, indoor plant troubleshooting, and helping clients keep houseplants alive in less-than-ideal conditions (dim light, dry heat, tiny spaces). Jessica completed a home gardening certificate program and shares her plant wins and failures on her modest Instagram following. Her partner, Maya, jokes that their apartment is now 40% plants, 60% living space. Jessica's passionate about making plant care accessible to renters who think they don't have room to garden.