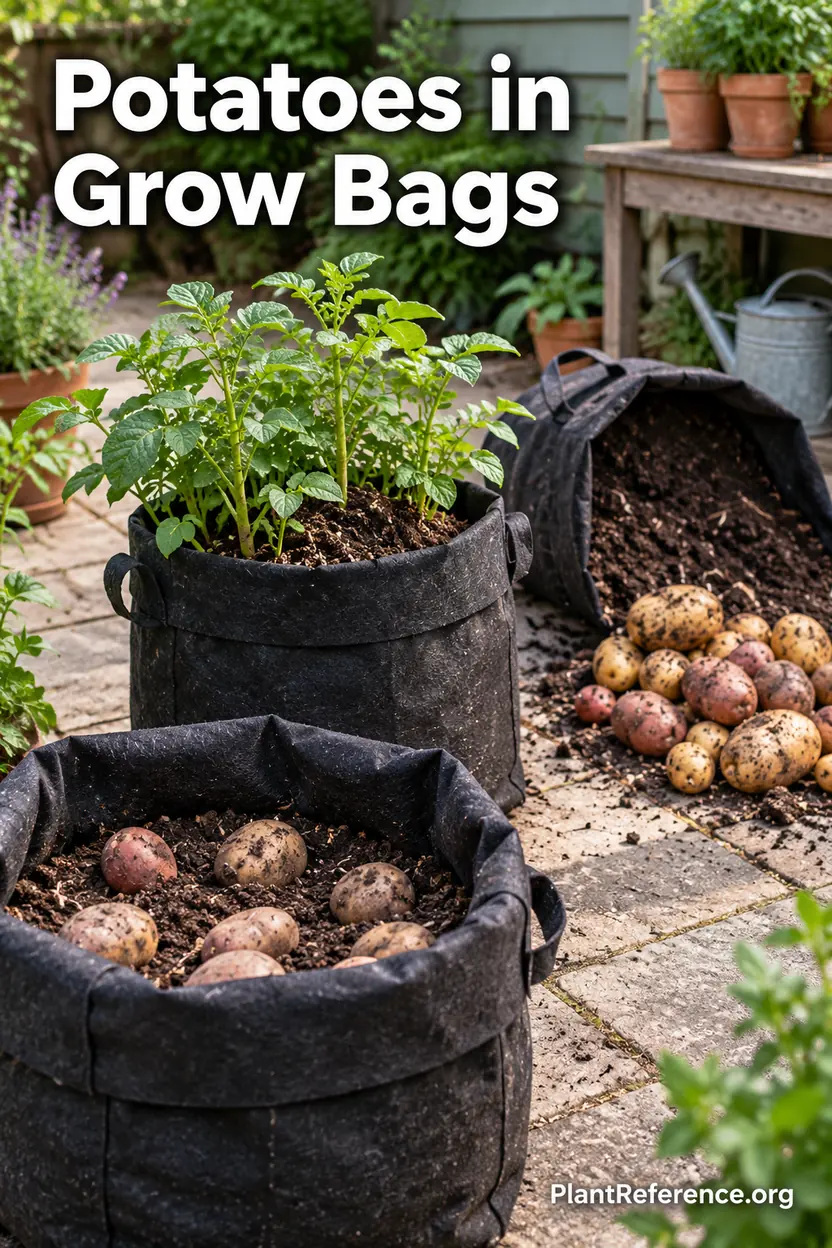
Growing Potatoes in Grow Bags: Planting, Hilling & Harvest
Pets & Toxicity
Recorded toxicity for plants linked in this guide. An unknown status is not a safety assessment.
Toxic to pets: potatoDetailsHide
— Image © PlantReference.org 2026
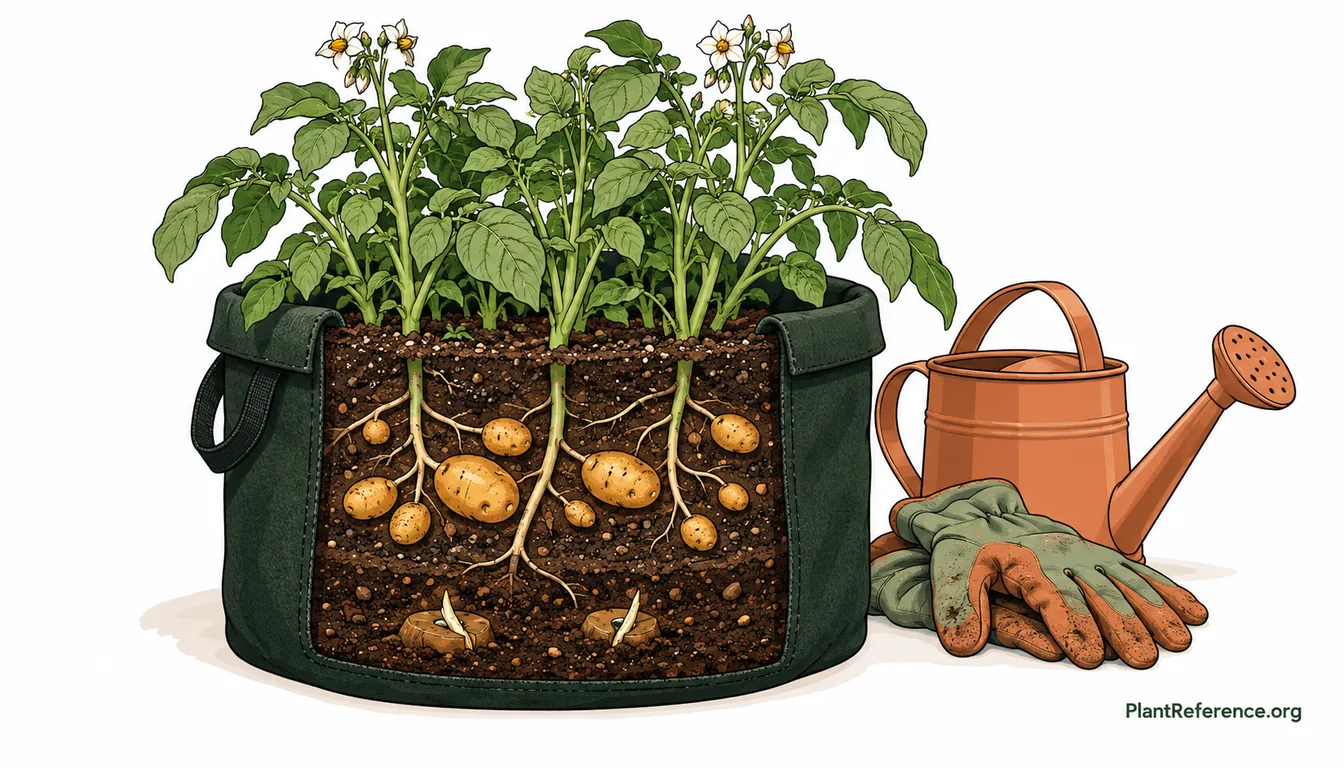
Growing potatoes in grow bags works because fabric containers drain freely, air-prune circling roots, and open for a low-mess harvest. Start with a 10–30-gallon (38–114 L) bag, certified disease-free seed potatoes, and an airy container mix. Roll the empty bag down, plant low, then unroll and add mix in stages as stems grow. Consistent water and patient harvest timing matter more than filling the bag all at once.
Choose the Bag Size and Potato Type
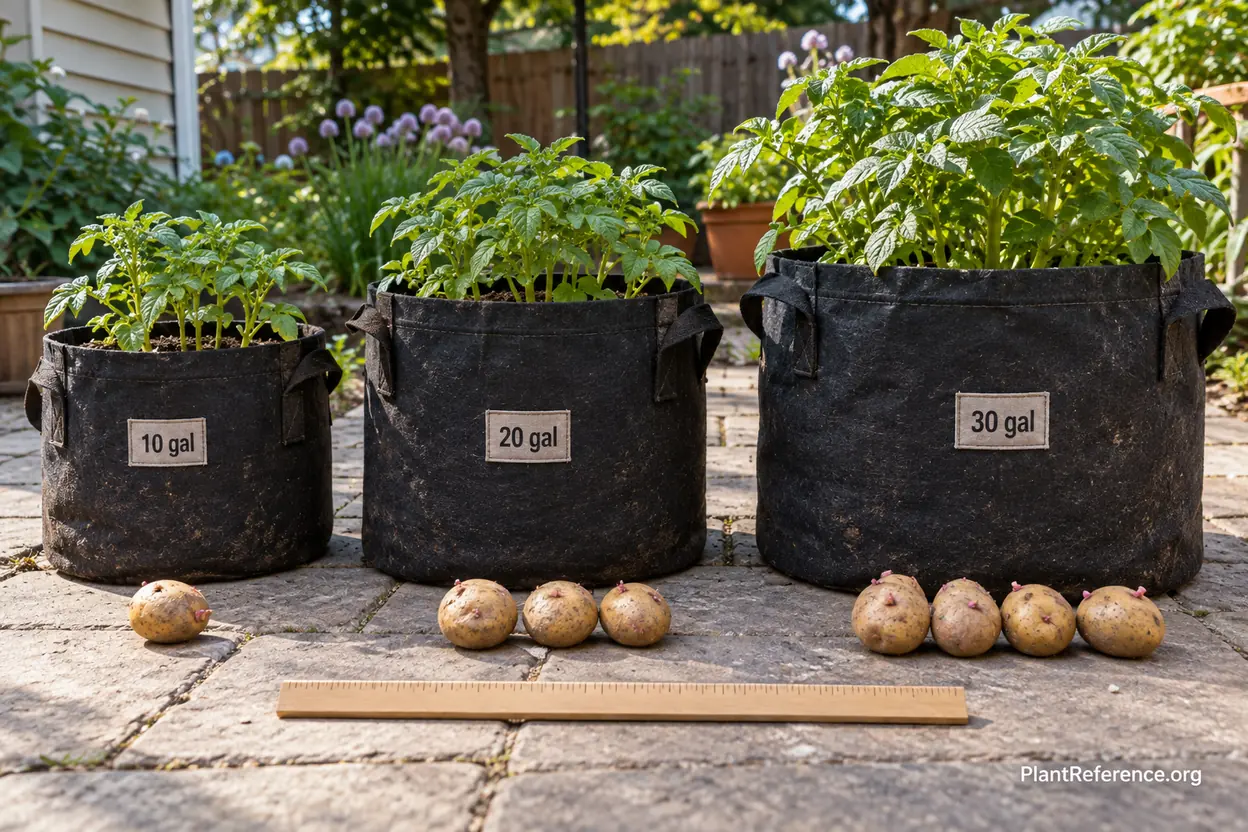
Potato 🌿Solanum tuberosum (soh-LAY-num too-BER-oh-sum) forms tubers on underground stems called stolons. The plant needs horizontal room for those stolons and enough mix to buffer moisture around them. A tiny pot can grow foliage, but it dries quickly and leaves little space for a worthwhile crop. For dependable results, allow about 5–10 gallons (19–38 L) of mix per seed piece.
A 10-gallon (38 L) bag suits one seed piece or two compact plants. A 15–20-gallon (57–76 L) bag holds two or three pieces. A 25–30-gallon (95–114 L) bag can support three or four if you space them evenly. More plants do not guarantee more potatoes. Crowding creates smaller tubers, uneven water use, and foliage that is difficult to inspect.
Bag capacity | Seed pieces | Filled depth | Practical use |
|---|---|---|---|
10 gallons (38 L) | 1 | 14–16 inches (35–40 cm) | Trial bag or small patio |
15 gallons (57 L) | 2 | 16–18 inches (40–45 cm) | Reliable beginner size |
20 gallons (76 L) | 2–3 | 18–20 inches (45–50 cm) | Larger main-season crop |
25–30 gallons (95–114 L) | 3–4 | 20–24 inches (50–60 cm) | Multiple plants with added weight |
Early cultivars mature quickly and are useful where summer heat arrives fast. Solanum tuberosum 'Red Norland' is an early red-skinned option, while Solanum tuberosum 'Yukon Gold' produces yellow-fleshed tubers on a midseason schedule. A later cultivar such as Solanum tuberosum 'Kennebec' needs a longer healthy season. Fingerling forms such as Solanum tuberosum 'French Fingerling' can crop well in bags, but they still need adequate volume.
Choose a sturdy bag made from dense, breathable fabric with reinforced handles. Fabric lets excess water escape and exposes root tips to air, which discourages circling. It also loses moisture faster than rigid plastic. That tradeoff makes bag size and daily observation important. The material comparison in Best Grow Bags for Tomatoes: Fabric vs Plastic Container Comparison applies to the same drainage and temperature behavior, even though potatoes use a different planting pattern.
Set the bag in its final position before filling it. A 20-gallon (76 L) bag of wet mix can weigh more than 100 pounds (45 kg), and handles are for careful repositioning, not routine hauling. Put it where it receives at least 6 hours of sun, drains without staining a sensitive surface, and can be reached with a hose or watering can.
Prepare Seed Potatoes and Roll the Bag
Buy certified seed potatoes rather than planting grocery-store tubers. Certification reduces the risk of introducing viruses and other potato diseases, and store potatoes may be treated to suppress sprouting. Inspect the seed stock and discard pieces that are soft, moldy, or foul-smelling. Healthy seed should feel firm and carry short, sturdy sprouts or visible eyes.
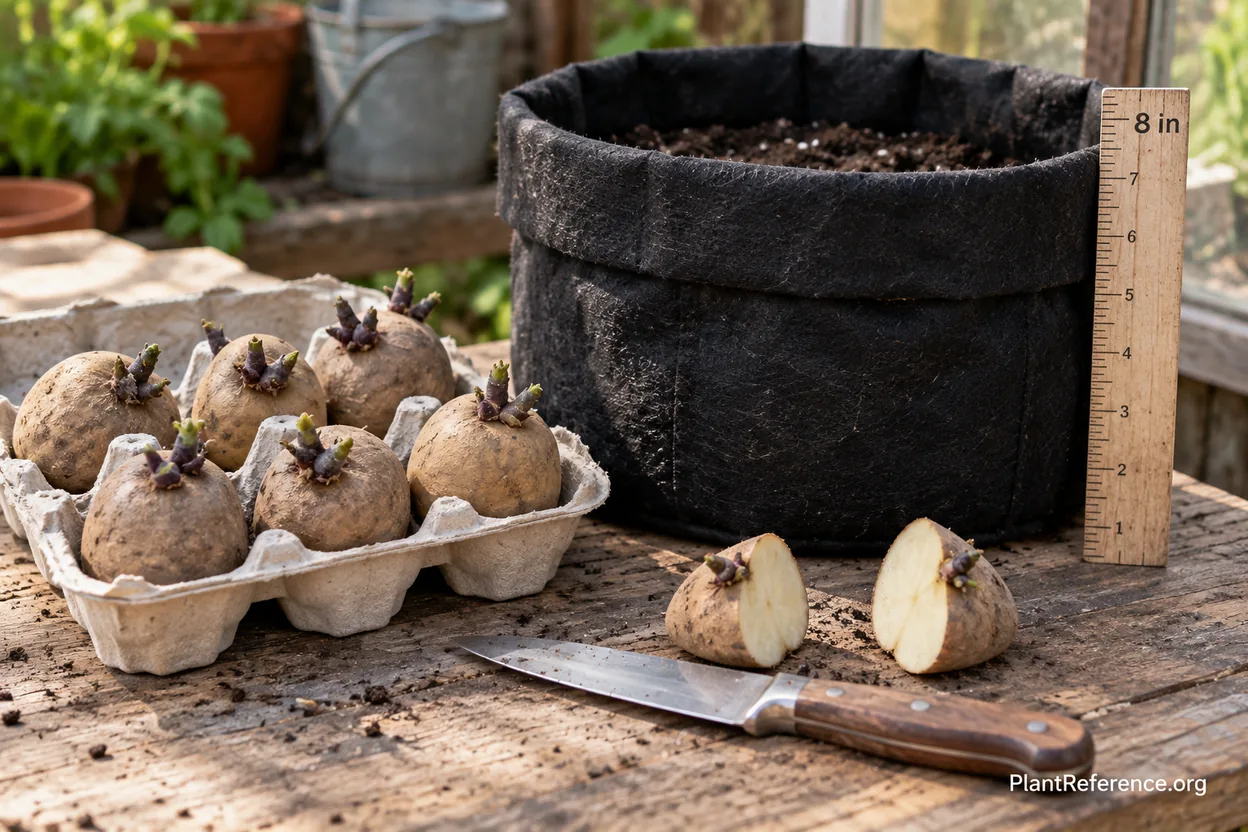
Chitting gives potatoes a head start. Place whole seed potatoes in a single layer in bright, indirect light at about 50–60°F (10–16°C) for two to four weeks. The goal is short, thick sprouts about 1/2–1 inch (1–2.5 cm) long, not pale shoots that snap during planting. Chitting is helpful in short seasons but optional where the soil warms early.
Plant small egg-sized seed potatoes whole. Cut larger ones into chunks weighing about 1.5–2 ounces (40–55 g), with at least one or two strong eyes per piece. Use a clean knife. Let cut surfaces dry in a ventilated place for one or two days until they feel leathery. This brief curing lowers the chance of rot after planting, especially in cool, wet mix.
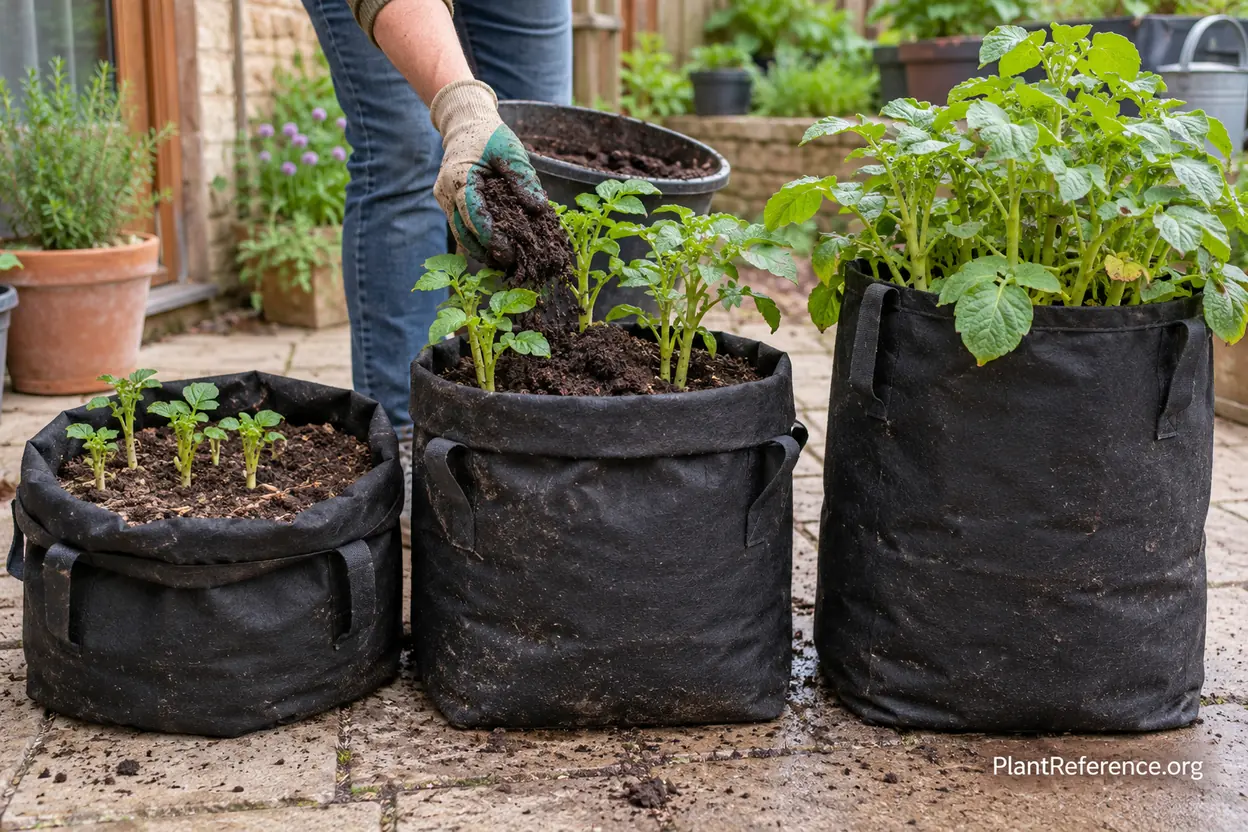
Roll the fabric bag outward until it stands only 8–10 inches (20–25 cm) tall. A rolled rim keeps floppy empty fabric out of the way and lets sunlight reach young shoots. As plants grow and you add mix, unroll the rim in stages. Do not fold it inward where it can trap irrigation water against the stems.
Before adding mix, confirm that the bag bottom is fully open and flat. Set it on pavers, a slatted stand, or a few narrow battens so drainage can escape. Avoid a deep saucer that holds runoff. Fabric breathability cannot protect tubers if the base sits in standing water.
Fill With Airy Mix and Plant Correctly
Use a light container medium rather than garden soil. A practical blend combines about two parts quality potting mix, one part finished compost, and one part coarse aeration material such as perlite or fine pine bark. The finished mixture should absorb water without collapsing into mud. Container Tomato Soil: Creating the Perfect Growing Mix for Maximum Yields explains the same air-and-water balance needed in a large bag.
Do not put gravel in the bottom. A gravel layer reduces useful volume and creates a texture boundary above which water can perch. Fill the rolled bag with 4–6 inches (10–15 cm) of moistened mix. It should feel evenly damp, not dripping. Blend any labeled starter fertilizer through this base rather than piling it beneath the seed pieces.
Place seed pieces cut side down and eyes up. Keep them at least 8–10 inches (20–25 cm) apart and 4 inches (10 cm) from the bag wall. Cover them with another 3–4 inches (7.5–10 cm) of mix. The bag will still look mostly empty; that is intentional. Water slowly until the base drains, then stop.
Place a weatherproof label in the bag with cultivar and planting date. Different cultivars may mature weeks apart, so one cultivar per bag makes harvest timing clearer. If you plant both Solanum tuberosum 'Red Norland' and Solanum tuberosum 'Kennebec', give each its own bag rather than mixing their schedules.
Shoots usually emerge in one to three weeks, depending on warmth. Protect the bag from hard frost, but do not move a soaked full bag indoors repeatedly. In a cold snap, wrap the bag and cover emerging foliage overnight, removing the cover in the morning. For general container siting and crop setup, The Complete Guide to Growing Tomatoes in Containers: From Seedling to Harvest offers useful small-space planning principles.
Hill Stems as the Bag Fills
Begin hilling when shoots stand about 6–8 inches (15–20 cm) above the mix. Add 3–4 inches (7.5–10 cm) of fresh medium around the stems, leaving the top 3–4 inches (7.5–10 cm) of leafy growth exposed. Unroll the bag rim just enough to support the new level. Water gently to settle the addition without compressing it by hand.
Repeat whenever stems rise another 6–8 inches (15–20 cm), stopping when the bag is filled to within 2–3 inches (5–7.5 cm) of the rim. Hilling shields developing tubers from light, supports stems, and provides more protected stem area. It does not create limitless stacked harvests. Potato genetics and leaf health set the crop's potential, so excessively tall bags can waste mix and make watering uneven.
Stage | Shoot height above mix | Mix added | Rim position |
|---|---|---|---|
Planting | No shoots | Cover by 3–4 inches (7.5–10 cm) | Rolled to 8–10 inches (20–25 cm) tall |
First hill | 6–8 inches (15–20 cm) | 3–4 inches (7.5–10 cm) | Unroll one section |
Later hills | Each new 6–8 inches (15–20 cm) | 3–4 inches (7.5–10 cm) | Raise with mix |
Final level | Foliage above full bag | Stop 2–3 inches (5–7.5 cm) below rim | Fully open |
Use the same airy blend for every lift. Dense compost-only layers hold too much water, while fluffy dry peat can repel the first irrigation. Pre-moisten each batch in a tub. Pour it evenly around all stems and use your fingers to work it into gaps without scraping or snapping shoots.
Do not bury all foliage. Leaves power tuber growth, and a plant repeatedly stripped of its canopy falls behind. If one stem grows much faster than the others, add a smaller amount rather than covering the shorter plant completely. A stake is rarely necessary, but a loose support can keep wind from folding tall stems. Placement strategies from Protecting Container Tomatoes on Windy Balconies and Exposed Patios help with exposed potato bags too.
Water and Feed Without Rotting Tubers
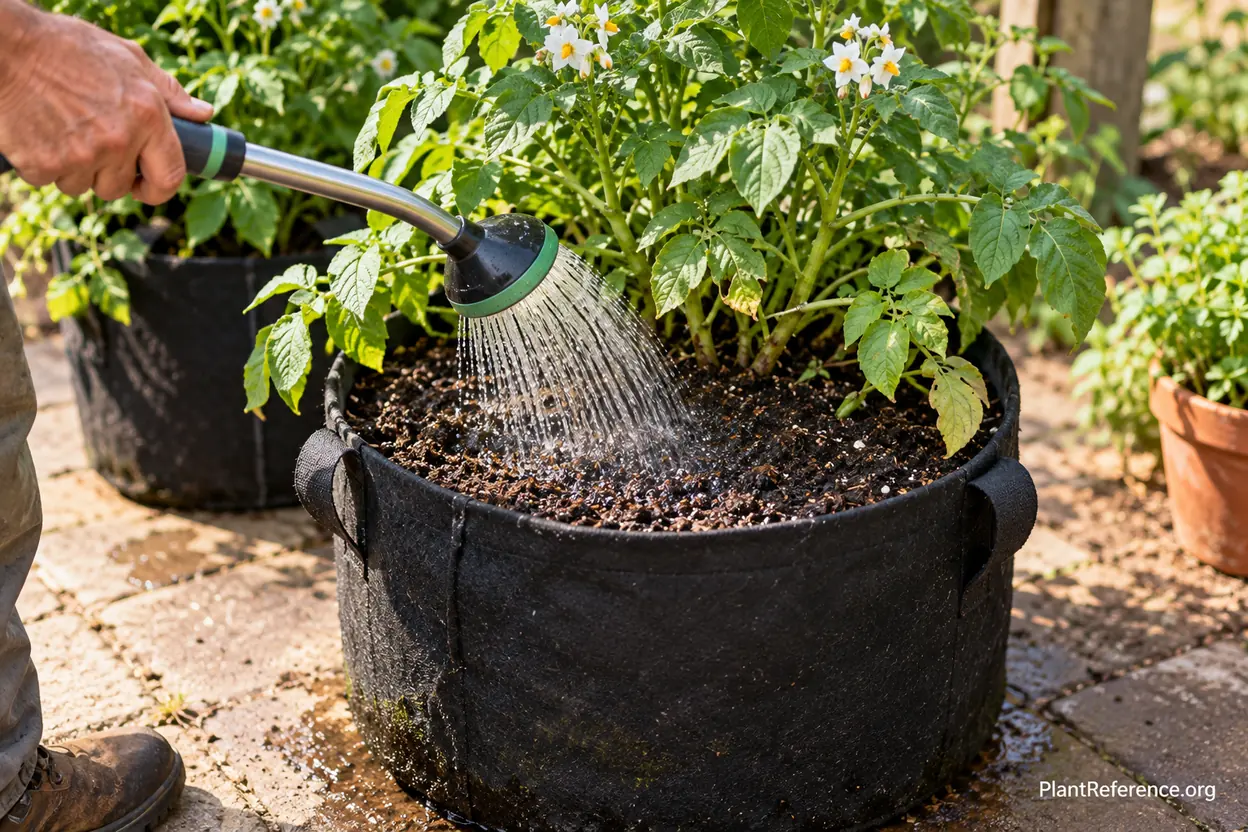
Fabric bags dry from the sides as well as the surface. Check moisture daily once foliage fills out, but water by need rather than by calendar. Push a finger 2 inches (5 cm) into the mix and lift one edge carefully to learn the bag's weight. Water when that upper zone is beginning to dry, applying a slow, even soak until a little runoff appears.
One fast pour often channels down the wall and leaves the center dry. Circle the bag with a watering wand, pause for absorption, then make a second pass. A drip ring can spread water evenly if its emitters are checked for clogs. Raised Bed Irrigation Systems: Watering Solutions for Consistent Growth covers distribution ideas that scale down to a large grow bag.
Keep moisture especially steady during flowering and early tuber bulking. Severe drought reduces tuber number and size; a flood after drought can encourage cracking or rot. The wilt and drainage checks in Overwatering vs Underwatering Container Tomatoes: How to Tell the Difference are useful, but remember that potatoes may naturally yellow near maturity. Always check the mix before diagnosing water stress from leaves alone.
Potatoes need moderate nutrition. Too much nitrogen grows a huge canopy at the expense of tubers. Use the potting mix's starter charge first, then apply a labeled vegetable fertilizer with moderate nitrogen as plants establish and begin flowering. Follow the container rate and account for fertilizer already present in compost or mix. Do not combine several full-rate products.
Stop adding fertilizer late in the crop. Once foliage begins its natural decline, more feed will not restart healthy tuber formation. Remove runoff from saucers and avoid soaking foliage in the evening, particularly where late blight is a concern. For a closer comparison of feeding approaches, Best Fertilizers for Container Tomatoes: Organic vs Synthetic Comparison explains release speed and salt buildup in containers.
Time the Harvest and Cure the Crop
For new potatoes, gently feel near the surface after flowering and harvest a few small tubers once they reach usable size. Use your fingers rather than a sharp tool. The plant can continue growing after a light harvest if roots and stems remain mostly undisturbed. Early cultivars such as Solanum tuberosum 'Red Norland' are especially useful for this approach.
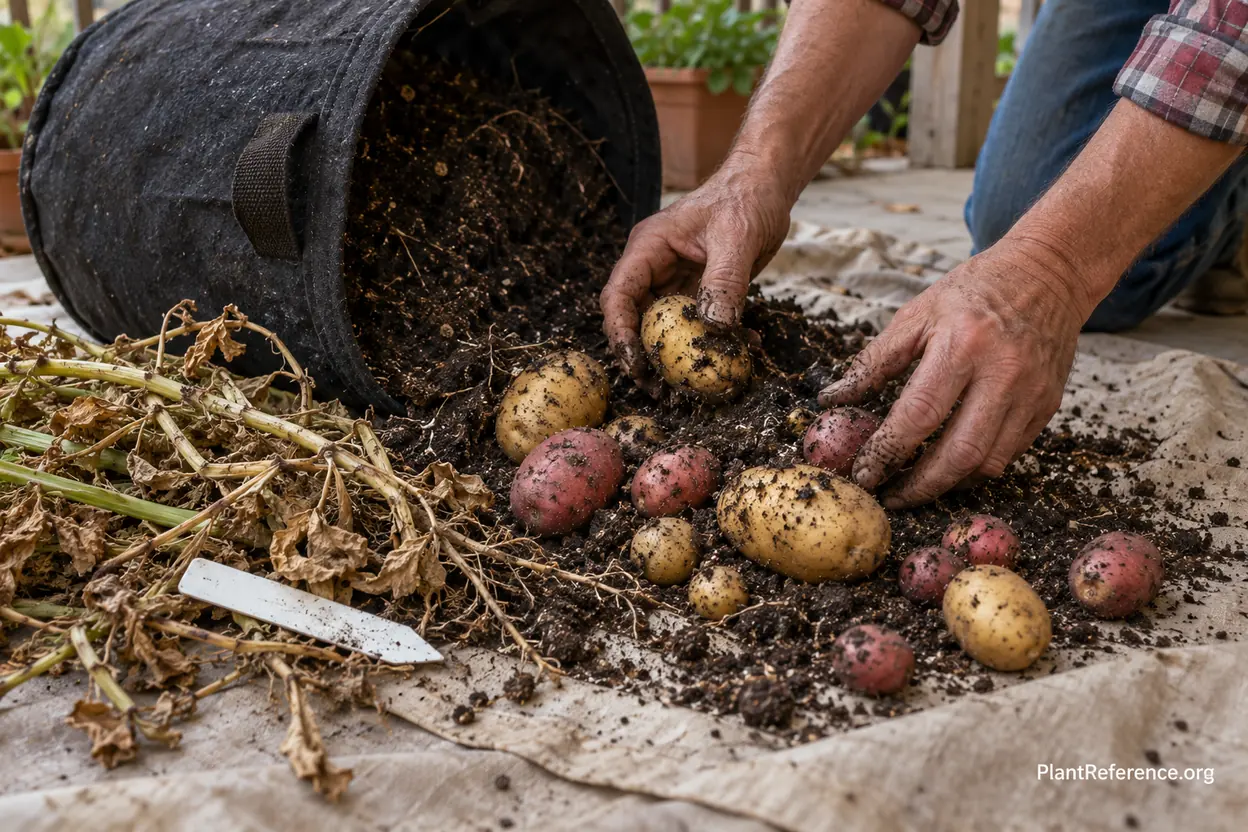
For a mature storage crop, wait until foliage yellows and dies back naturally. Cut the stems at the mix line, then stop watering for 7–14 days if dry weather allows. This period lets skins firm and makes the bag lighter. Do not leave mature tubers in saturated mix, and harvest immediately if disease or hard frost threatens.
Spread a tarp, tip the bag on its side, and peel fabric away from the root ball. Break the mix apart by hand and collect tubers. This is safer than stabbing through the bag with a fork. Keep harvested potatoes out of direct sunlight; even a short exposure can start greening.
Cure sound, mature potatoes for about 7–14 days at 50–60°F (10–16°C) in a dark, humid, ventilated place. Do not wash them first. After curing, brush off loose mix and store them around 40–50°F (4–10°C), dark and ventilated. Refrigerators are usually too cold, while a warm kitchen shortens storage life. Eat nicked tubers first and discard any that smell rotten.
Do not eat green skin, green flesh, or bitter potatoes. Light exposure raises glycoalkaloid levels, and cutting away a small green spot may not make a heavily green tuber safe. Hilling and immediate shade at harvest prevent the problem better than trimming later.
Diagnose Low Yields, Green Tubers, and Pests
Lots of leaves with few tubers usually points to excess nitrogen, crowding, insufficient sun, or harvest before maturity. Confirm the cultivar's expected season and check whether several seed pieces were packed into too little volume. Do not respond with more fertilizer. Give the remaining foliage full light and steady moisture, then wait for natural dieback.
Small tubers can also follow repeated drought. A black fabric bag in reflected afternoon heat may dry at the outer edge while the center remains damp. Group bags to shade their walls, add a pale outer wrap with an air gap, or move them out of the hottest reflected exposure. The container-sizing logic in Container Size Matters: The Ultimate Guide to Choosing the Perfect Pot for Tomatoes also applies to moisture buffering in potato bags.
Green tubers were exposed to light. Add 2–3 inches (5–7.5 cm) of mix as soon as a tuber appears at the surface and keep the bag rim upright. If irrigation washes channels around stems, fill those gaps. Discard heavily green or bitter tubers rather than composting them where they might resprout.
Yellow foliage is normal at maturity but concerning early in the season. Check moisture and drainage first. A consistently wet, sour-smelling bag suggests root or seed-piece rot. Stop watering, improve airflow under the base, and remove collapsed stems. A dry bag feels light and pulls away from its sides. Rewet it slowly in several passes rather than flooding once.
Colorado potato beetles and their red larvae can strip foliage. Inspect leaf undersides, hand-pick adults and larvae into soapy water, and crush orange egg clusters. Aphids can spread viruses, which is another reason to start with certified seed and remove suspicious plants. Do not save tubers from diseased plants for next year's seed.
At season's end, inspect the empty mix. Healthy roots and a clean earthy smell mean it can be refreshed for a non-potato crop. Do not immediately replant potatoes, tomatoes, peppers, or eggplants in the same medium because these relatives share pests and diseases. Remove all tiny tubers, clean and dry the bag, and rotate to an unrelated crop. If disease was present, discard the mix according to local guidance and sanitize tools before reuse.
One well-spaced bag is a useful trial. Record seed weight, planting date, hilling dates, and harvested weight. Those notes show whether your next improvement should be a larger bag, steadier irrigation, or a better-timed cultivar instead of another purchased input.
Frequently Asked Questions
Reading about plants and recognising them are different skills. These three build the second.
- Daily PlantIdentify the day’s mystery plant from a close-up photograph.
- Keyed OutWork a dichotomous key, lead by lead, to name a hidden specimen.
- Name That PlantName a specimen from botanical clues dealt hardest first.
Free to play, no account needed
Tagged with
Carlos grew up helping his abuelos tend their backyard garden in San Antonio, Texas, but didn't get serious about growing his own food until he bought his first house in Austin. He works as an HVAC technician during the day and gardens in the early mornings and evenings. Carlos specializes in heat-tolerant vegetables and container growing—essential skills for Texas summers and his south-facing driveway that gets intense sun. He's learned through plenty of failures (multiple dead fig trees, countless bolted lettuce crops) and now helps neighbors troubleshoot their own gardens. His YouTube channel documenting his container tomato experiments has a small but dedicated following. Carlos is passionate about growing food on a budget, often sourcing free containers and building his own compost.