Container Too Small? How to Save Root-Bound Tomato Plants
Pets & Toxicity
Recorded toxicity for plants linked in this guide. An unknown status is not a safety assessment.
Toxic to pets: phoenix tomato, yellow pear tomatoDetailsHide
Solanum lycopersicum 'Phoenix' — Toxicity Warning
Toxic to petsView Solanum lycopersicum 'Phoenix' plant profileSolanum lycopersicum 'Yellow Pear' — Toxicity Warning
Toxic to petsView Solanum lycopersicum 'Yellow Pear' plant profile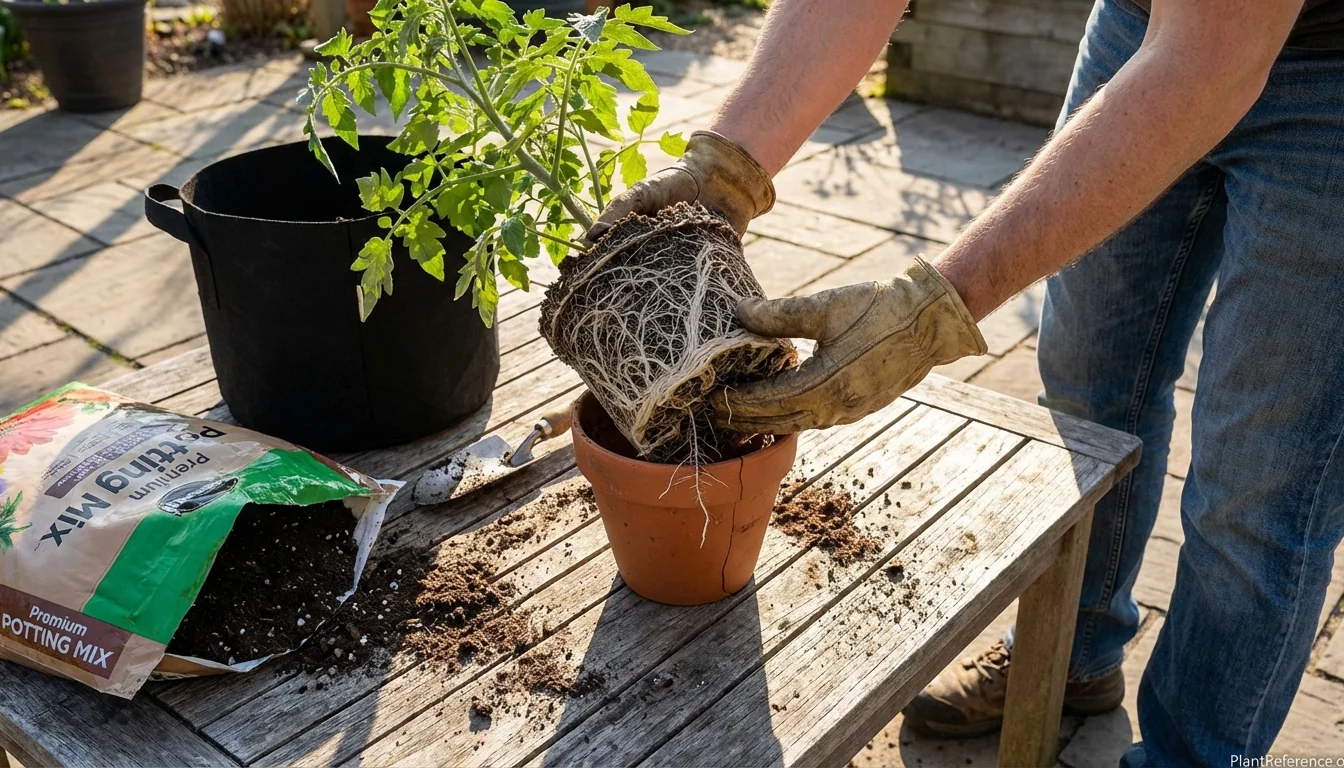
— Image © Plant Reference 2026
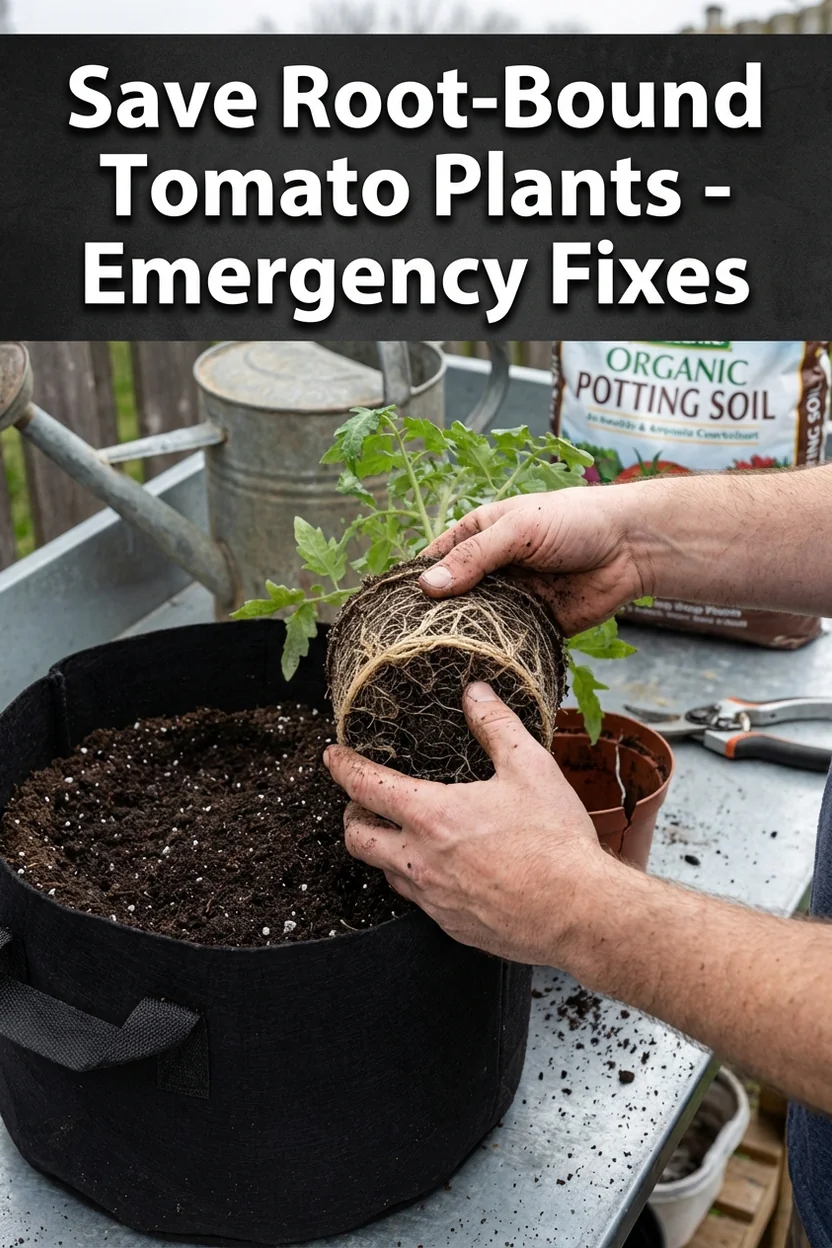
I learned this lesson the hard way during my third year of container gardening. My beautiful 'Early Girl' tomato started wilting every single day despite constant watering, and I couldn't figure out why. When I finally tipped the container to investigate, I discovered a solid mass of circled roots—my plant was completely root-bound. If you're dealing with root bound tomato plants showing similar symptoms, you're not alone, and more importantly, you can save them.
Recognizing Root-Bound Container Tomatoes
After growing tomatoes in containers for over eight years, I can spot a root-bound plant from across my patio. The telltale signs are unmistakable once you know what to look for.
The most obvious indicator is frequent wilting despite adequate water. If you're watering your 🌿Solanum lycopersicum 'Yellow Pear' (so-LAH-num ly-ko-PER-si-kum) daily and it still shows signs of drought stress, the roots have likely outgrown their space. I've watched perfectly healthy-looking plants wilt within hours of watering simply because the root mass couldn't absorb moisture efficiently.
Stunted growth becomes apparent when you compare your container plant to others of the same variety. My root-bound 'Celebrity' tomato stayed at 18 inches (46 cm) tall while my properly-sized plants reached 4 feet (1.2 m) in the same timeframe. The plant essentially stops growing upward and focuses energy on developing more roots in the limited space.
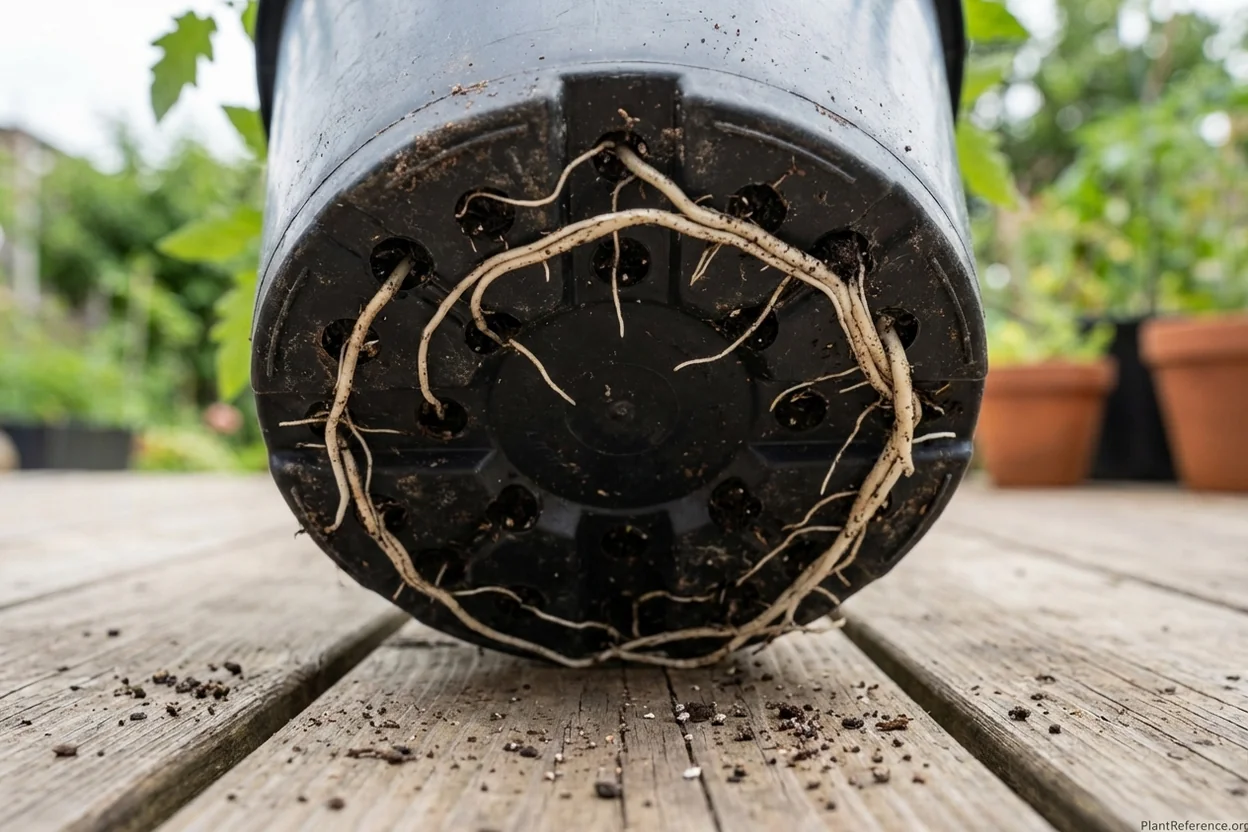
Visual inspection provides the definitive answer. Tip your container slightly and look at the drainage holes—if you see thick, white roots emerging or circling the bottom, your plant is root-bound. Don't wait for this stage; by then, the damage to growth potential is already significant.
Daily wilting despite adequate moisture
Growth that stops or dramatically slows
Roots visible through drainage holes
Water running straight through container
Yellowing lower leaves despite proper fertilization
Frequent need for watering (more than once daily)
The soil structure changes noticeably in root-bound containers. Water runs straight through without being absorbed because the root mass has displaced most of the soil. I've seen containers where 90% of the volume was roots with almost no growing medium remaining.
Emergency Signs That Need Immediate Action
Some symptoms require immediate intervention to save your tomato plants. I've learned to recognize these crisis signals after losing two plants to severe root binding early in my container gardening journey.
Daily wilting by mid-morning represents a true emergency. When plants can't stay hydrated despite morning watering, the root system can no longer function effectively. I've observed this pattern consistently in containers smaller than 5 gallons (19 L) housing determinate varieties that should thrive in that space.
Water absorption problems become critical when irrigation runs straight through the container within seconds. Healthy container soil should absorb water gradually, allowing roots time to uptake moisture. If water hits the soil surface and immediately drains out the bottom, the root mass has consumed nearly all available growing space.
Leaf drop starting from the bottom while upper growth remains green indicates the plant is sacrificing older foliage to redirect energy toward root development. This survival mechanism works temporarily, but the plant will continue declining without intervention.
Wilting occurs within 2-3 hours of watering
Water runs through container in under 30 seconds
Lower leaves yellow and drop while top stays green
Plant height hasn't increased in 3+ weeks
Multiple thick roots visible at surface
Container feels significantly lighter than others of same size
Temperature stress becomes more severe in root-bound plants because the limited soil volume heats up faster than properly-sized containers. During my testing, root-bound containers reached 85°F (29°C) while adequate-sized containers stayed at 75°F (24°C) on the same afternoon.
The "shoulder test" provides a quick diagnostic method. Gently grasp the main stem near soil level and attempt to lift the plant slightly. Root-bound plants will lift the entire soil mass as one solid piece, while healthy plants allow some soil movement around the roots.
How to Safely Transplant Mid-Season
Mid-season transplanting requires careful technique to minimize shock and maximize recovery success. I've refined this process through trial and error, losing one plant to transplant shock before developing this reliable method.
Timing matters significantly for successful transplantation. Early morning provides optimal conditions because plants are fully hydrated and temperatures remain cool. Avoid transplanting during afternoon heat when plants already face natural stress. I schedule all emergency transplants for 6-8 AM when possible.
Choose a container 2-3 times larger than the current one. If your plant is in a 3-gallon (11 L) container, move to 8-10 gallons (30-38 L) minimum. This provides adequate root expansion space without overwhelming the plant with too much soil volume initially. I've found that doubling container size isn't sufficient—the roots will become bound again within 6-8 weeks.
Pre-hydration prevents transplant shock. Water the root-bound plant thoroughly 1-2 hours before transplanting. This ensures roots are fully hydrated and makes root ball removal easier. Simultaneously, moisten your new potting mix to field capacity but not waterlogged.
Water plant 1-2 hours before transplanting
Choose container 2-3 times larger than current
Work in early morning or late evening
Have all materials ready before starting
Use high-quality potting mix, never garden soil
Score root ball in 3-4 places if severely bound
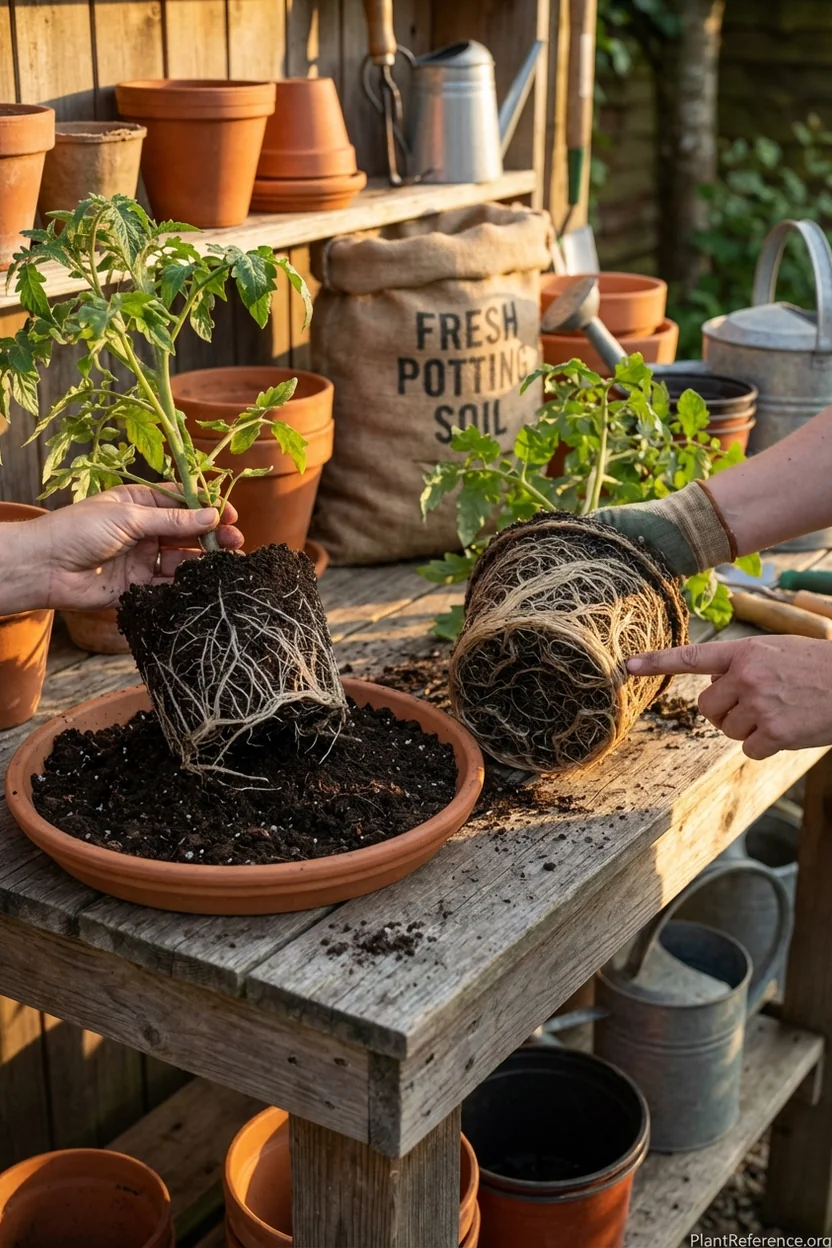
Gentle root ball handling prevents damage during the transition. Turn the container sideways and tap the edges while supporting the plant stem. The entire root mass should slide out as one piece. If roots resist, run a knife around the inside edge to separate them from container walls.
Root scoring becomes necessary for severely bound plants. Using a sharp, clean knife, make 3-4 vertical cuts through the root ball, each about 1 inch (2.5 cm) deep. This breaks the circling pattern and encourages outward growth. Don't be afraid of cutting roots—this temporary damage promotes long-term health.
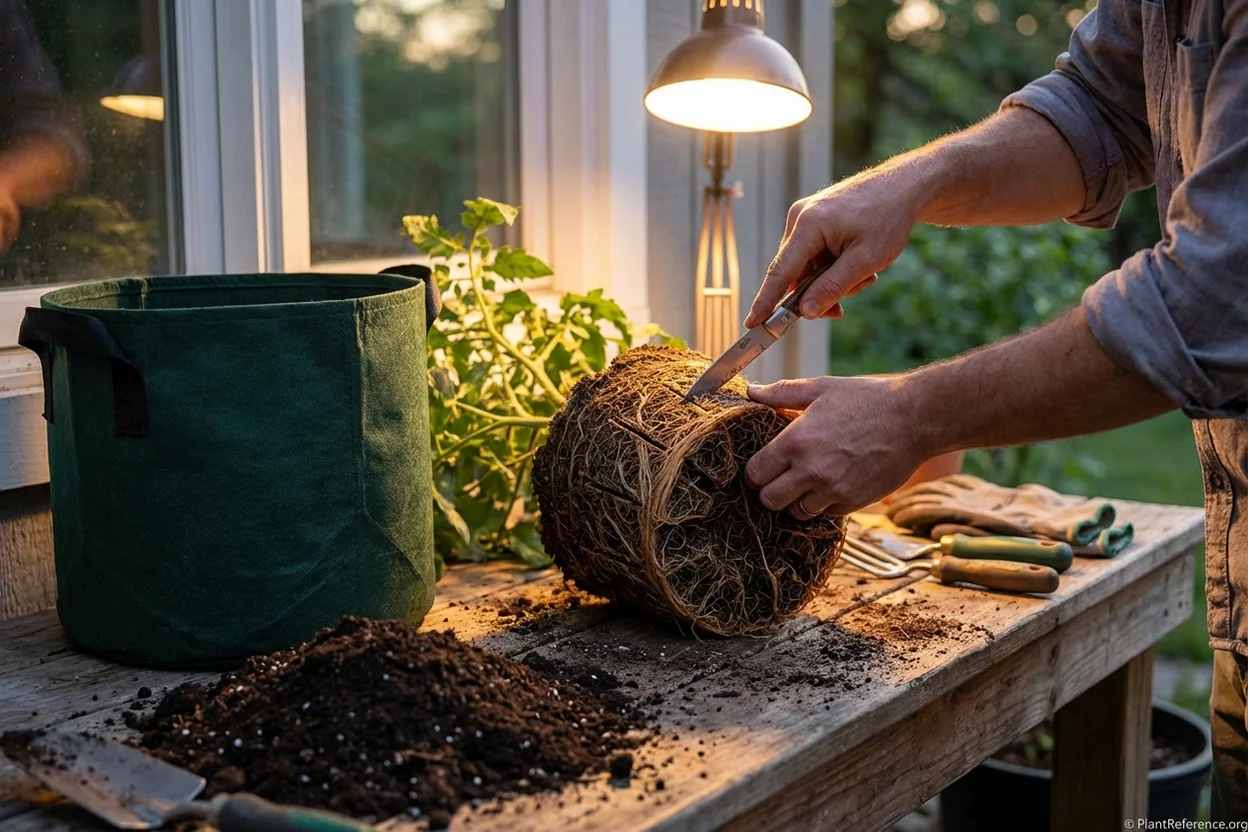
Position the plant at the same soil depth as previously planted. Tomatoes can handle slightly deeper planting, but avoid burying more than 1 inch (2.5 cm) of additional stem. Fill around the root ball with fresh potting mix, gently firming to eliminate air pockets without compacting.
Water thoroughly immediately after transplanting, ensuring water reaches the entire root zone. The initial watering should saturate both old and new soil areas. Expect some water to run through initially as the potting mix settles.
Choosing the Right Container Size
Container selection makes the difference between thriving plants and repeated root-binding problems. After testing various sizes with different tomato varieties, I've developed specific recommendations that prevent issues before they start.
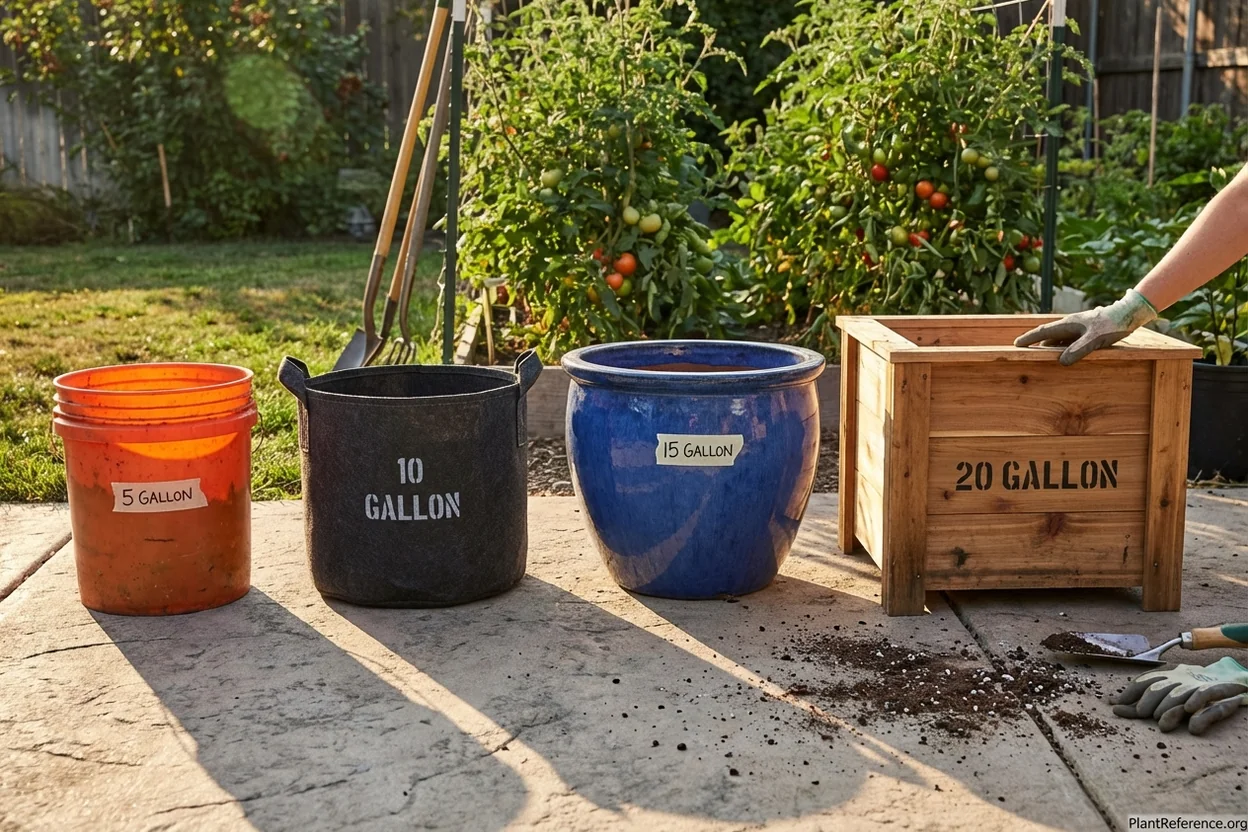
Determinate varieties require minimum 5-gallon (19 L) containers for full-season growth. Popular varieties like 'Roma', 'Celebrity', and 'Patio Princess' reach 2-4 feet (60-120 cm) tall and develop extensive root systems despite compact top growth. I've successfully grown these varieties in 5-gallon containers, but 7-10 gallons (26-38 L) provides better results.
Indeterminate varieties need 10+ gallon (38+ L) containers for optimal performance. Varieties like 'Early Girl', 'Cherokee Purple', and 'Brandywine' can reach 6-8 feet (1.8-2.4 m) tall and require proportional root space. My most productive indeterminate plants grow in 15-20 gallon (57-76 L) containers.
Cherry tomatoes fall between these requirements depending on growth habit. Compact varieties like 'Tiny Tim' thrive in 3-5 gallon (11-19 L) containers, while vigorous types like 'Surefire Red' need 7-10 gallons (26-38 L). Check your variety's mature size before selecting containers.
Determinate varieties: 5-10 gallon minimum (7 gallons optimal)
Indeterminate varieties: 10+ gallon minimum (15 gallons optimal)
Cherry tomatoes: 3-10 gallon depending on variety
Consider mature plant height when sizing
Factor in root development below ground
Account for full-season growth, not just current size
Container depth matters as much as volume. Tomatoes develop extensive root systems extending 12-18 inches (30-46 cm) deep. Containers should measure at least 14-16 inches (36-41 cm) deep to accommodate natural root development. Wide, shallow containers cause root circling even with adequate volume.
Material selection impacts root health significantly. Fabric containers like Best Grow Bags for Tomatoes: Fabric vs Plastic Container Comparison promote air pruning, preventing root circling naturally. Plastic containers work well but require more attention to prevent binding. Terra cotta provides excellent drainage but heats up quickly in summer.
Recovery Care After Transplanting
Post-transplant care determines whether your rescued tomato thrives or struggles through the remainder of the growing season. I've refined this recovery protocol after observing dozens of transplanted plants over multiple seasons.
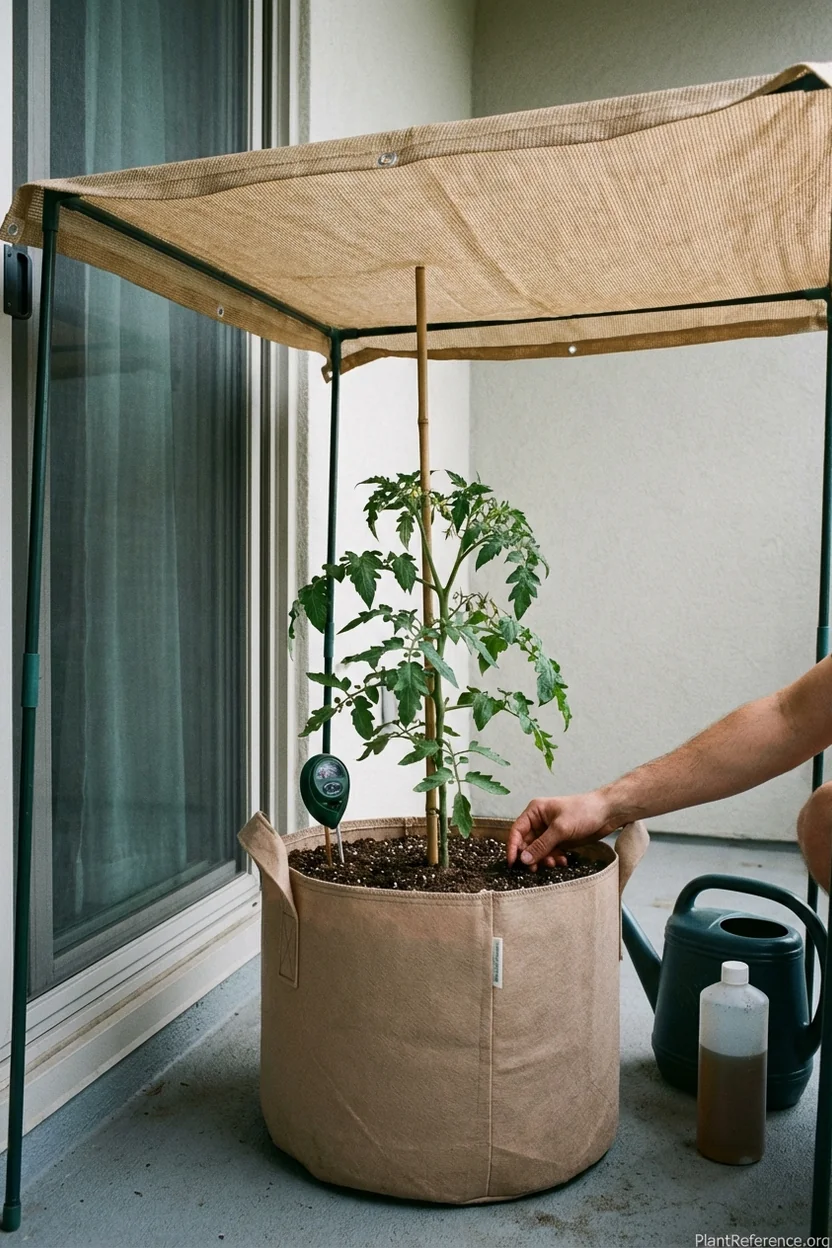
Consistent moisture becomes critical during the first 2-3 weeks following transplantation. Check soil moisture daily by inserting your finger 2 inches (5 cm) deep into the soil. Water when the top layer feels dry but avoid waterlogging. I've found that newly transplanted tomatoes need 25-30% more water than established plants during recovery.
Temporary shade protection helps reduce transplant shock, especially during hot weather. Create filtered shade using shade cloth or position containers where they receive morning sun but afternoon protection. Full sun exposure immediately after transplanting can overwhelm stressed plants. I provide 2-3 days of reduced light, then gradually return to full sun.
Fertilization timing requires patience. Avoid feeding newly transplanted plants for 10-14 days, allowing roots to establish in fresh soil first. Most quality potting mixes contain sufficient nutrients for initial recovery. When you resume feeding, start with half-strength solutions and gradually increase to normal rates.
Monitor soil moisture daily for first 3 weeks
Provide temporary shade for 2-3 days if hot weather
Skip fertilization for first 10-14 days
Support plants with stakes or cages immediately
Remove any flowers/fruit for first week to reduce stress
Watch for wilting and adjust care accordingly
Flower and fruit removal during the first week redirects plant energy toward root establishment rather than reproduction. This temporary sacrifice results in stronger plants and higher yields later in the season. Remove all existing flowers and small fruits up to golf ball size.
Staking becomes essential immediately after transplanting because the larger container changes the plant's center of gravity. Install support systems right away rather than waiting for the plant to establish. The Staking Tomatoes in Containers: 5 Support Methods guide provides detailed installation instructions for various support types.
Monitor for transplant shock symptoms including temporary wilting, yellowing leaves, or stunted growth. Mild symptoms lasting 3-5 days are normal; severe or prolonged stress indicates problems requiring intervention. I've observed that properly transplanted plants show new growth within 7-10 days.
Recovery timeline varies by plant size and stress level, but most transplanted tomatoes show significant improvement within 2-3 weeks. New growth, improved leaf color, and reduced wilting indicate successful establishment. Full recovery and optimal growth typically occur 4-6 weeks after transplanting.
Prevention Strategies for Next Season
Preventing root-bound containers is far easier than fixing them mid-season. My prevention strategies have eliminated root-binding problems in my container garden for the past four years.
Start with appropriate container sizes from planting day. Don't plan to transplant later—size containers for full-season growth initially. This approach costs more upfront but saves labor, reduces plant stress, and produces better yields. Calculate container needs based on variety specifications, not current seedling size.
Choose varieties suited to container growing rather than forcing large varieties into small spaces. Compact determinate varieties like 'Patio Choice Yellow', 'Bush Early Girl', and 'Tiny Tim' deliver excellent results in smaller containers. The Best Tomato Varieties for Containers: 25+ Proven Winners guide provides detailed recommendations for different container sizes.
Monitor root development throughout the season by checking drainage holes monthly. Early intervention prevents severe binding that requires emergency transplanting. I examine all my containers on the first day of each month, looking for early root emergence.
Size containers for full-season growth, not current plant size
Select compact varieties suited to container cultivation
Check drainage holes monthly for emerging roots
Plan annual soil replacement for multi-season containers
Consider fabric containers for natural air pruning
Keep larger containers available for emergency transplanting
Annual soil replacement prevents root binding in reused containers. Even with proper sizing, tomato roots modify soil structure over the growing season, creating compacted areas that restrict future growth. I replace all container soil annually and compost the used material.
Fabric container advantages make them my preferred choice for tomato growing. Products like the VIVOSUN 5-Pack 5 Gallon Grow Bags naturally air-prune roots, preventing root circling behavior that leads to binding. The breathable material also regulates soil temperature better than plastic alternatives.
Emergency preparation includes keeping several larger containers available throughout the season. I maintain a stock of 10-15 gallon (38-57 L) containers specifically for mid-season rescues. This preparation has saved multiple plants that would otherwise have been lost to root binding.
→ VIVOSUN 5-Pack 10 Gallon Grow Bags ($19.99-$24.99) - Heavy-duty fabric prevents root circling naturally
These 10-gallon fabric containers feature 300G thickened nonwoven fabric that promotes healthy root development through natural air pruning. Double-stitched handles support full plant weight for easy moving, while the breathable material regulates soil temperature better than plastic pots. The fabric allows excess moisture to evaporate, preventing root rot while maintaining proper drainage. Ideal size for most tomato varieties, providing adequate root space without being overwhelming. Reusable for multiple seasons and machine washable for easy maintenance.
Common Mistakes to Avoid
Learning from common mistakes saves time, plants, and frustration. These errors appear repeatedly among container gardeners dealing with root-bound plants.
Waiting too long to act represents the most frequent and costly mistake. Early intervention when roots first appear at drainage holes succeeds more often than emergency transplanting of severely bound plants. I've lost plants by postponing transplanting "until next weekend" repeatedly.
Transplanting into containers too small for long-term growth wastes effort and repeats the problem. Moving from a 3-gallon to 5-gallon container only delays root binding by 4-6 weeks. Make significant size increases—at least doubling volume—when transplanting.
Ignoring variety requirements leads to repeated failures with the same plants. Large indeterminate varieties like 'Brandywine' or 'Cherokee Purple' will become root-bound in 7-10 gallon containers regardless of care quality. Match variety selection to available container sizes.
Acting too late when symptoms appear severe
Making small container size increases instead of significant jumps
Choosing varieties too large for available containers
Transplanting during hot weather without shade protection
Using garden soil instead of quality potting mix
Failing to monitor newly transplanted plants closely
Hot weather transplanting without proper preparation stresses plants unnecessarily. I've watched gardeners transplant during 85°F (29°C) afternoon heat, then wonder why their plants struggled for weeks afterward. Temperature timing and protection matter significantly for success.
Poor quality potting mix compromises transplant success regardless of technique quality. Garden soil, cheap potting mix, or old soil from previous seasons lack the drainage and nutrition needed for recovery. Invest in fresh, high-quality potting mix for all transplanting operations.
The Container Tomato Soil: Creating the Perfect Growing Mix guide provides detailed recommendations for soil selection and preparation that maximize transplant success rates.
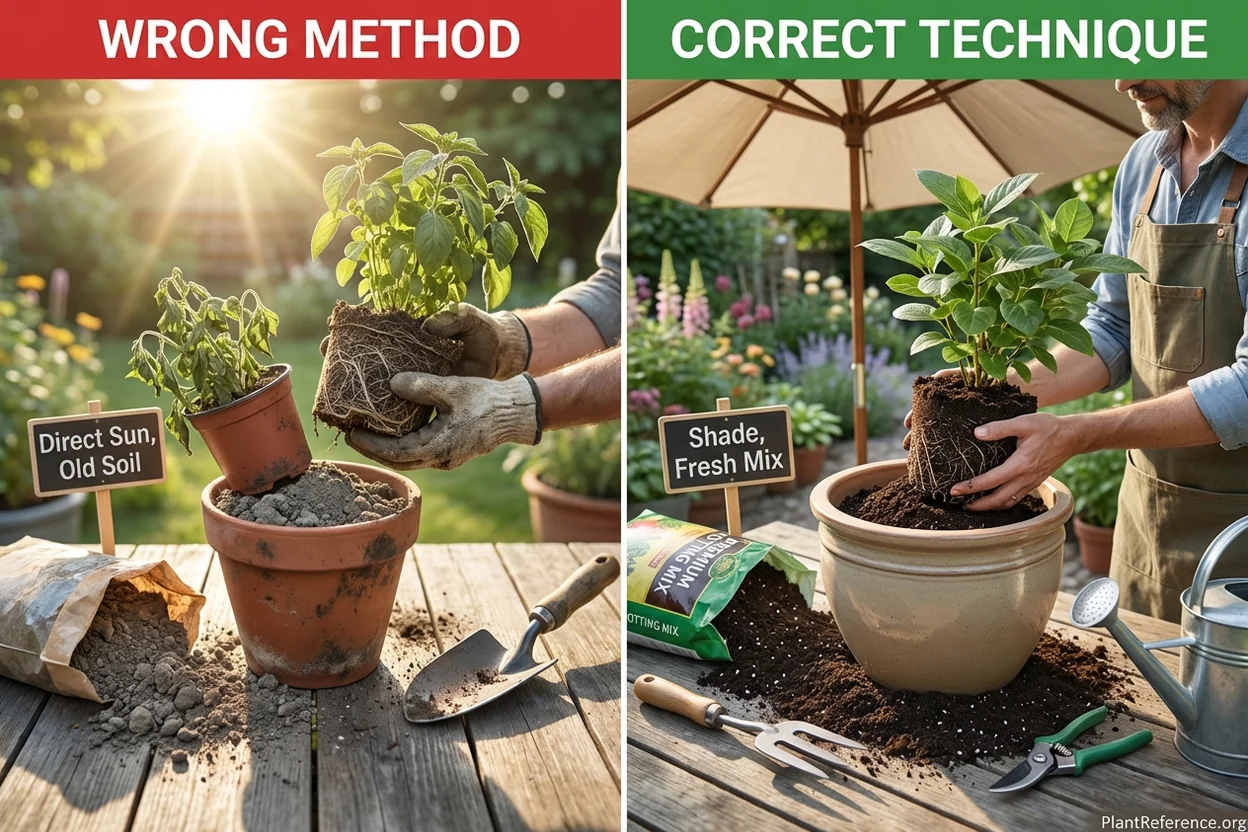
Rushing the recovery process by returning to full sun and regular fertilization too quickly can undo successful transplanting work. Plants need 2-3 weeks of gradual adjustment before resuming normal growth patterns. Patient recovery care produces stronger plants long-term.
Remember that preventing root-bound conditions through proper initial container selection remains far easier than correcting problems later. However, when root binding does occur, quick action using proper techniques can save plants and restore productive growth for the remainder of the growing season.
Frequently Asked Questions
Reading about plants and recognising them are different skills. These three build the second.
- Daily PlantIdentify the day’s mystery plant from a close-up photograph.
- Keyed OutWork a dichotomous key, lead by lead, to name a hidden specimen.
- Name That PlantName a specimen from botanical clues dealt hardest first.
Free to play, no account needed
Linda's been growing tomatoes in containers on her suburban Pittsburgh balcony—ever since her kids grew up and she finally had time for hobbies again. She's a medical billing specialist by day and a tomato enthusiast by night and weekend. Linda started documenting her container growing experiments on a simple blog and discovered other renters and condo dwellers were desperate for practical advice. She tests different varieties every season, tracking yields, disease resistance, and flavor in a detailed spreadsheet. Linda's approach is practical and budget-conscious—she saves seeds, reuses containers, and makes her own fertilizer from kitchen scraps. Her specialty is maximizing production in small spaces, and she's perfected the art of growing full-size tomatoes in 5-gallon buckets. She's a Pennsylvania Master Gardener and teaches container growing workshops at her local library.