Watering Container Tomatoes: The Complete Guide to Preventing Common Problems
Pets & Toxicity
Recorded toxicity for plants linked in this guide. An unknown status is not a safety assessment.
Toxic to pets: early girl tomato, yellow pear tomatoDetailsHide
Solanum lycopersicum 'Early Girl' — Toxicity Warning
Toxic to petsView Solanum lycopersicum 'Early Girl' plant profileSolanum lycopersicum 'Yellow Pear' — Toxicity Warning
Toxic to petsView Solanum lycopersicum 'Yellow Pear' plant profile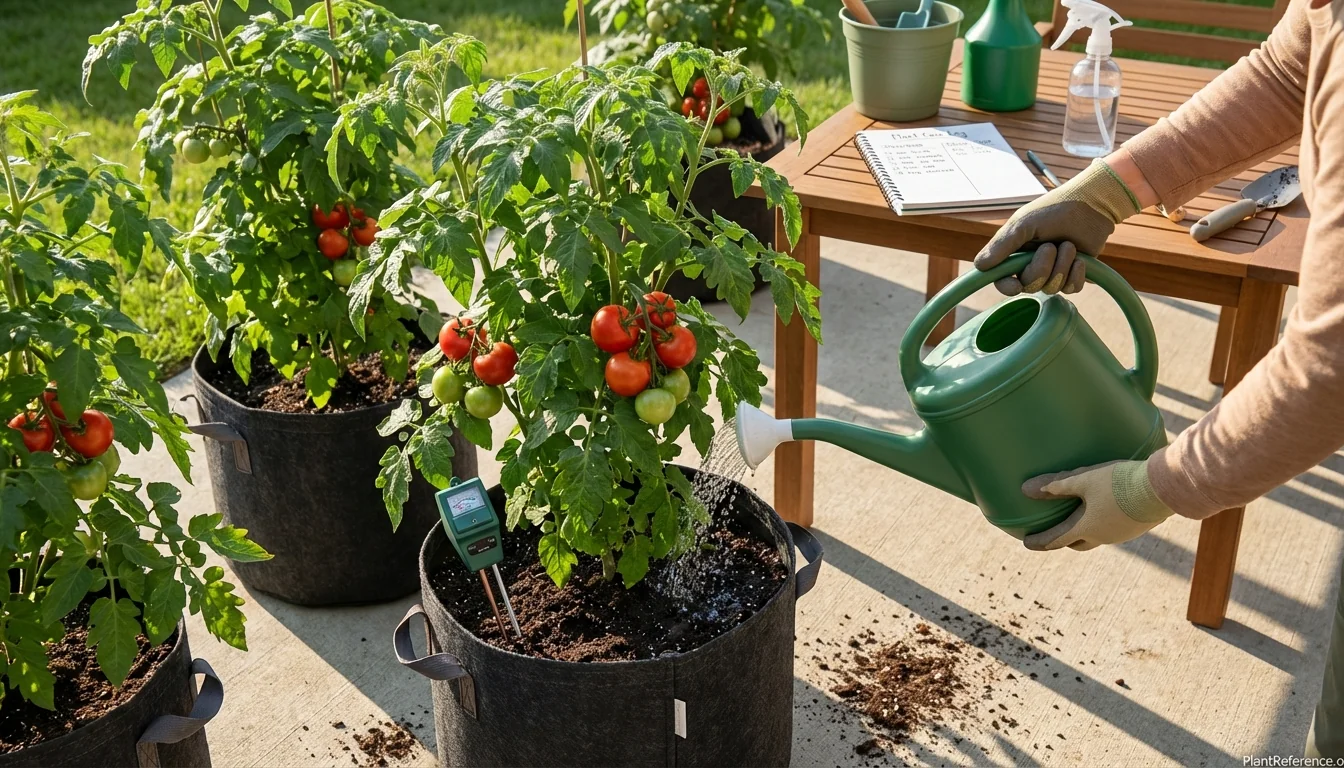
— Image © Plant Reference 2026
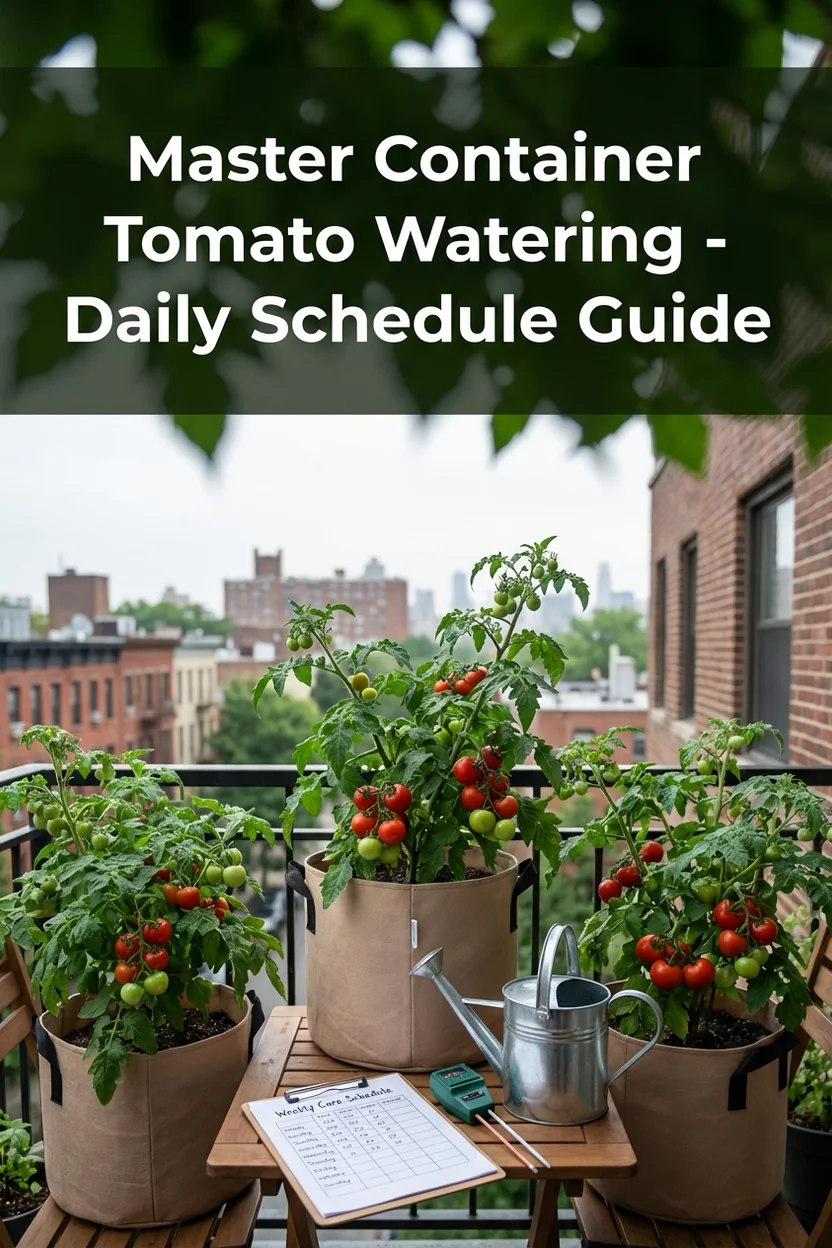
Getting watering right is the difference between thriving container tomatoes and constant plant problems. Unlike garden-grown plants that tap into groundwater, container tomatoes depend entirely on you for their water needs—and those needs change dramatically throughout the growing season.
The biggest mistake I see new container gardeners make? They water like they're caring for houseplants. But tomatoes 🌿Solanum lycopersicum 'Yellow Pear' (so-LAH-num ly-ko-PER-si-kum) in containers are water-hungry vegetables that can consume 1-2 gallons (3.8-7.6 liters) daily when mature. Get this wrong, and you'll deal with blossom end rot, root rot, or stunted growth.
Understanding Container Water Dynamics
Container growing creates unique watering challenges that don't exist in ground gardens. The limited soil volume means water runs out quickly, while solid walls prevent roots from spreading to find moisture. This creates a boom-bust cycle where containers go from saturated to bone-dry in hours.
Container walls also heat up faster than ground soil, increasing evaporation rates by 30-40% compared to garden beds. On hot days (85°F/29°C+), a 5-gallon (19-liter) container can lose 2-3 gallons (7.6-11.4 liters) of water through plant transpiration and soil evaporation combined.
How Container Size Affects Water Retention
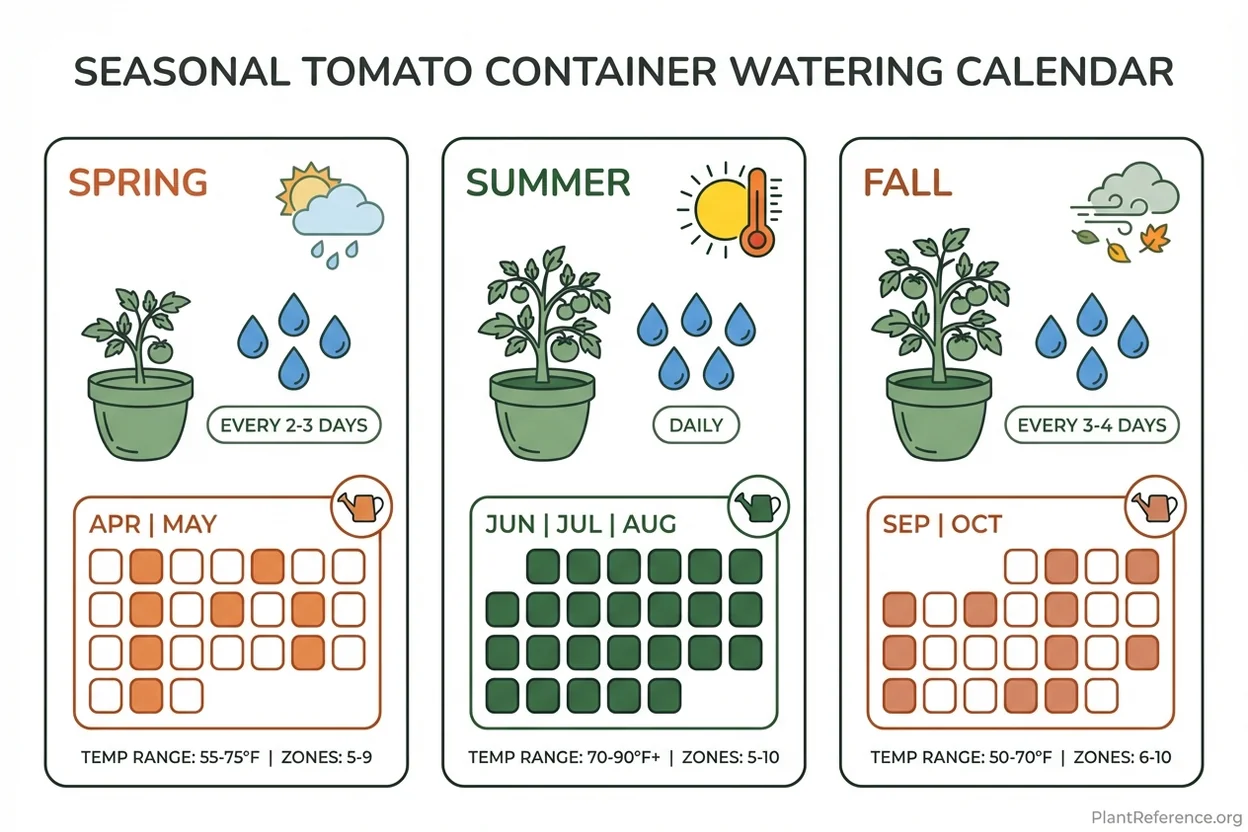
Small containers (5 gallons/19 liters or less) dry out fastest because they have less soil to hold moisture. The math is simple: less soil volume equals more frequent watering. Here's what I've observed after growing hundreds of container tomatoes:
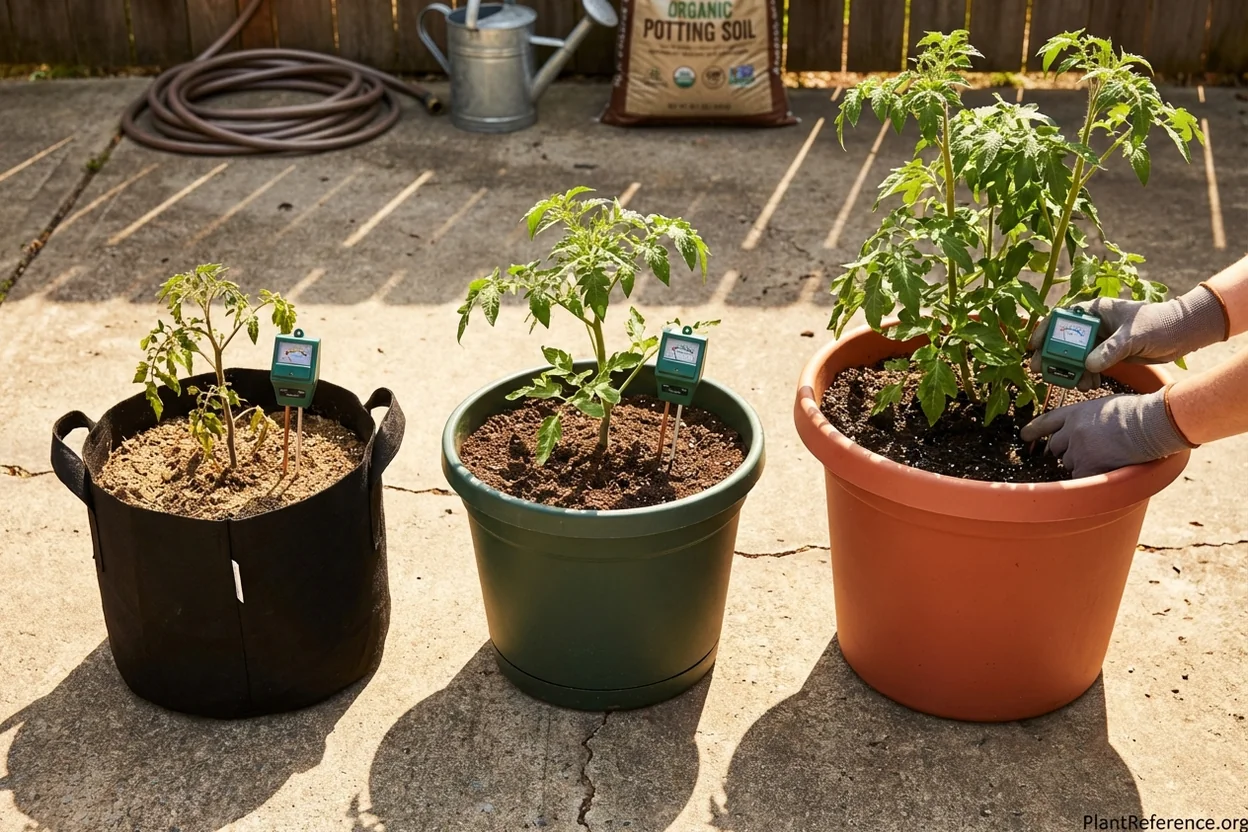
5-gallon containers: Daily watering required in temperatures above 75°F (24°C)
10-gallon containers: Every 1-2 days in hot weather, every 3-4 days in cool weather
15+ gallon containers: Every 2-3 days even in peak summer, weekly in cool spring weather
Fabric grow bags: Dry 20-30% faster than plastic due to air circulation through walls
The soil composition also matters dramatically. Standard potting mixes with lots of peat moss hold water longer but can become waterlogged. Well-draining mixes with perlite and bark chips need more frequent watering but reduce root rot risk.
Temperature's Impact on Water Needs
I track daily water consumption in my containers, and the correlation with temperature is dramatic. At 65°F (18°C), a mature plant in a 10-gallon (38-liter) container uses about 0.5 gallons (1.9 liters) daily. But at 85°F (29°C), that same plant drinks 1.5-2 gallons (5.7-7.6 liters).
Wind compounds the effect by increasing transpiration rates. On my exposed balcony, windy days require 25-40% more water than calm days at the same temperature.
Daily Water Requirements by Container Size
Let me break down exactly how much water your containers need based on size, plant maturity, and weather conditions. These numbers come from weighing my containers before and after watering for three growing seasons.
Small Containers (3-7 gallons/11-26 liters)
Seedling Stage (0-4 weeks after transplant):
Cool weather (60-70°F/16-21°C): 0.25-0.5 gallons (0.9-1.9 liters) every 2-3 days
Warm weather (70-80°F/21-27°C): 0.5-0.75 gallons (1.9-2.8 liters) daily
Hot weather (80°F+/27°C+): 0.75-1 gallon (2.8-3.8 liters) daily
Flowering Stage (4-8 weeks after transplant):
Cool weather: 0.5-0.75 gallons (1.9-2.8 liters) every 1-2 days
Warm weather: 0.75-1.25 gallons (2.8-4.7 liters) daily
Hot weather: 1-1.5 gallons (3.8-5.7 liters) daily, sometimes twice daily
Fruiting Stage (8+ weeks after transplant):
Cool weather: 0.75-1 gallon (2.8-3.8 liters) daily
Warm weather: 1-1.5 gallons (3.8-5.7 liters) daily
Hot weather: 1.5-2 gallons (5.7-7.6 liters) daily, split into morning and evening
Large Containers (10+ gallons/38+ liters)
Large containers are much more forgiving because they hold moisture longer and buffer against temperature swings.
All Growth Stages:
Cool weather (60-70°F/16-21°C): Water every 2-4 days, 1-2 gallons (3.8-7.6 liters) per watering
Warm weather (70-80°F/21-27°C): Water every 1-2 days, 1.5-2.5 gallons (5.7-9.5 liters) per watering
Hot weather (80°F+/27°C+): Daily watering, 2-3 gallons (7.6-11.4 liters) per session
The key advantage of large containers is consistency. While small containers swing from soaked to dry, large containers maintain more even moisture levels that prevent plant stress.
Seasonal Watering Schedules by Climate Zone
Your location dramatically affects watering frequency. I've grown tomatoes in three different climate zones, and each requires different approaches.
Northern Climates (USDA Zones 3-6)
Spring (May-June): Cool temperatures and frequent rain mean less watering. Check containers every 2-3 days, water only when top 2 inches (5 cm) feel dry.
Summer (July-August): Peak growing season with long days but moderate heat. Daily checking required, watering every 1-2 days for most containers.
Fall (September-October): Shortening days and cooling temperatures reduce water needs. Return to every 2-3 day checking, water less frequently but deeply.
Hot Climate Zones (USDA Zones 7-9)
Spring (March-May): Rapid temperature swings require daily monitoring. Start with every-other-day watering, increase frequency as temperatures rise.
Summer (June-September): Extreme heat demands daily watering, often twice daily for small containers. Early morning watering prevents midday stress.
Fall/Winter (October-February): Extended growing season in hot climates means continued watering needs, but reduce frequency to 2-3 times weekly.
Desert Climates (USDA Zones 9-11)
Desert container growing requires the most intensive watering schedules I've encountered.
Spring (February-April): Perfect growing weather but low humidity. Daily watering for most containers, every other day for very large ones.
Summer (May-September): Extreme challenge period. Small containers may need water twice daily. Shade cloth and mulching essential to reduce water loss.
Fall/Winter (October-January): Best growing season with manageable water needs. Every 1-2 days for most containers.
Testing Soil Moisture Like a Pro
Guessing moisture levels leads to watering problems. After killing my first batch of container tomatoes through inconsistent watering, I learned that testing soil moisture accurately is a skill worth mastering.
The Finger Test Method
This free method works well once you develop the touch. Insert your index finger straight down 2-3 inches (5-7.5 cm) into the soil, about 3-4 inches (7.5-10 cm) from the plant stem.
What you're feeling for:
Dry: Soil feels dusty and pulls away from your finger—water immediately
Slightly moist: Soil feels cool and holds together but doesn't stick to finger—wait 12-24 hours
Moist: Soil feels damp and sticks slightly to finger—don't water yet
Wet: Soil feels muddy and sticks heavily to finger—danger of overwatering
The finger test fails in very dense or very loose soil mixes. Dense soils can feel wet on top but be dry underneath, while loose mixes might feel dry when adequate moisture exists deeper down.
Using Moisture Meters Effectively
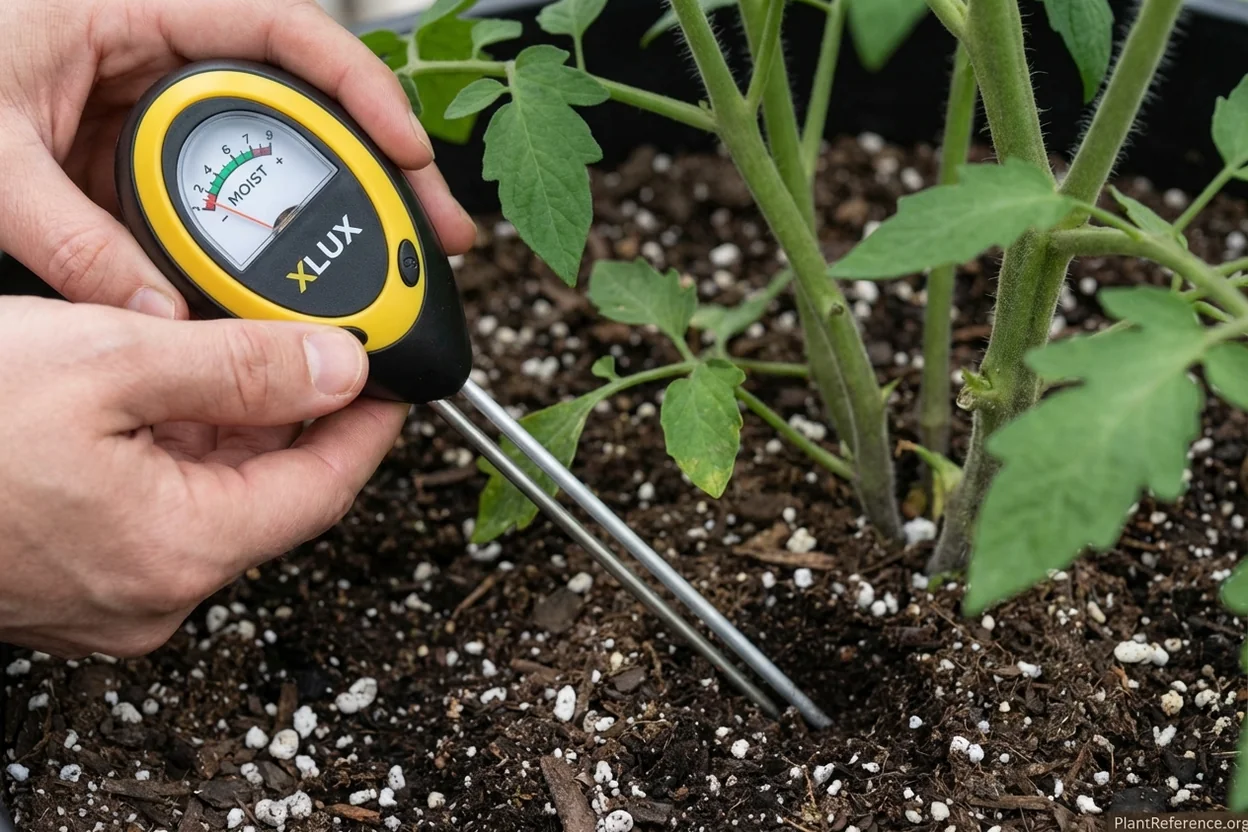
→ XLUX Soil Moisture Meter ($10-12) - Professional accuracy without batteries
Features 10-inch probe that reaches deep root zones for accurate moisture readings throughout container depth. No batteries required—simple push-and-read design provides instant feedback on soil conditions. Durable metal construction withstands repeated use in multiple containers. Color-coded dial clearly shows dry, moist, and wet zones to eliminate guesswork. Ideal for container tomatoes where consistent moisture prevents blossom end rot and ensures healthy growth patterns.
I insert the probe at three different depths: 2 inches (5 cm), 4 inches (10 cm), and 6 inches (15 cm) if the container is deep enough. Consistent readings across all depths mean even moisture distribution. Dry readings at 2 inches but moist at 6 inches indicate the need for slower, deeper watering.
Moisture meter scale interpretation:
Red zone (1-3): Dry—water immediately and check drainage if consistently low
Green zone (4-7): Ideal—maintain this range for healthy root growth
Blue zone (8-10): Too wet—improve drainage and reduce watering frequency
Weight Method for Small Containers
Lifting containers gives immediate feedback on water content. A dry 5-gallon (19-liter) container with a mature plant weighs 15-20 pounds (6.8-9.1 kg). After thorough watering, the same container weighs 35-45 pounds (15.9-20.4 kg).
I lift containers daily during peak season. When they feel significantly lighter than after watering, it's time to add water. This method works best for containers under 15 gallons (57 liters)—larger ones become too heavy to lift safely.
Preventing Overwatering and Underwatering
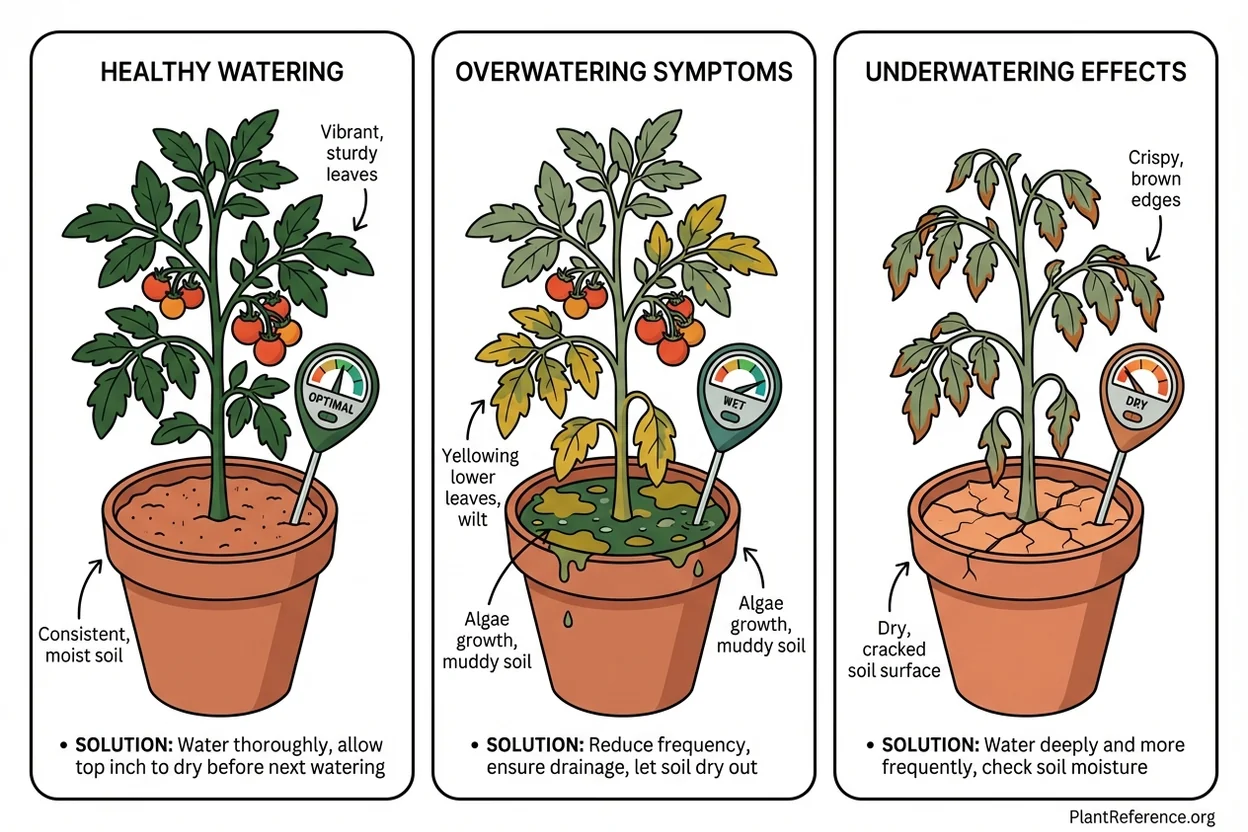
Both overwatering and underwatering cause similar symptoms—wilting, yellowing leaves, and poor fruit development. Learning to distinguish between them prevents costly mistakes that can kill plants or ruin harvests.
Overwatering Warning Signs
Overwatering is the more dangerous condition because it leads to root rot that can kill plants within days. Watch for these early indicators:
Visual symptoms:
Lower leaves turn yellow and drop off, starting with oldest leaves first
Stems near soil level develop dark, soft spots (early root rot)
New growth appears pale and weak despite adequate fertilizer
Soil surface develops green algae or white mold growth
Fruit develops blossom end rot despite adequate calcium
Soil and root symptoms:
Soil smells sour or musty when disturbed
Water puddles on soil surface after watering instead of absorbing
Roots appear dark brown or black instead of white or tan
Soil pulls away from container edges due to root rot and shrinkage
Underwatering Warning Signs
Underwatering stress develops more gradually but can permanently damage fruit quality and reduce yields. Recognition symptoms include:
Plant behavior:
Leaves wilt during hottest part of day but recover by evening
Leaf edges turn brown and crispy (different from blossom end rot)
Fruit develops thick skin and poor flavor due to stress
Plants stop growing taller and producing new leaves
Flowers drop without setting fruit due to water stress
Soil indicators:
Soil pulls away from container walls, creating gaps
Top 3-4 inches (7.5-10 cm) of soil feels dusty and dry
Water runs straight through container without absorbing (hydrophobic soil)
Mulch on soil surface appears completely dried out
The Overwatering-Underwatering Cycle
Many container gardeners get trapped in a destructive cycle: they underwater, then panic and overwater, which damages roots and makes the plant unable to absorb water efficiently, leading back to underwatering symptoms.
Breaking this cycle requires consistent moisture levels rather than dramatic swings. I use these strategies:
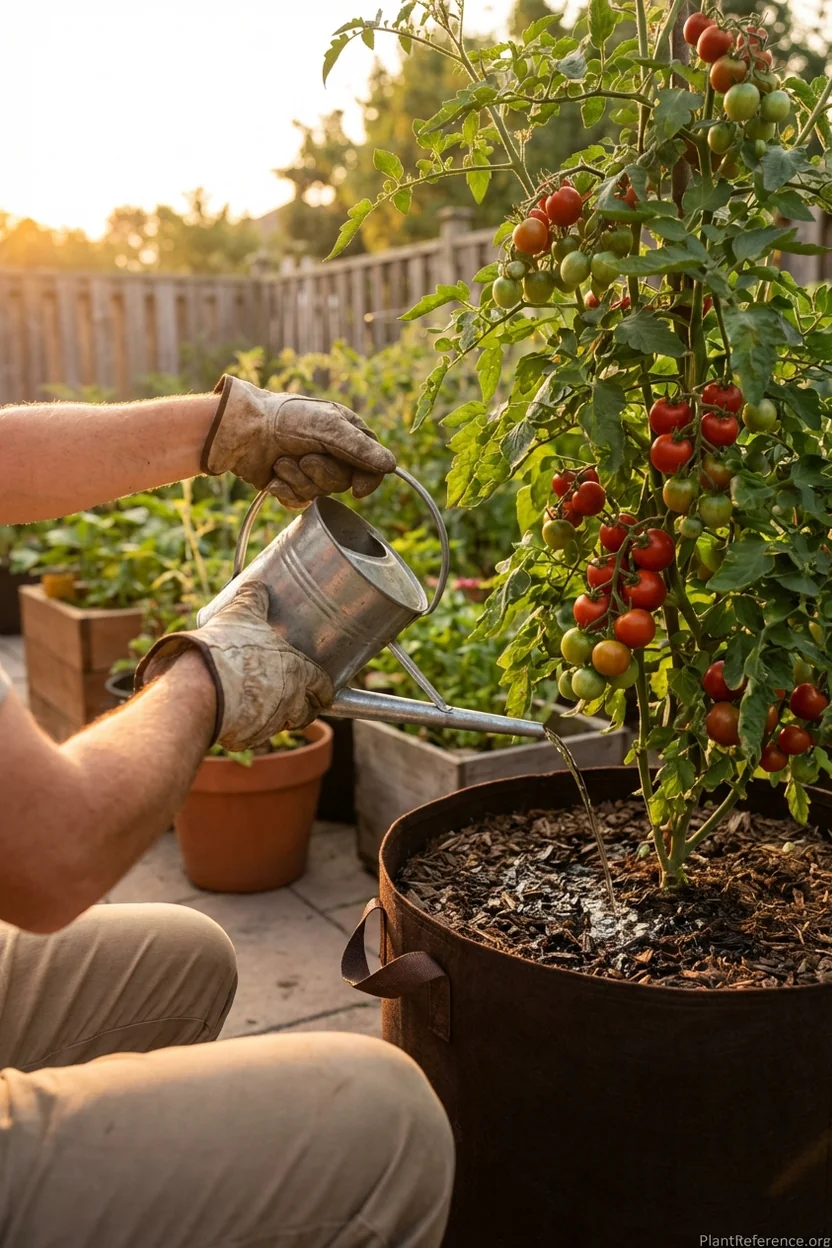
Water the same amount at the same time daily during peak season
Use mulch to slow evaporation and maintain even soil moisture
Install self-watering systems for containers over 10 gallons (38 liters)
Check moisture levels daily but water based on need, not schedule
Self-Watering Systems and Automation
After hand-watering containers for two seasons, I invested in automation systems that eliminated my biggest headaches: vacation plant care and daily watering consistency. The initial cost pays for itself in reduced plant losses and better yields.
Self-Watering Container Options
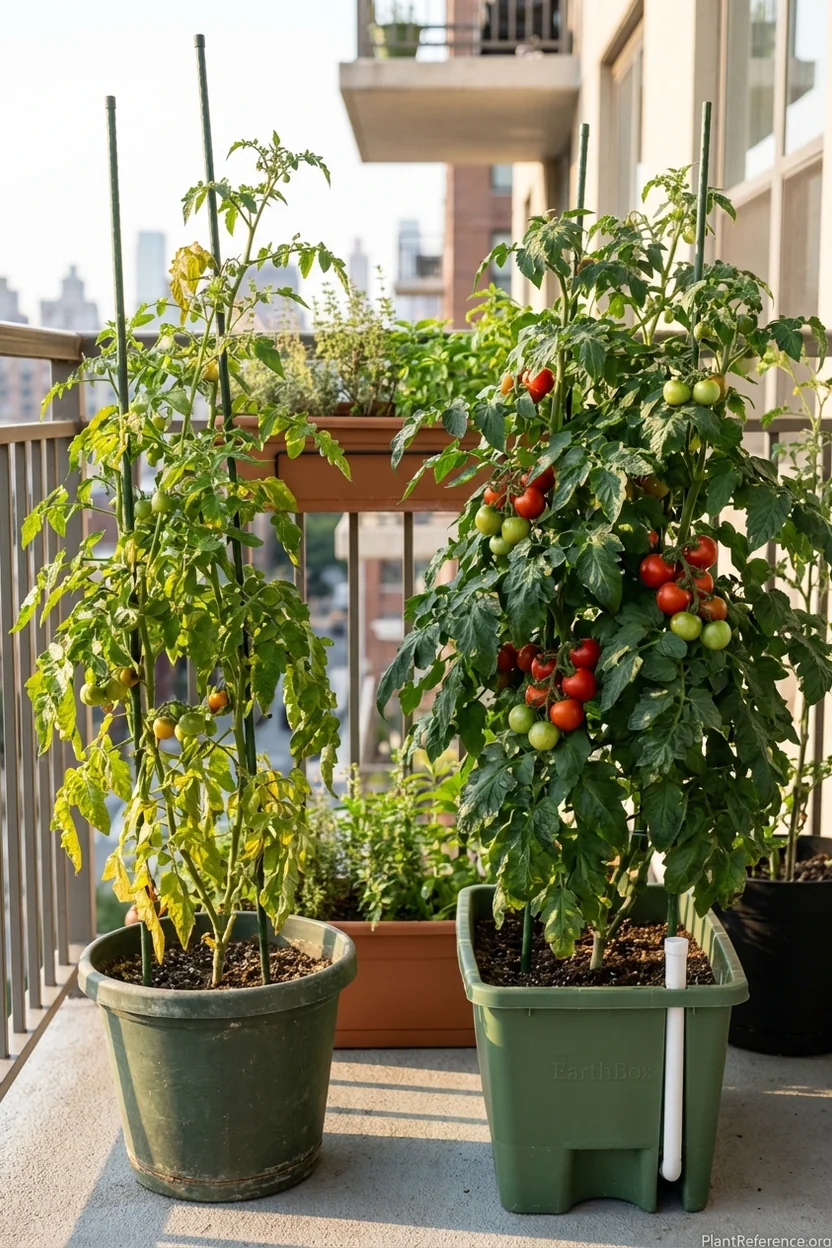
→ EarthBox Original Garden Kit ($59-89) - Proven sub-irrigation system
Features patented sub-irrigation system with 3-gallon water reservoir that provides consistent moisture without overwatering risks. Built-in overflow drain prevents root rot while fertilizer strip delivers nutrients automatically throughout growing season. Includes mulch cover that conserves water and blocks weeds. Perfect for beginners who struggle with watering schedules, as plants draw water as needed. Proven system used by commercial growers and adapted for home gardens with excellent results.
Self-watering containers work through capillary action—water moves up from a reservoir into the growing medium as plants use it. This creates consistent moisture levels that prevent the wet-dry cycles causing most container problems.
Benefits I've observed:
40-60% reduction in daily watering time during peak season
Dramatic decrease in blossom end rot due to consistent moisture
Plants can survive 5-7 days without attention during cool weather
Better root development due to even moisture distribution
Reduced fertilizer leaching compared to traditional containers
Drip Irrigation for Multiple Containers
→ DripWorks Container Watering Kit ($45-65) - Professional-grade automation
Complete drip system waters up to 20 containers automatically with adjustable flow rates for each plant. Includes pressure compensating emitters that deliver consistent water volume regardless of elevation differences. Timer controls watering duration and frequency, allowing vacation automation. Quick-connect fittings make installation simple without tools. Connects to standard garden hose with built-in filter to prevent clogging. Reduces water waste by 30-50% compared to hand watering while improving plant health through consistent moisture delivery.
Product link unavailable
For multiple containers, drip irrigation provides precise water delivery to each plant. I run separate lines to containers of different sizes, adjusting flow rates based on plant water needs.
System components:
Main supply line connects to garden hose with timer control
Individual drip lines run to each container with adjustable emitters
Pressure compensating emitters deliver consistent flow regardless of container height
Stakes hold emitters in place at soil level for efficient water delivery
Timer allows 15-minute to 2-hour watering sessions 1-4 times daily
DIY Self-Watering Conversion
You can convert existing containers into self-watering systems using materials from hardware stores. I've converted six containers this way, saving $200+ compared to buying commercial self-watering planters.
Materials needed (per container):
Food-grade 5-gallon bucket with tight-fitting lid
2-3 feet of PVC pipe (1-2 inches diameter) for water refill tube
Cotton string or fabric strips for wicking material
Drill with various bit sizes for drainage and refill holes
Landscape fabric to separate soil from water reservoir
The system works by creating a water reservoir in the bottom 4-6 inches (10-15 cm) of the container, with fabric wicks drawing water up into the soil zone. An overflow hole prevents waterlogging during heavy rains.
Troubleshooting Common Watering Problems
Even with good systems, watering problems develop. Here are the issues I encounter most frequently and my proven solutions:
Problem: Blossom End Rot Despite Regular Watering
This frustrated me for an entire season until I learned that inconsistent moisture prevents calcium uptake, causing blossom end rot even when total water amounts are adequate.
Solutions:
Switch to daily watering instead of heavy watering every few days
Add calcium chloride spray (1 tablespoon per gallon) directly to leaves weekly
Mulch soil surface with 2-3 inches (5-7.5 cm) of organic matter to slow evaporation
Install self-watering system or drip irrigation for automatic consistency
Problem: Water Runs Straight Through Container
This happens when potting soil becomes hydrophobic from completely drying out. The soil repels water instead of absorbing it, creating fake drainage.
Solutions:
Add 2-3 drops of liquid dish soap to watering can to break surface tension
Water very slowly in small amounts, allowing 5-10 minutes between applications
Bottom-water by setting container in tray of water for 30-60 minutes
Replace top 2 inches (5 cm) of soil with fresh potting mix if severely hydrophobic
Problem: Algae Growth on Soil Surface
Green algae on soil surfaces indicates overwatering combined with poor air circulation. While not directly harmful to plants, it signals conditions that promote root rot.
Solutions:
Reduce watering frequency and improve drainage with perlite amendment
Add 1-2 inch (2.5-5 cm) layer of mulch to block light from soil surface
Increase air circulation around containers with fans or better spacing
Remove affected top soil layer and replace with fresh, well-draining mix
Problem: Containers Dry Out During Weekend Trips
Two-day trips can devastate container tomatoes during peak summer heat. I learned this the hard way when I returned to find $200 worth of plants severely stressed.
Solutions:
Group containers together to create humid microclimate that slows water loss
Move containers to shadier location temporarily to reduce transpiration
Set up temporary drip irrigation using inverted plastic bottles with holes
Install automatic timer watering systems before peak season travel
Building Your Weekly Watering Routine
Successful container watering requires consistent routines that become second nature. Here's the system I use to manage 12 containers with minimal time investment:
Daily 5-Minute Check (Peak Season)
Every morning during summer months (June-September), I spend exactly 5 minutes checking all containers:
Minutes 1-2: Visual assessment
Look for wilting, yellowing, or drooping that indicates water stress
Check soil surface for cracking, pulling away from container edges
Note any new flower clusters or fruit development that increases water needs
Minutes 3-4: Moisture testing
Test 2-3 representative containers with finger or moisture meter
Lift small containers to gauge weight compared to post-watering weight
Check self-watering reservoir levels and refill as needed
Minute 5: Watering decisions
Water containers that tested dry at 2-inch (5 cm) depth
Note containers that will need water by evening for split watering schedule
Adjust automatic timers if weather forecast changes significantly
Weekly Deep Assessment
Every Sunday, I spend 15-20 minutes on thorough container evaluation:
Drainage check: Pour water slowly onto soil surface and time how long it takes to start draining from bottom holes. Good drainage shows water within 1-2 minutes. Slow drainage indicates compacted soil or clogged holes.
Root inspection: For containers showing poor growth, I tip them carefully to examine roots at drainage holes. White or tan roots indicate health, while black or mushy roots suggest overwatering problems.
System maintenance: Clean drip irrigation emitters, refill self-watering reservoirs completely, and replace any damaged equipment.
Seasonal Routine Adjustments
Spring setup (April-May):
Test and repair irrigation systems after winter storage
Adjust timer schedules for increasing temperatures and longer days
Begin daily monitoring as temperatures consistently exceed 70°F (21°C)
Summer maintenance (June-August):
Daily moisture checks become critical for plant survival
Split watering into morning and evening sessions for small containers
Monitor weather forecasts to adjust schedules for heat waves or rain
Fall transition (September-October):
Gradually reduce watering frequency as temperatures cool
Return to every-other-day checking schedule
Prepare irrigation systems for winter storage in freezing climates
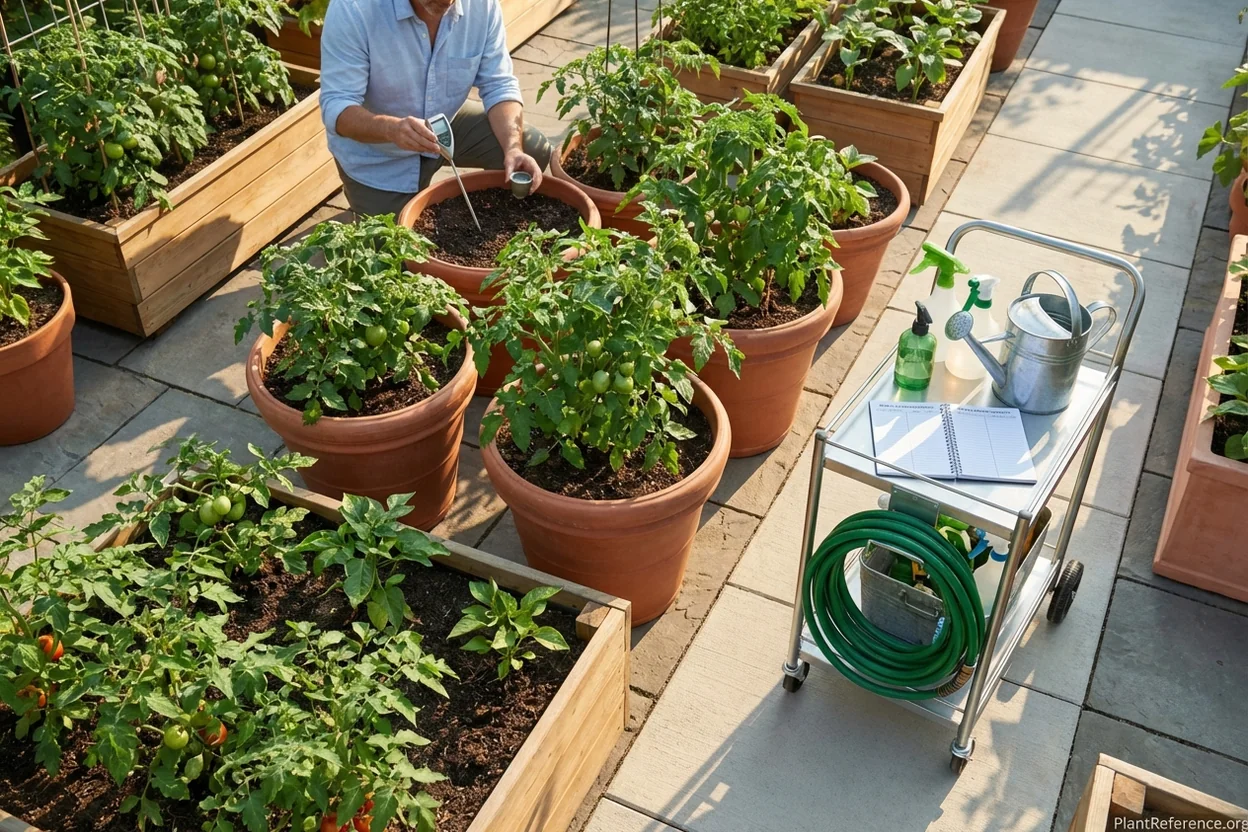
The key to long-term success isn't perfect watering—it's consistent watering that your plants can depend on. Start with daily checks during your first growing season to learn your containers' specific needs, then build systems that maintain consistency even during busy periods or vacations.
Remember that watering container tomatoes successfully is a skill that improves with practice. Each season teaches you more about your specific containers, climate, and plants' needs. Don't get discouraged by early mistakes—even experienced gardeners lose plants to watering problems occasionally.
The reward for mastering container watering is amazing: healthy plants producing 15-25 pounds (6.8-11.3 kg) of tomatoes per plant, season-long harvests, and the satisfaction of growing food in limited spaces. Once you establish good watering routines, container tomatoes become much easier to manage than traditional gardens.
Frequently Asked Questions
Reading about plants and recognising them are different skills. These three build the second.
- Daily PlantIdentify the day’s mystery plant from a close-up photograph.
- Keyed OutWork a dichotomous key, lead by lead, to name a hidden specimen.
- Name That PlantName a specimen from botanical clues dealt hardest first.
Free to play, no account needed
Linda's been growing tomatoes in containers on her suburban Pittsburgh balcony—ever since her kids grew up and she finally had time for hobbies again. She's a medical billing specialist by day and a tomato enthusiast by night and weekend. Linda started documenting her container growing experiments on a simple blog and discovered other renters and condo dwellers were desperate for practical advice. She tests different varieties every season, tracking yields, disease resistance, and flavor in a detailed spreadsheet. Linda's approach is practical and budget-conscious—she saves seeds, reuses containers, and makes her own fertilizer from kitchen scraps. Her specialty is maximizing production in small spaces, and she's perfected the art of growing full-size tomatoes in 5-gallon buckets. She's a Pennsylvania Master Gardener and teaches container growing workshops at her local library.