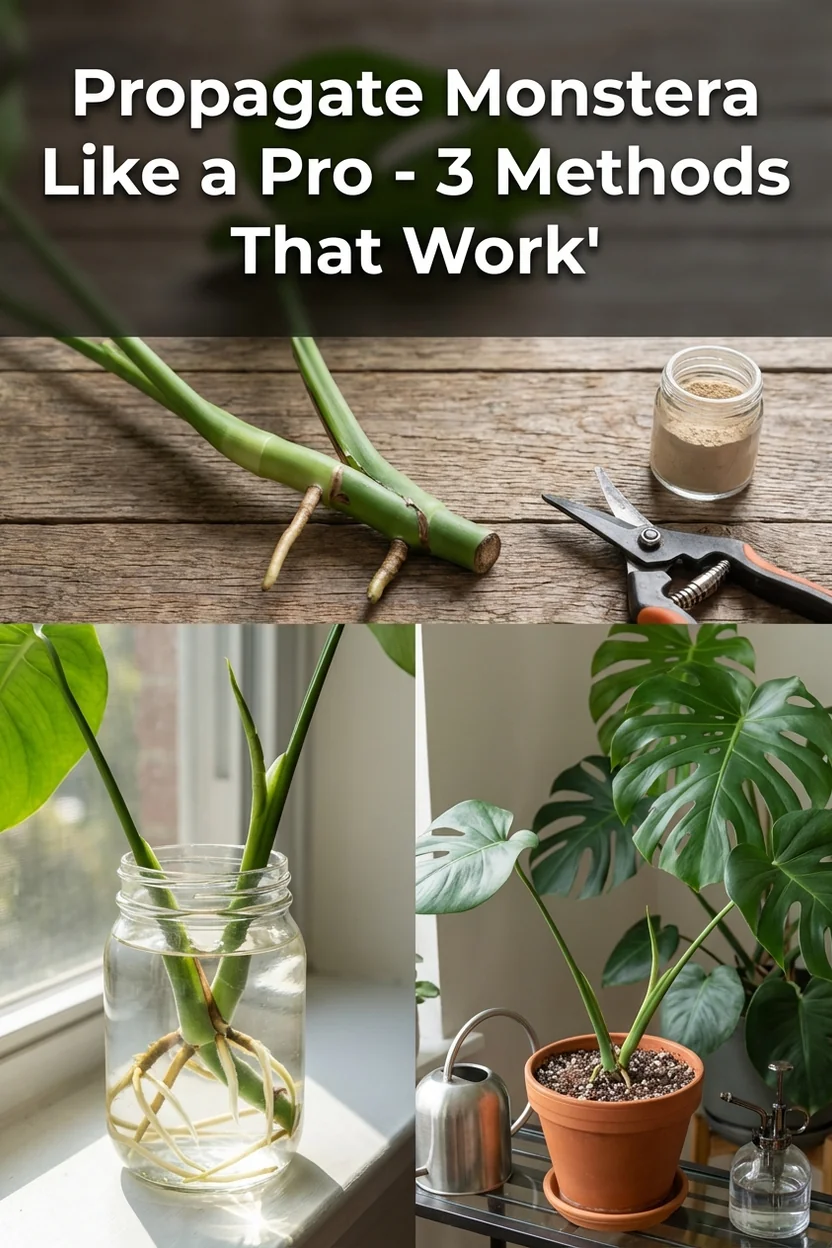
Monstera Propagation: 3 Methods That Actually Work
Pets & Toxicity
Recorded toxicity for plants linked in this guide. An unknown status is not a safety assessment.
Toxic to pets: Swiss cheese plantDetailsHide
Monstera deliciosa — Toxicity Warning
Toxic to pets and humans. All vegetative parts contain calcium oxalate crystals that cause mouth pain, swelling, and drooling if ingested. Unripe fruit also contains calcium oxalate and is toxic; only fully ripened fruit (after 12+ months) is edible.View Monstera deliciosa plant profile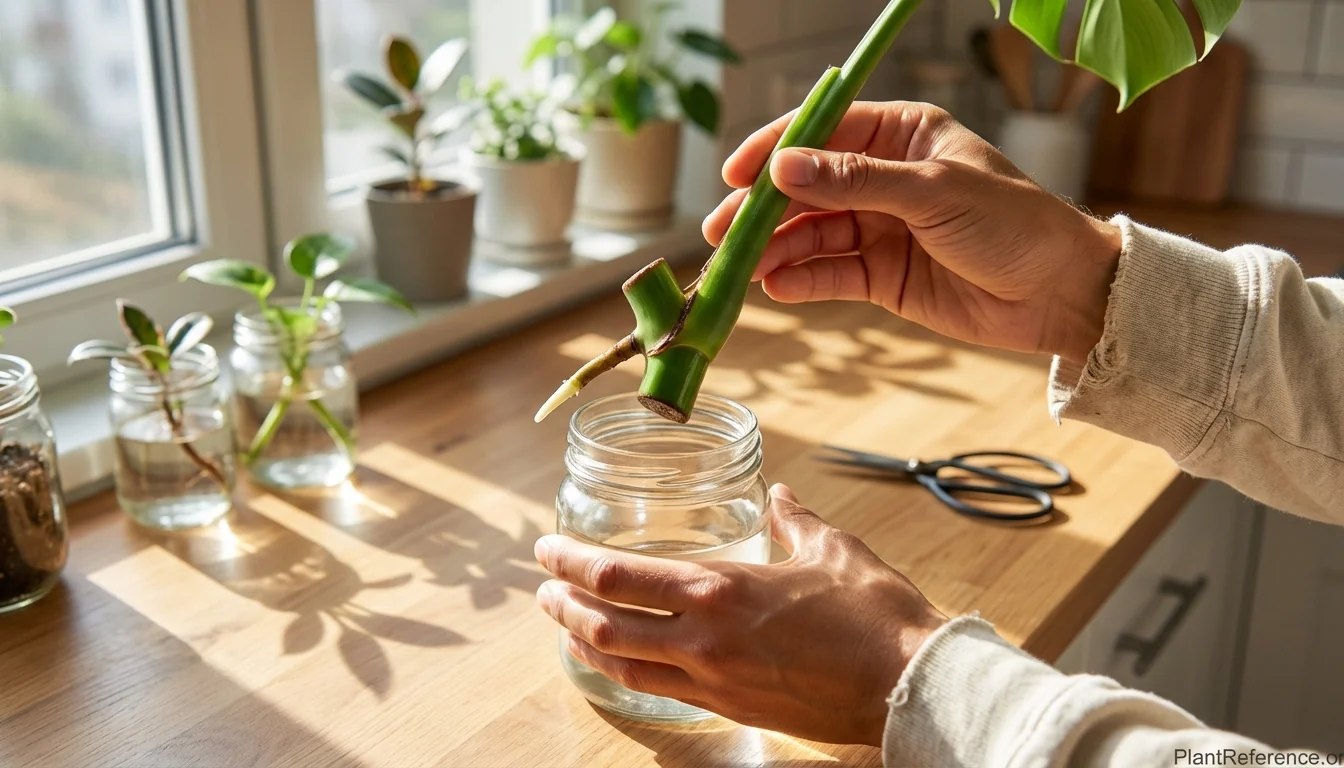
— Image © Plant Reference 2026
Learning how to propagate monstera can seem intimidating, but these tropical climbing plants are actually among the easiest houseplants to multiply. With over 48 species in the Monstera genus, Monstera deliciosa responds exceptionally well to propagation when you understand the plant's biology.
Understanding Monstera Nodes: The Key to Successful Propagation
Successful monstera propagation hinges on understanding nodes—the specialized stem structures where leaves, aerial roots, and new growth emerge. The Swiss cheese plant 🌿Monstera deliciosa (mon-STER-ah de-lis-ee-OH-sah) produces nodes every 4-6 inches (10-15 cm) along mature stems, making it incredibly propagation-friendly.
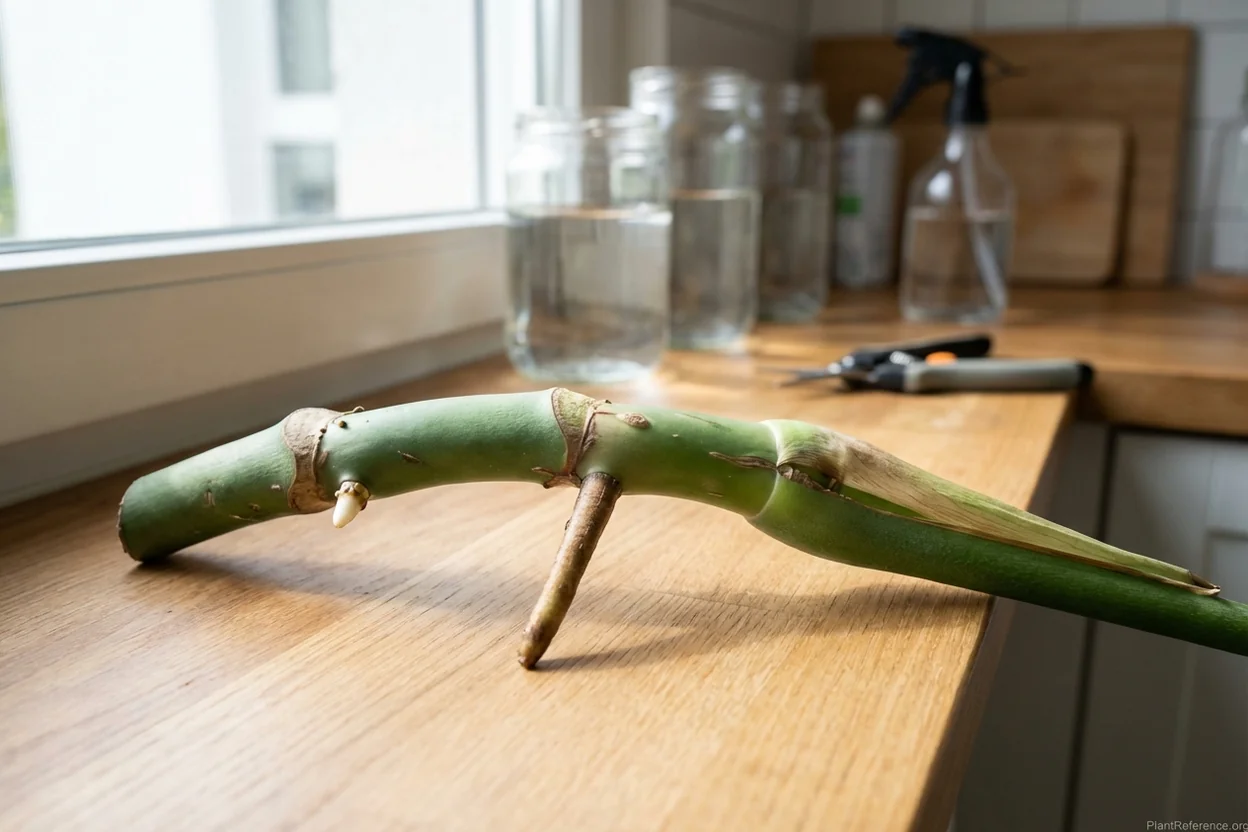
Each node contains meristematic tissue—undifferentiated cells capable of developing into roots, shoots, or leaves. This is why a single node cutting can develop into a complete plant. Nodes appear as slight swellings or bumps on the stem, often with visible aerial root nubs or brown protective sheaths called cataphylls.
Anatomy of a Monstera Node
Understanding node anatomy helps you identify the best propagation sites. Each node contains:
Axillary bud: Develops into new shoots and leaves
Aerial root primordia: Becomes functional roots
Cambium layer: Produces new vascular tissue
Cataphyll: Protective brown sheath (may be present or shed)
The most successful propagation occurs at nodes showing aerial root development. These roots contain specialized cells that rapidly transition from atmospheric moisture absorption to soil nutrient uptake—a process called root plasticity that makes monstera exceptionally adaptable.
Method 1: Stem Cuttings (Water vs Soil Propagation)
Stem cuttings offer the most straightforward propagation method, with success rates reaching 85-95% when performed correctly. This method works because monstera nodes contain everything necessary for independent plant survival.
Water Propagation Method
Water propagation allows you to observe root development and provides the highest success rate for beginners. The transparent environment lets you monitor progress and quickly identify any problems.
Materials Needed:
Clean, sharp pruning shears
Glass jar or propagation vessel
Filtered or distilled water
Rooting hormone (optional but recommended)
Node-bearing monstera cutting 6-8 inches (15-20 cm) long
Step-by-Step Water Propagation:
Select Your Cutting: Choose a healthy stem section with 2-3 nodes and at least one aerial root. The cutting should be 6-8 inches (15-20 cm) long with 2-3 leaves.
Make the Cut: Using sterilized pruning shears, cut approximately 1 inch (2.5 cm) below the lowest node. Make a clean, angled cut to maximize surface area for water uptake.
Prepare the Cutting: Remove the lowest leaf to prevent underwater decay. If using rooting hormone, dip the cut end according to package directions.
Water Setup: Fill a clear glass jar with filtered water, covering nodes but keeping leaves above waterline. Use filtered water to avoid chlorine stress—a common cause of propagation failure.
Environmental Conditions: Place in bright, indirect light away from direct sun. Maintain temperatures between 70-80°F (21-27°C) for optimal root development.
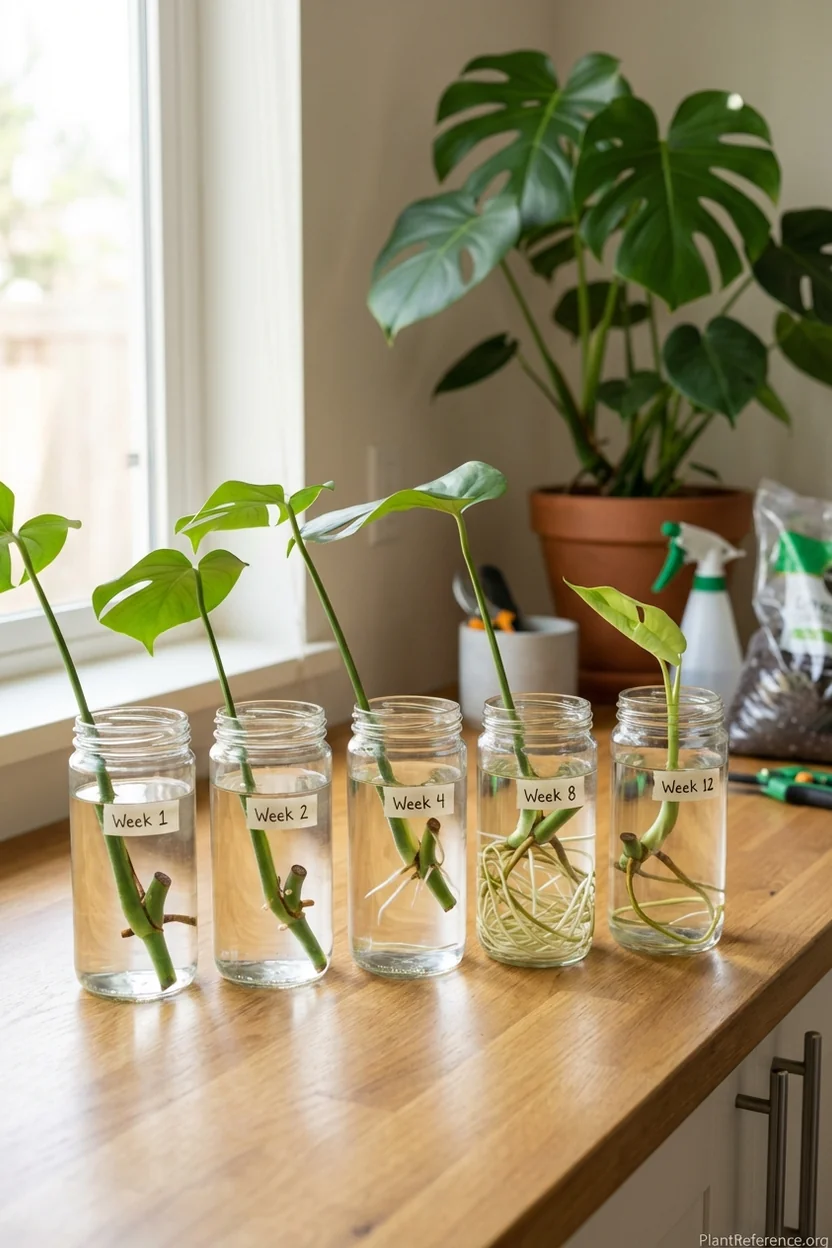
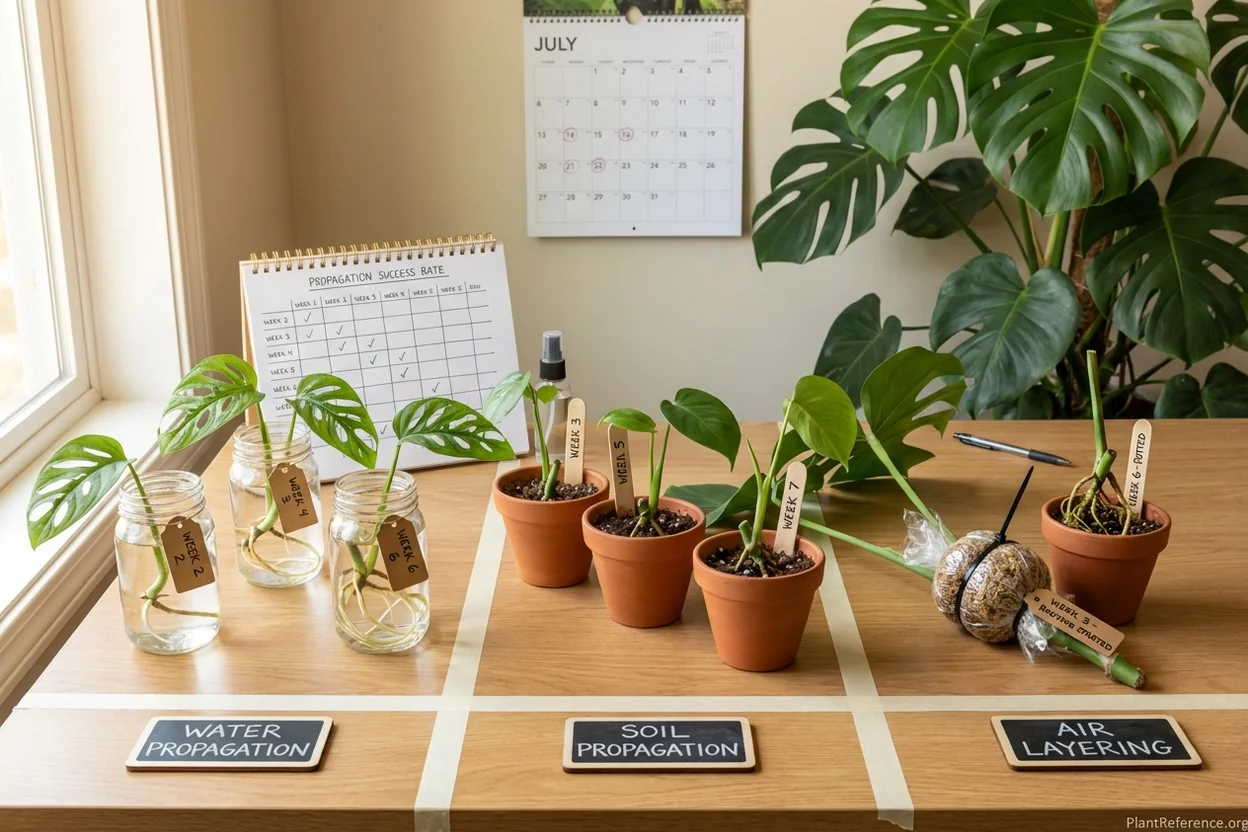
Timeline Expectations: Roots typically appear within 10-14 days, reaching transplant size (2-3 inches/5-8 cm) in 4-6 weeks. New leaf buds often emerge around week 3-4.
Soil Propagation Method
Direct soil propagation eliminates transplant shock but requires more attention to moisture levels. This method works well for gardeners comfortable with soil moisture management.
Soil Mix Requirements: Use a well-draining mix combining equal parts potting soil, perlite, and orchid bark. This provides the drainage monstera roots require while maintaining adequate moisture retention.
Step-by-Step Soil Propagation:
Cutting Preparation: Follow the same cutting selection and preparation as water propagation.
Soil Setup: Fill a 4-6 inch (10-15 cm) pot with propagation mix. Create a planting hole 2-3 inches (5-8 cm) deep.
Planting: Insert the cutting with nodes buried but leaves above soil level. Firm soil gently around the cutting without compacting.
Humidity Management: Cover with a clear plastic bag or humidity dome, maintaining 70-80% humidity. Ventilate daily to prevent fungal issues.
Watering Protocol: Keep soil consistently moist but not waterlogged. Water when the top inch (2.5 cm) feels dry.
Success Indicators: New growth typically appears in 3-4 weeks, with established root systems developing in 6-8 weeks.
→ Rooting Hormone Gel ($8-12) - Accelerates root development and increases success rates
Professional-grade auxin-based gel promotes rapid root development in woody and herbaceous cuttings. Easy application with built-in fungicide protection prevents cutting rot. Contains optimal IBA concentration for monstera propagation success. Works faster than powder formulations due to better plant uptake. Sterile formulation reduces contamination risk during propagation process.
Product link unavailable
Method 2: Air Layering for Guaranteed Success
Air layering provides the highest success rate (95%+) because the cutting remains attached to the mother plant while developing roots. This method works exceptionally well for valuable or difficult-to-propagate monstera varieties.
Understanding Air Layering Biology
Air layering mimics natural monstera behavior in the wild, where aerial roots develop while stems remain connected to the parent plant. By encouraging root development before separation, you eliminate the stress period when cuttings must survive on stored energy alone.
When to Use Air Layering:
Propagating expensive or rare monstera varieties
Working with thick, woody stems that resist traditional cutting methods
Wanting guaranteed success with minimal risk
Creating multiple plants from a single long vine
Step-by-Step Air Layering Process
Materials Required:
Sphagnum moss (long-fiber preferred)
Clear plastic wrap
Garden twist ties or string
Sharp, clean knife
Spray bottle for misting
Rooting hormone (optional)
Air Layering Procedure:
Site Selection: Choose a healthy node with aerial roots, preferably 12-18 inches (30-45 cm) from the growing tip.
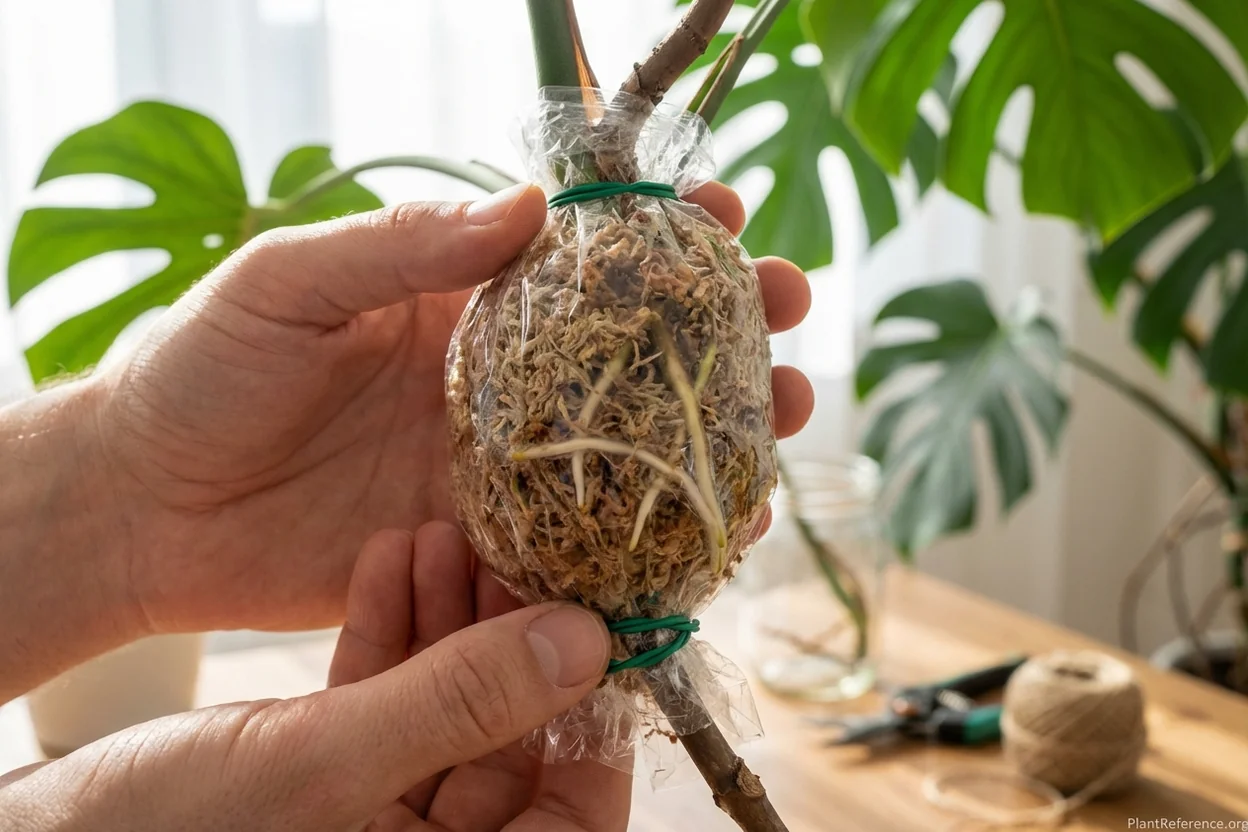
Wound Creation: Make a shallow, upward-angling cut halfway through the stem just below the selected node. Insert a small piece of sphagnum moss to keep the wound open.
Moss Preparation: Soak long-fiber sphagnum moss until thoroughly saturated but not dripping. Squeeze out excess water.
Wrapping Process: Surround the wounded area and node with 2-3 inches (5-8 cm) of damp moss. Wrap tightly with clear plastic wrap, securing both ends with twist ties.
Maintenance: Mist through ventilation holes weekly to maintain moisture. Root development typically begins within 2-3 weeks.
Timeline and Monitoring: Roots become visible through the plastic in 4-6 weeks. Once roots reach 2-3 inches (5-8 cm) long, cut below the root ball and pot normally.
Method 3: Division for Mature Plants
Division works best with mature monstera plants that have developed multiple growth points or have become root-bound. This method essentially separates naturally occurring divisions within the plant.
Identifying Division Candidates
Not all monstera plants are suitable for division. Look for these characteristics:
Multiple distinct growth points emerging from soil level
Well-established root system (typically 3+ years old)
Overcrowded pot with visible roots circling the container
Clear separation between growth sections
Best Timing: Perform division during active growing season (spring to early summer) when plants can quickly recover from the stress.
Division Process
Pre-Division Preparation:
Water Management: Stop watering 3-4 days before division to make soil removal easier and reduce root breakage.
Tool Sterilization: Clean all cutting tools with rubbing alcohol to prevent disease transmission.
Workspace Setup: Prepare a clean, well-lit area with newspaper or plastic sheeting to contain soil mess.
Step-by-Step Division:
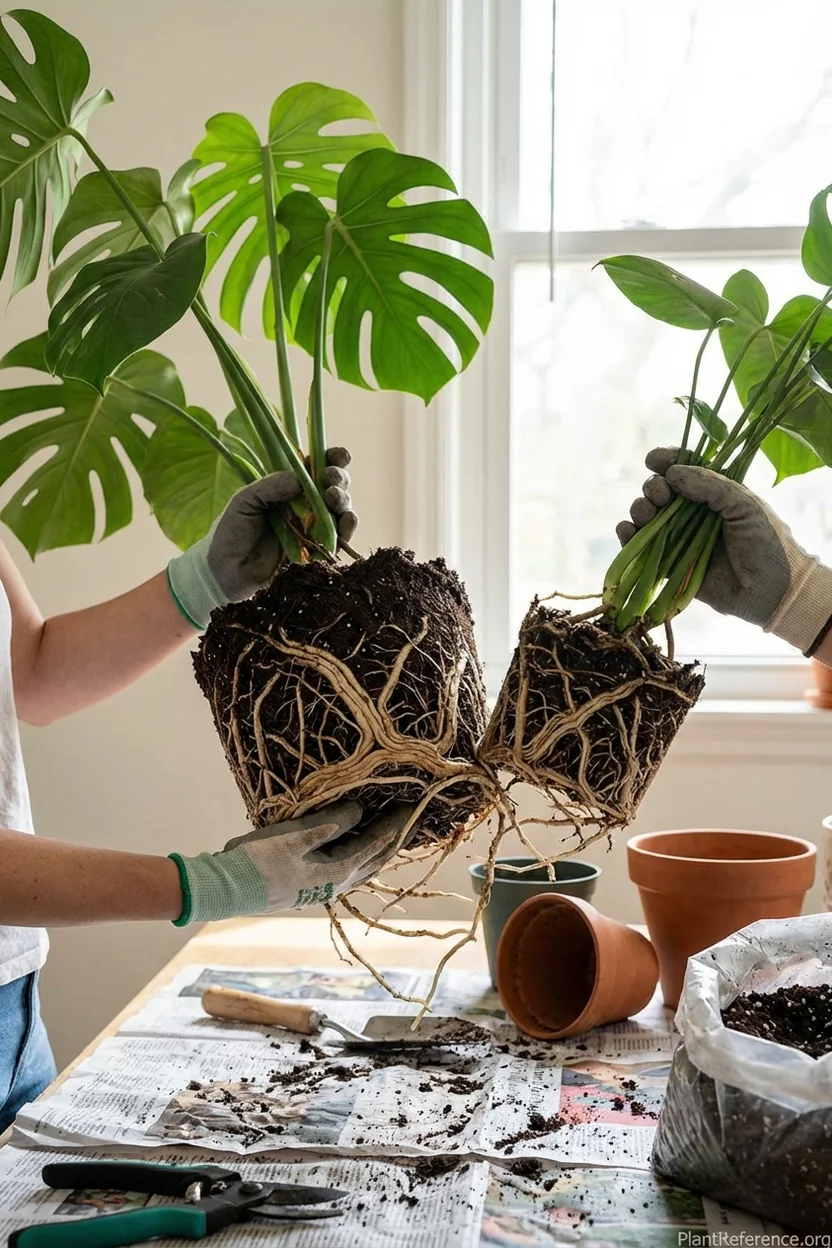
Plant Removal: Carefully remove the entire plant from its container, supporting the base to prevent stem damage.
Root Inspection: Gently shake or rinse away soil to expose the root system. Look for natural division points where root sections can be separated cleanly.
Division Cuts: Using a sharp, sterile knife, cut through root sections at natural division points. Each division needs both roots and growing shoots.
Wound Treatment: Dust cut surfaces with antifungal powder to prevent rot during establishment.
Individual Potting: Plant each division in appropriately sized containers (typically 2-3 inches/5-8 cm larger than root spread) using well-draining potting mix.
Post-Division Care: Maintain higher humidity (60-70%) and reduce watering frequency for 2-3 weeks while roots establish. New growth typically appears within 4-6 weeks, indicating successful establishment.
Node Identification Guide: Finding the Right Cutting Points
Proper node identification determines propagation success. Monstera nodes vary in development stage and propagation potential, making selection crucial for optimal results.
Node Development Stages
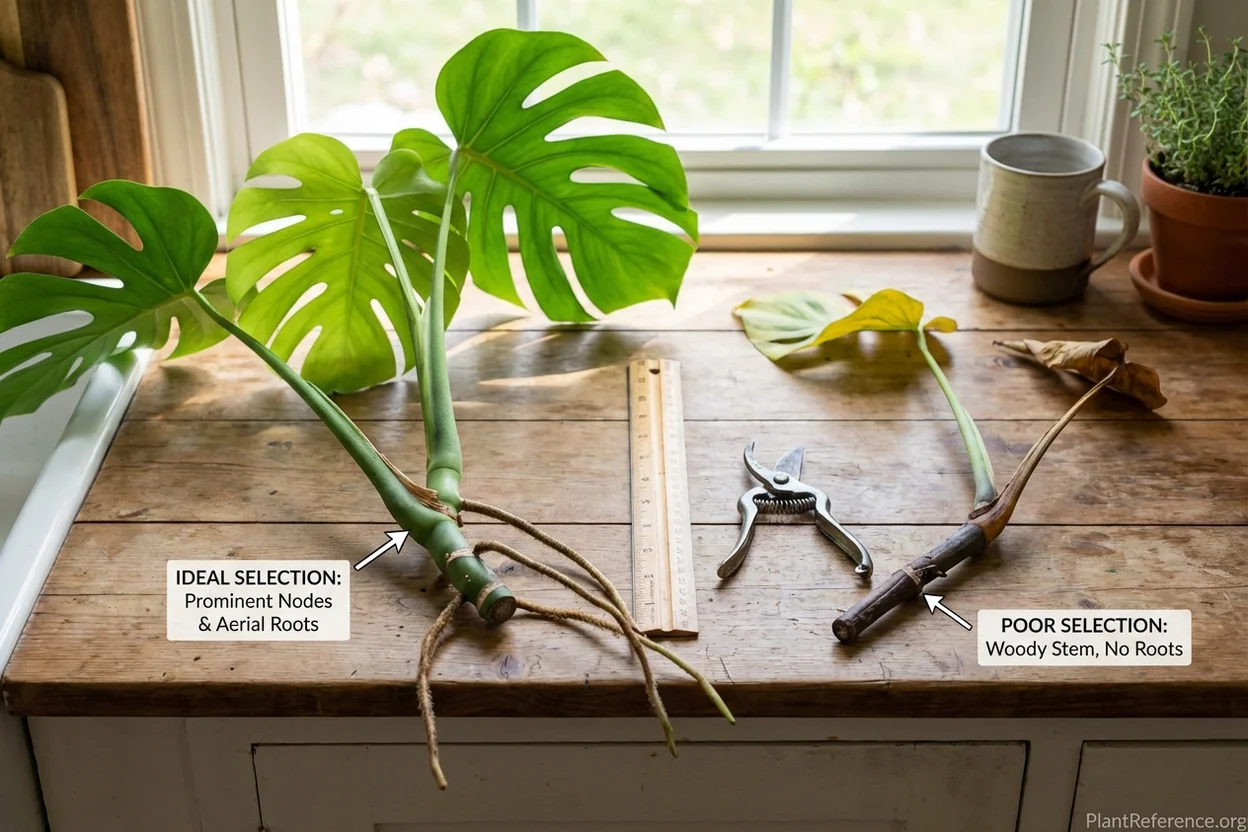
Juvenile Nodes: Found on younger stems, these nodes may lack visible aerial roots but contain active meristematic tissue. Success rate: 70-80%.
Mature Nodes: Display obvious aerial roots and prominent swelling. These provide the highest success rates: 90-95%.
Senescent Nodes: Older nodes on woody stems may have reduced vigor. Success rate: 60-70%.
Visual Identification Characteristics
Prime Propagation Nodes Display:
Visible aerial root development (white to brown colored)
Slight stem swelling or bump
Recent leaf attachment point nearby
Healthy, non-woody stem tissue
No signs of disease or pest damage
Avoid These Node Types:
Nodes on woody, brown stem sections
Areas with pest damage or fungal issues
Nodes without any aerial root development
Sections with yellowing or declining foliage nearby
Cutting Length Guidelines
Optimal cutting length balances energy reserves with manageable size. Include 2-3 nodes per cutting to provide redundancy—if one node fails, others may succeed.
Recommended Cutting Dimensions:
Length: 6-8 inches (15-20 cm)
Node count: 2-3 nodes minimum
Leaf count: 2-3 leaves (remove lower leaves if needed)
Aerial root presence: At least 1 visible aerial root
→ Professional Pruning Shears ($12-18) - Clean cuts prevent infection and improve success rates
Precision stainless steel blades create clean cuts that heal quickly and reduce infection risk. Non-stick coating prevents sap buildup during multiple cuts. Sharp needle-nose tips allow precise cuts around nodes without damaging surrounding tissue. Ergonomic design reduces hand fatigue during propagation sessions. Easy-clean construction maintains sterility between plants to prevent disease transmission.
Product link unavailable
Rooting Timeline and Success Rates by Method
Understanding realistic timelines and success rates helps set appropriate expectations and identify problems early. Success rates vary significantly based on method, timing, and environmental conditions.
Comparative Success Rates
Method Performance Analysis:
Method | Success Rate | Timeline to Roots | Timeline to New Growth | Difficulty Level |
|---|---|---|---|---|
Water Propagation | 85-90% | 10-14 days | 3-4 weeks | Beginner |
Soil Propagation | 75-85% | 2-3 weeks | 4-6 weeks | Intermediate |
Air Layering | 95%+ | 2-3 weeks | 6-8 weeks | Advanced |
Division | 80-90% | N/A (established) | 4-6 weeks | Intermediate |
Factors Affecting Success Rates
Environmental Conditions:
Temperature: 70-80°F (21-27°C) optimal; below 65°F (18°C) significantly slows rooting
Humidity: 60-70% ideal for all methods
Light: Bright, indirect light; avoid direct sun during rooting phase
Seasonal Timing Impact:
Spring (March-May): Highest success rates due to active growth hormones
Summer (June-August): Good success but requires more attention to humidity
Fall (September-November): Moderate success; slower root development
Winter (December-February): Lowest success rates; extend timelines by 50%
Plant Health Factors:
Mother plant nutrition status affects cutting vigor
Recent fertilization improves propagation success by 15-20%
Pest-free plants show significantly higher rooting rates
Common Propagation Problems and Solutions
Even with proper technique, propagation challenges can arise. Understanding common problems and their solutions prevents failure and improves overall success rates.
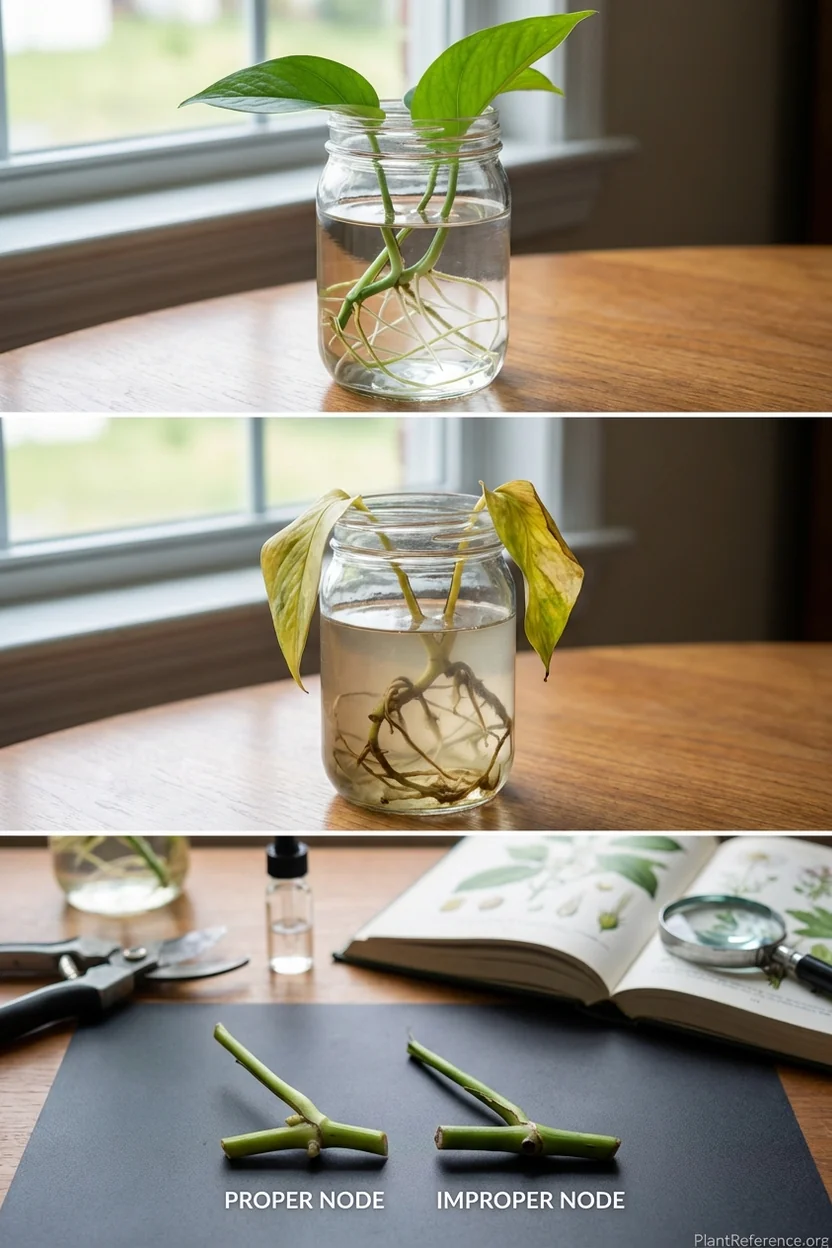
Root Rot During Water Propagation
Symptoms: Brown, mushy roots with foul odor; cutting becomes soft at base; leaves yellowing rapidly.
Causes: Stagnant water, bacterial infection, chlorinated water, or too-warm conditions.
Solutions: Change water every 2-3 days; use filtered water; add one drop of hydrogen peroxide per cup of water; maintain temperatures below 78°F (26°C).
Prevention: Use clean containers; change water regularly; avoid overcrowding multiple cuttings.
Slow or No Root Development
Symptoms: No visible roots after 3+ weeks; cutting remains unchanged; leaves may droop.
Causes: Insufficient warmth, poor node selection, wrong season, or lack of hormones.
Solutions: Increase temperature to 75-78°F (24-26°C); apply rooting hormone; ensure cutting includes nodes with aerial roots; wait until growing season.
Prevention: Select prime cuttings with visible nodes; propagate during active growing season; maintain optimal temperatures.
Cutting Decline After Transplant
Symptoms: Wilting, yellowing, or dropping leaves after moving from water to soil.
Causes: Transplant shock, overwatering, insufficient humidity, or dramatic environmental change.
Solutions: Maintain high humidity (70%+); reduce watering frequency; provide bright, indirect light; avoid fertilizing for 4-6 weeks.
Prevention: Gradual transition from water to soil; maintain consistent environmental conditions; wait for substantial root development before transplanting.
Fungal Issues in Soil Propagation
Symptoms: White fuzzy growth on soil surface; cutting base turning black; musty odor.
Causes: Overwatering, poor drainage, contaminated soil, or inadequate ventilation.
Solutions: Improve drainage with perlite; reduce watering frequency; apply antifungal treatment; increase air circulation.
Prevention: Use sterile propagation mix; avoid overwatering; provide adequate ventilation; sterilize tools between cuttings.
Aftercare: From Cutting to Established Plant
Successful propagation doesn't end with root development. Proper aftercare during the critical establishment period determines long-term plant health and growth.
Transplant Timeline and Process
When to Transplant: Water-propagated cuttings should have 2-3 inch (5-8 cm) roots before soil transplant. Rushing this step significantly increases failure rates.
Soil Selection: Use a well-draining mix appropriate for mature monstera plants. Combine equal parts:
Quality potting soil
Perlite or pumice for drainage
Orchid bark for aeration
Small amount of worm castings for nutrition
Container Sizing: Start with 4-6 inch (10-15 cm) containers for new transplants. Oversized pots retain too much moisture and can cause root rot.
Post-Transplant Care Protocol
Week 1-2: Critical Establishment
Maintain humidity 60-70% using humidity domes or pebble trays
Water only when top 1 inch (2.5 cm) of soil feels dry
Provide bright, indirect light; avoid direct sunlight
Monitor daily for signs of stress or decline
Week 3-6: Root System Development
Gradually reduce humidity as plant adapts
Begin normal watering routine based on soil moisture
Watch for new growth—first sign of successful establishment
Avoid fertilizing during this period to prevent root burn
Month 2+: Transition to Normal Care
Begin monthly fertilization with diluted liquid fertilizer
Consider providing climbing support for vertical growth
Gradually increase light exposure as plant strengthens
Begin normal
Monstera Deliciosa Care: Complete Guide routine
Growth Expectations and Milestones
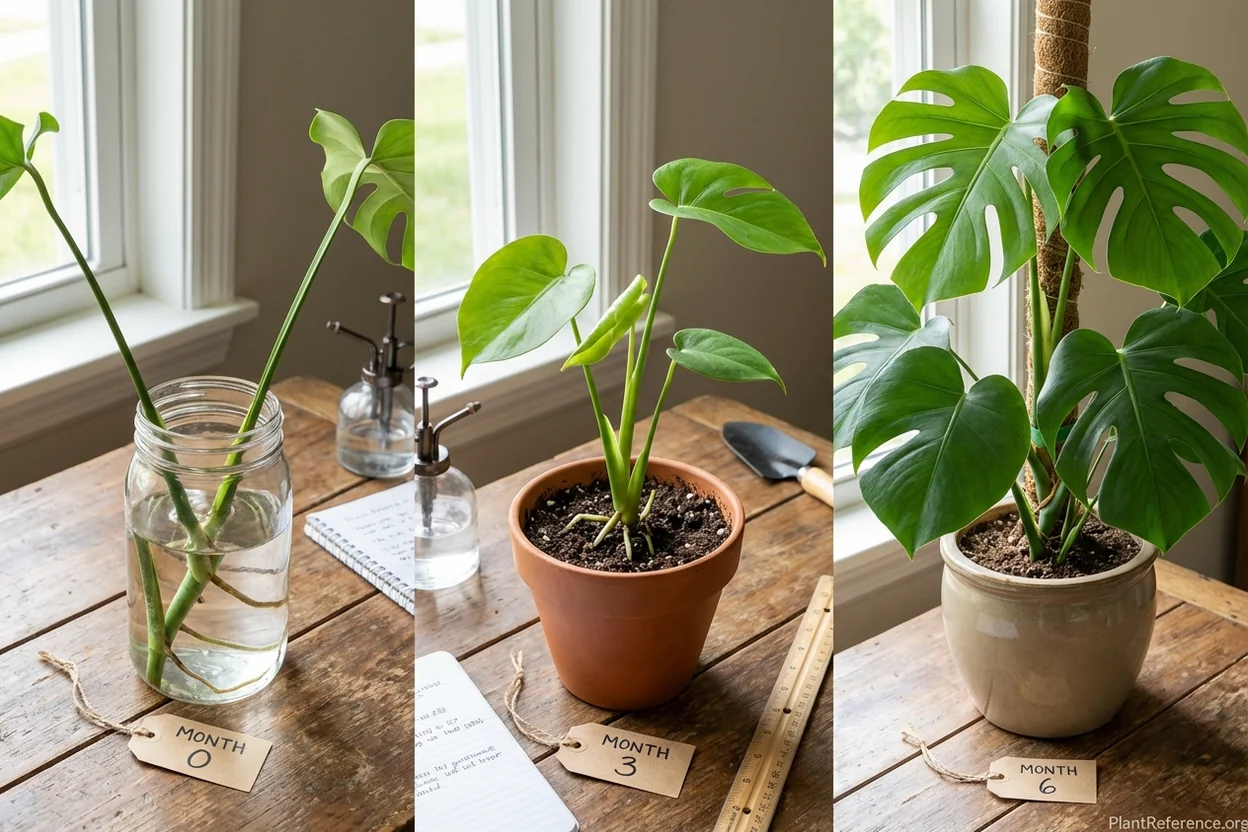
First 3 Months: Focus on root establishment and initial leaf production. Expect 1-2 new leaves during this period.
Months 3-6: More rapid growth with improved root system. New leaves may be larger but likely won't show fenestrations yet.
6-12 Months: Established growth pattern with regular new leaf production. Consider Best Moss Pole for Monstera: Support Systems Compared for climbing support.
Year 2+: Mature growth with potential fenestration development if provided adequate light and support.
→ Professional Humidity Dome ($15-25) - Maintains optimal humidity during critical establishment phase
Clear polycarbonate dome maintains 70-80% humidity during critical propagation period. Adjustable ventilation prevents fungal issues while maintaining optimal moisture. Fits standard seed trays and individual pots up to 6 inches. Durable construction withstands repeated use across multiple propagation cycles. Easy-clean design prevents disease transmission between propagation batches.
Product link unavailable
Understanding how to propagate monstera deliciosa opens up endless possibilities for expanding your collection and sharing plants with friends. Whether you choose the beginner-friendly water method, the reliable soil approach, or the guaranteed success of air layering, each technique offers unique advantages for different situations.
Remember that propagation success depends heavily on timing, technique, and aftercare. Spring propagation yields the highest success rates, proper node selection determines initial success, and consistent aftercare ensures long-term establishment. With patience and attention to detail, you'll soon have thriving new monstera plants ready to become statement pieces in your indoor jungle.
For continued success with your newly propagated plants, consider exploring Monstera Light Requirements: Finding the Perfect Spot and How to Water a Monstera: Complete Watering Guide to ensure optimal growing conditions as your plants mature.
Frequently Asked Questions
Reading about plants and recognising them are different skills. These three build the second.
- Daily PlantIdentify the day’s mystery plant from a close-up photograph.
- Keyed OutWork a dichotomous key, lead by lead, to name a hidden specimen.
- Name That PlantName a specimen from botanical clues dealt hardest first.
Free to play, no account needed
Jessica transformed her small Brooklyn balcony into a thriving container garden after moving to New York City. What started as a pandemic hobby turned into a plant care consulting business serving urban apartment dwellers across the city. She specializes in small-space gardening, indoor plant troubleshooting, and helping clients keep houseplants alive in less-than-ideal conditions (dim light, dry heat, tiny spaces). Jessica completed a home gardening certificate program and shares her plant wins and failures on her modest Instagram following. Her partner, Maya, jokes that their apartment is now 40% plants, 60% living space. Jessica's passionate about making plant care accessible to renters who think they don't have room to garden.