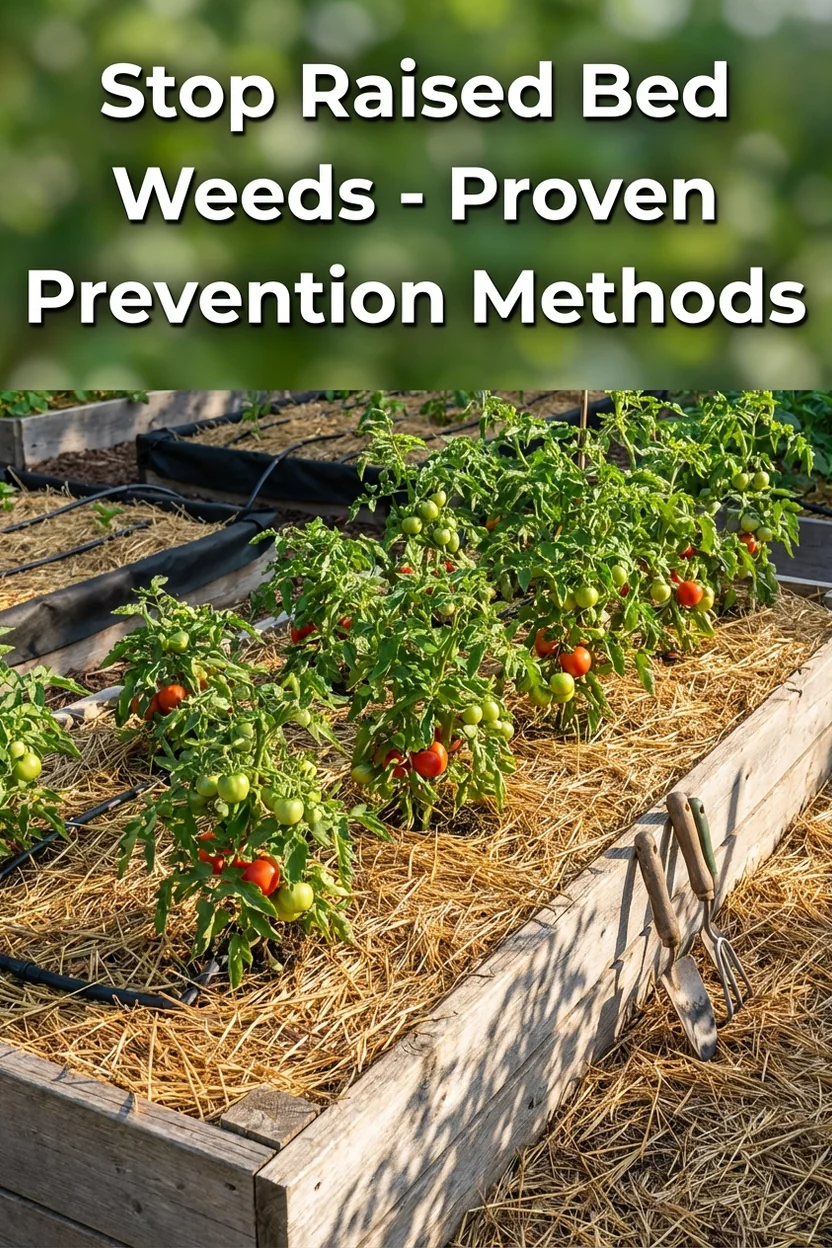
Raised Bed Weeds: Prevention Strategies and Control Methods
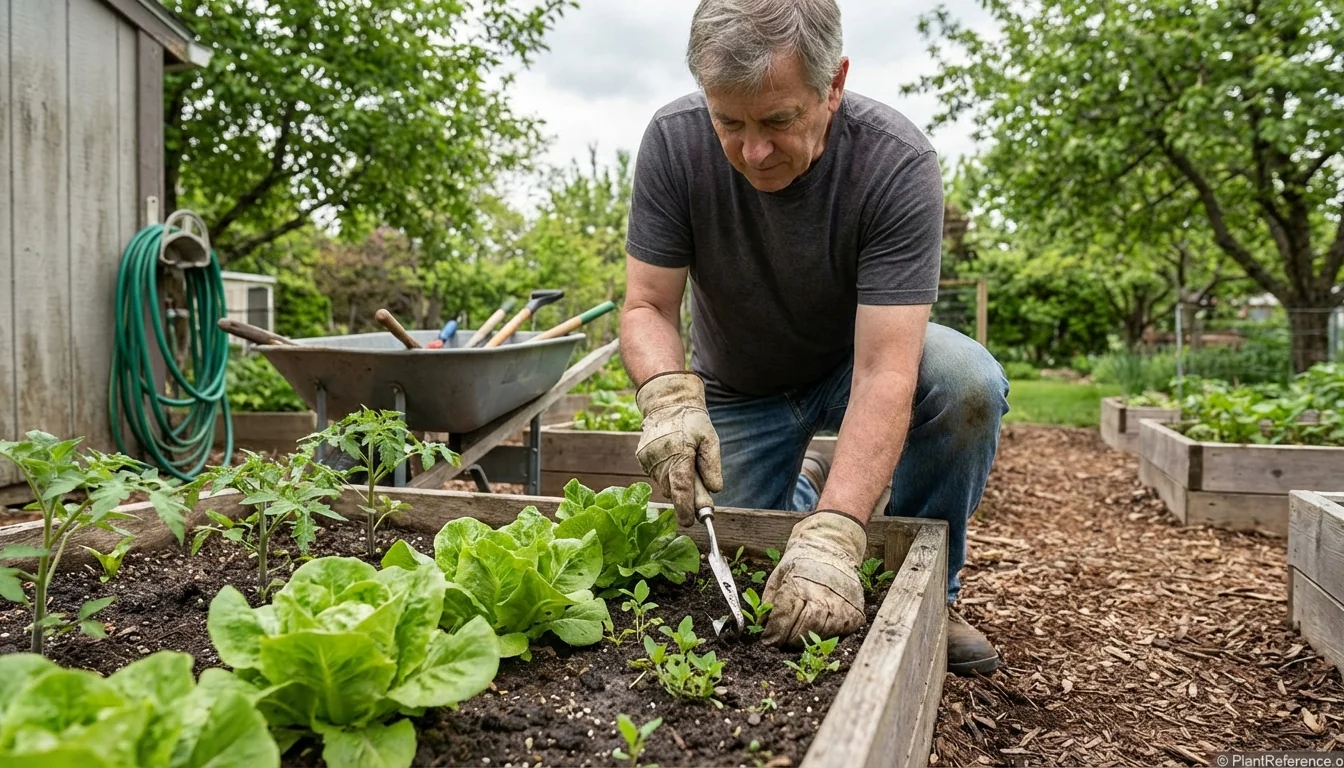
— Image © Plant Reference 2026
Thought raised beds meant no more weeds? I've been gardening for forty years, and I'll tell you straight—weeds find a way into every garden, raised or not. But here's the good news: weeds in raised beds are far easier to prevent and control than in traditional ground gardens, once you know the right methods.
The key is getting ahead of the problem before it starts. Most folks wait until they see weeds popping up, then spend hours every weekend pulling them. That's working harder, not smarter. With proper prevention and the right timing, you can cut your weeding time down to minutes instead of hours.
Why Raised Beds Still Get Weeds
Don't believe anyone who tells you raised beds are naturally weed-free. Weeds get into raised beds through three main routes, and understanding these helps you block them effectively.
Contaminated soil and compost bring in dormant weed seeds. Even quality potting soil can contain seeds that germinate when conditions are right. Cheap compost that wasn't properly heated during decomposition is especially problematic—I've seen beds overrun with weeds from one bad batch of compost.
Windblown seeds land in your beds constantly. Dandelion seeds can travel over 60 miles (96 km), and most common weeds spread this way. Your neighbor's neglected yard becomes your problem when the wind picks up.
Root invasion from surrounding areas happens with perennial weeds like bindweed, quack grass, and nutsedge. These aggressive spreaders send roots under and around your raised bed walls, popping up inside where conditions are perfect for growth.
The truth is, raised beds create ideal growing conditions—loose, fertile soil with good drainage and no foot traffic. Weeds love these conditions just as much as your vegetables do.
Weed Prevention Before Planting
The best time to prevent weeds is before you fill your raised bed with soil. This is your chance to create an effective barrier system that stops weeds for years, not months.
Ground preparation starts with killing existing vegetation completely. Don't just mow or cut—those roots are still alive. I spray the area with 30% white vinegar (acetic acid) on a sunny day. For tough perennial weeds, you might need two applications a week apart. Some folks use cardboard alone, but I've seen aggressive weeds punch right through after a few months.
Cardboard barriers work when done properly. Use thick corrugated cardboard, not thin shipping boxes. Overlap edges by 6 inches (15 cm) minimum—gaps become weed highways. Remove all tape and staples before laying down. Water the cardboard thoroughly after placing it, then add your soil immediately. Don't let it dry out and create air gaps.
The cardboard method has limitations. It biodegrades in 4-6 months, which is perfect for annual weeds but worthless against perennial roots that wait patiently underground. I use cardboard as part of a system, not the whole solution.
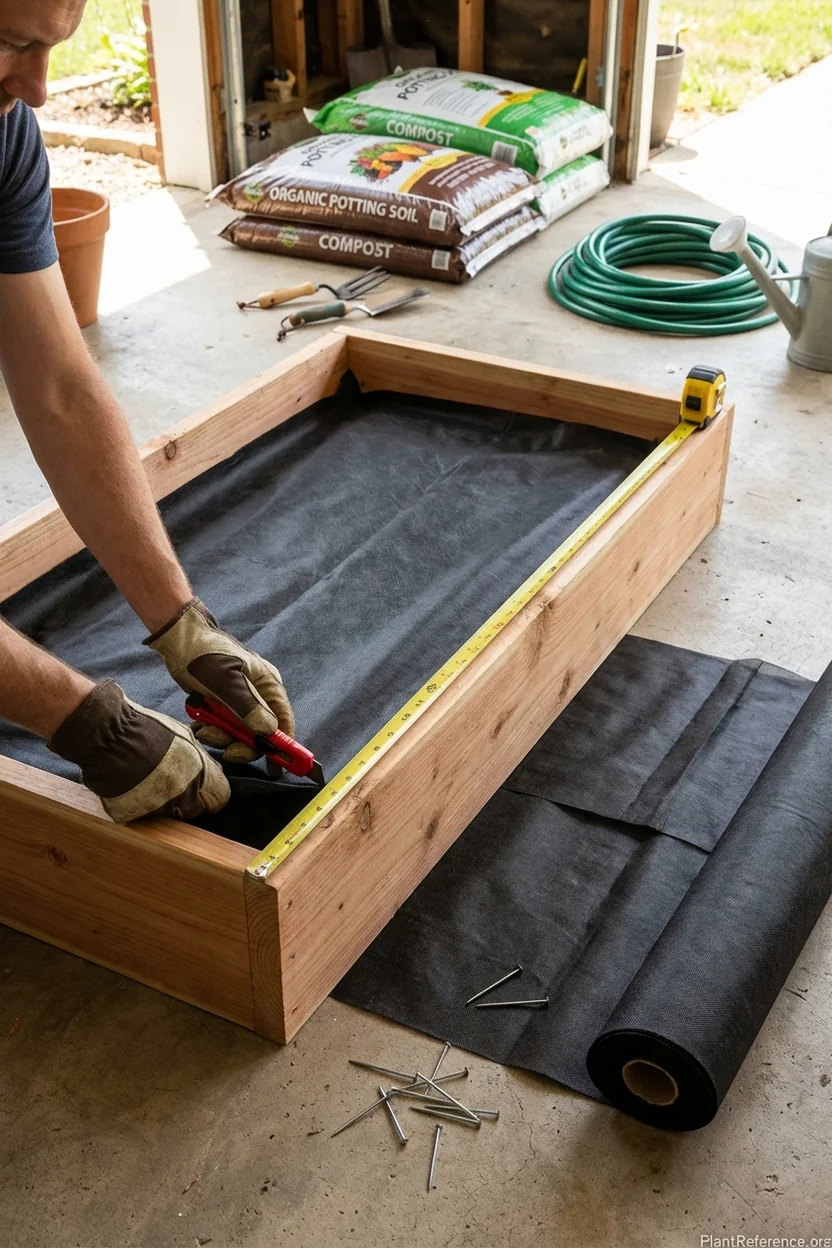
Landscape fabric installation requires doing it right the first time. Cheap landscape fabric tears and lets weeds through within a year. Buy commercial-grade woven fabric that water can penetrate but weeds cannot.
Measure your bed interior dimensions precisely
Cut fabric 2 inches (5 cm) smaller than interior to avoid overlap up walls
Secure with landscape pins every 18 inches (45 cm) along edges
Cut precise X-shaped slits for plants, not large holes
Overlap fabric pieces by 4 inches (10 cm) minimum
The fabric isn't perfect—organic matter eventually builds up on top, creating a planting medium for wind-blown seeds. But it gives you several seasons of protection while your prevention system establishes.
Barrier Methods That Actually Work
Physical barriers stop weeds before they germinate, but they need to match the weed type you're fighting. One barrier doesn't solve every problem.
Hardware cloth for root barriers stops the most aggressive perennial invaders. Install 1/4 inch (6 mm) hardware cloth vertically along the inside walls of your raised bed, extending 8-12 inches (20-30 cm) deep. This blocks quack grass, bindweed, and other runners that tunnel under bed walls.
For beds built on existing lawn, lay hardware cloth flat on the ground before adding soil. This creates an impenetrable barrier against grass roots growing upward. The mesh allows water drainage while blocking plant material.
Deep edging creates a permanent barrier around beds. Dig a trench 6-8 inches (15-20 cm) deep around the bed perimeter. Install metal or plastic edging that extends 2 inches (5 cm) above ground and 4-6 inches (10-15 cm) below. This stops grass runners and creates a clean definition between bed and pathway.
Newspaper barriers work for annual weeds in organic systems. Use 6-8 sheet thickness, overlap edges generously, and wet thoroughly before adding mulch. Newspaper biodegrades in one season—perfect for spring annual weed prevention. It's free, completely organic, and improves soil as it decomposes.
The key with any barrier is complete coverage. A 6-inch (15 cm) gap becomes a superhighway for weed invasion. Take time to do barriers right the first time, because fixing gaps later means digging through established plants.
Mulching Strategies for Long-Term Control
Mulch is your long-term defense against weeds in raised beds, but not all mulches work the same way. Choose the right material for your situation and apply it thick enough to actually prevent weeds.
Organic mulches that suppress weeds effectively include straw, shredded leaves, wood chips, and grass clippings. Each has specific applications and limitations you need to understand.
Straw (not hay, which contains seeds) creates an excellent weed barrier at 3-4 inches (7-10 cm) thick. It allows water penetration, moderates soil temperature, and decomposes slowly. Wheat straw works best—avoid rice straw in areas with rice blast disease concerns.
Shredded leaves provide dense coverage that prevents light penetration. Apply 2-3 inches (5-7 cm) thick after shredding—whole leaves mat down and block air circulation. Oak and maple leaves work well; avoid black walnut leaves which contain growth inhibitors.
Wood chips suppress weeds for 2-3 years but tie up nitrogen initially. Apply 2-3 inches (5-7 cm) thick in planting beds (up to 4 inches on paths) and add nitrogen fertilizer the first year. Hardwood chips last longer than pine, which breaks down quickly in humid climates.
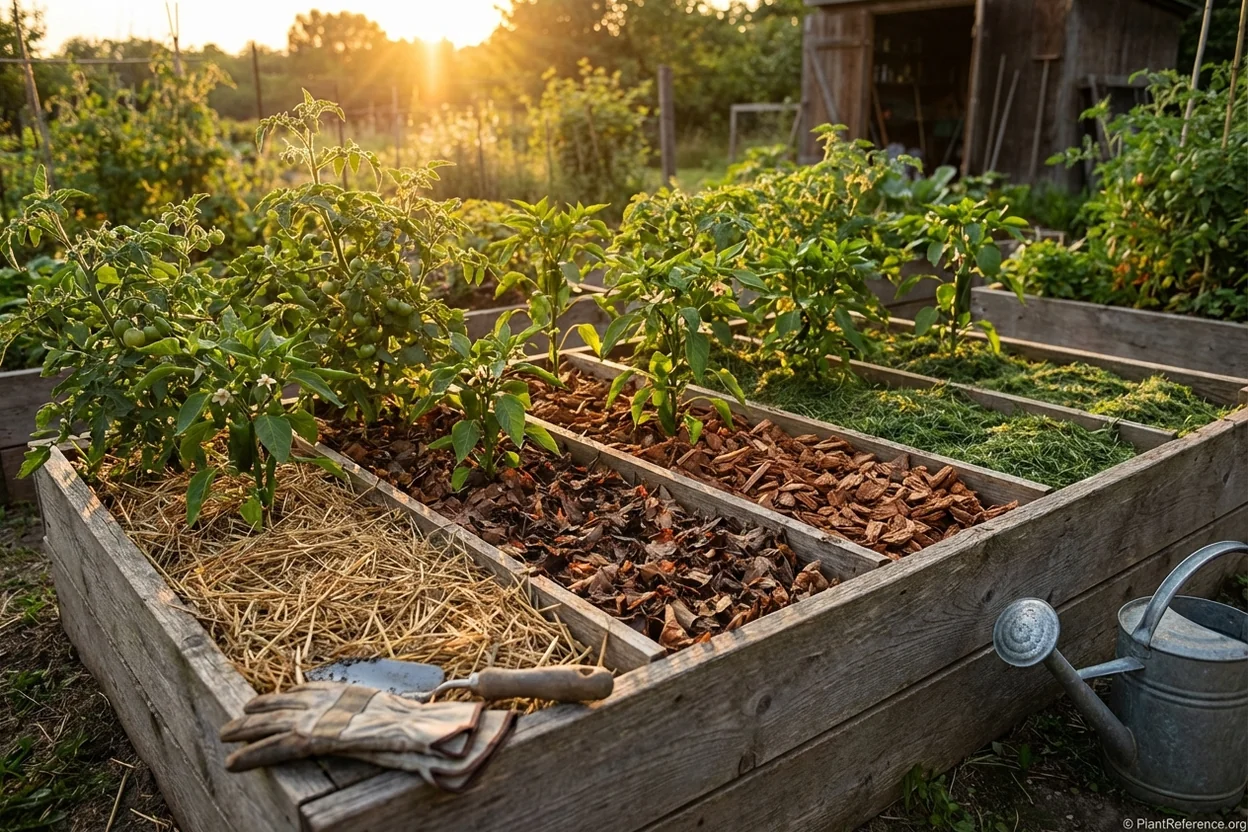
Application timing determines mulch effectiveness. Apply organic mulches after soil warms to 60°F (15°C) in spring. Earlier application keeps soil too cool for warm-season crops. For fall mulching, wait until after first hard frost to avoid creating rodent habitat.
Mulch depth must block light completely while allowing water penetration. Too thin, and weeds grow right through. Too thick, and water runs off instead of soaking in.
Fine materials (grass clippings, shredded leaves): 2-3 inches (5-7 cm)
Medium materials (straw, chopped hay): 3-4 inches (7-10 cm)
Coarse materials (wood chips, bark): 2-3 inches (5-7 cm) in planting beds, up to 4 inches (10 cm) on paths
Leave 2-3 inches (5-7 cm) clear around plant stems to prevent pest problems
Refresh organic mulches mid-season as they decompose. By July, spring mulch usually needs a fresh 1-2 inch (2-5 cm) top-off to maintain weed suppression through fall.
Hand-Weeding Techniques and Timing
Even with good prevention, some weeds will appear. Removing them effectively means understanding when and how to pull them for permanent results.
Timing makes all the difference in hand-weeding success. Pull weeds when soil is moist but not soggy—you want the soil to release roots cleanly. The day after watering or rainfall gives you ideal conditions. Dry soil breaks roots off, leaving pieces that regrow.
Small weeds pull easier than large ones, and they haven't established extensive root systems yet. Check beds weekly and remove any new seedlings immediately. A weed you can pull with two fingers today might need tools and serious effort in two weeks.
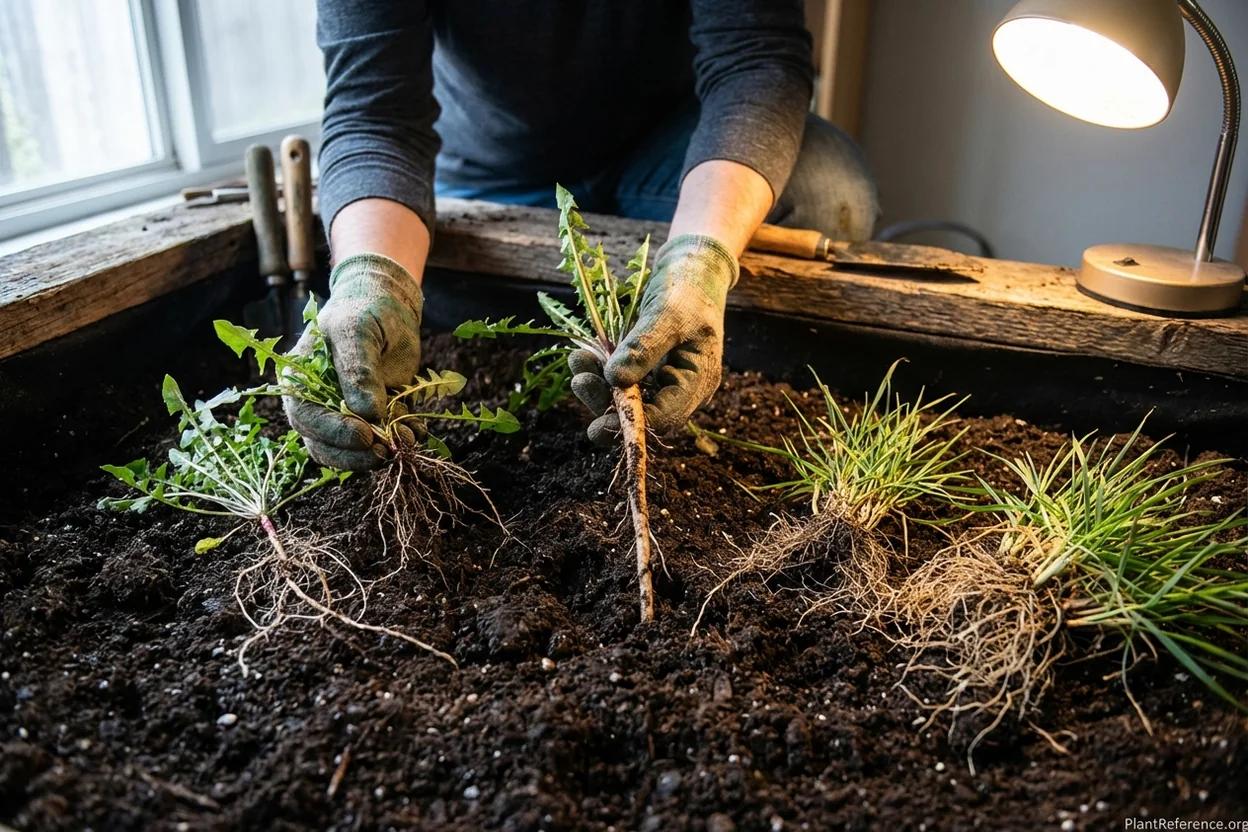
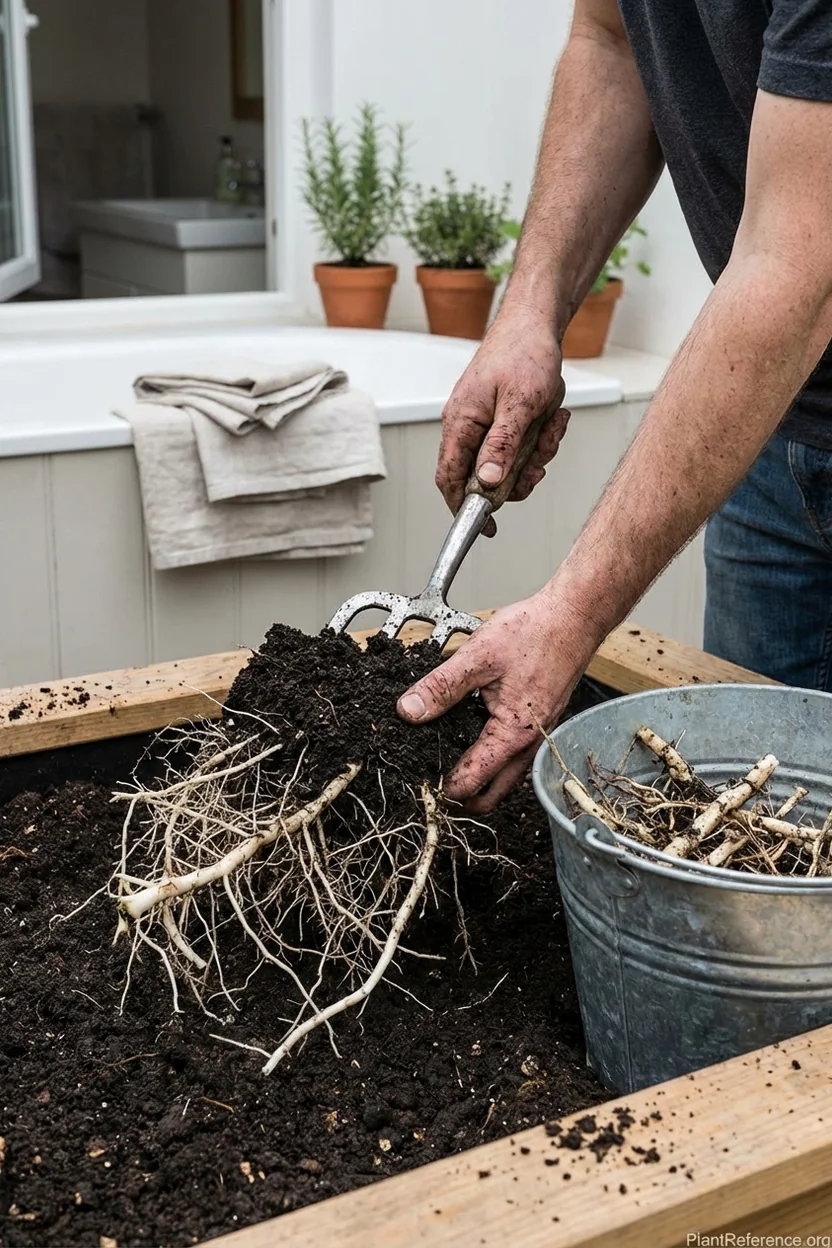
Root removal determines success more than anything else. Annual weeds like lambsquarters and pigweed need complete root removal to prevent regrowth. Perennial weeds like dandelions and dock need every piece of root removed—even small fragments can regenerate new plants.
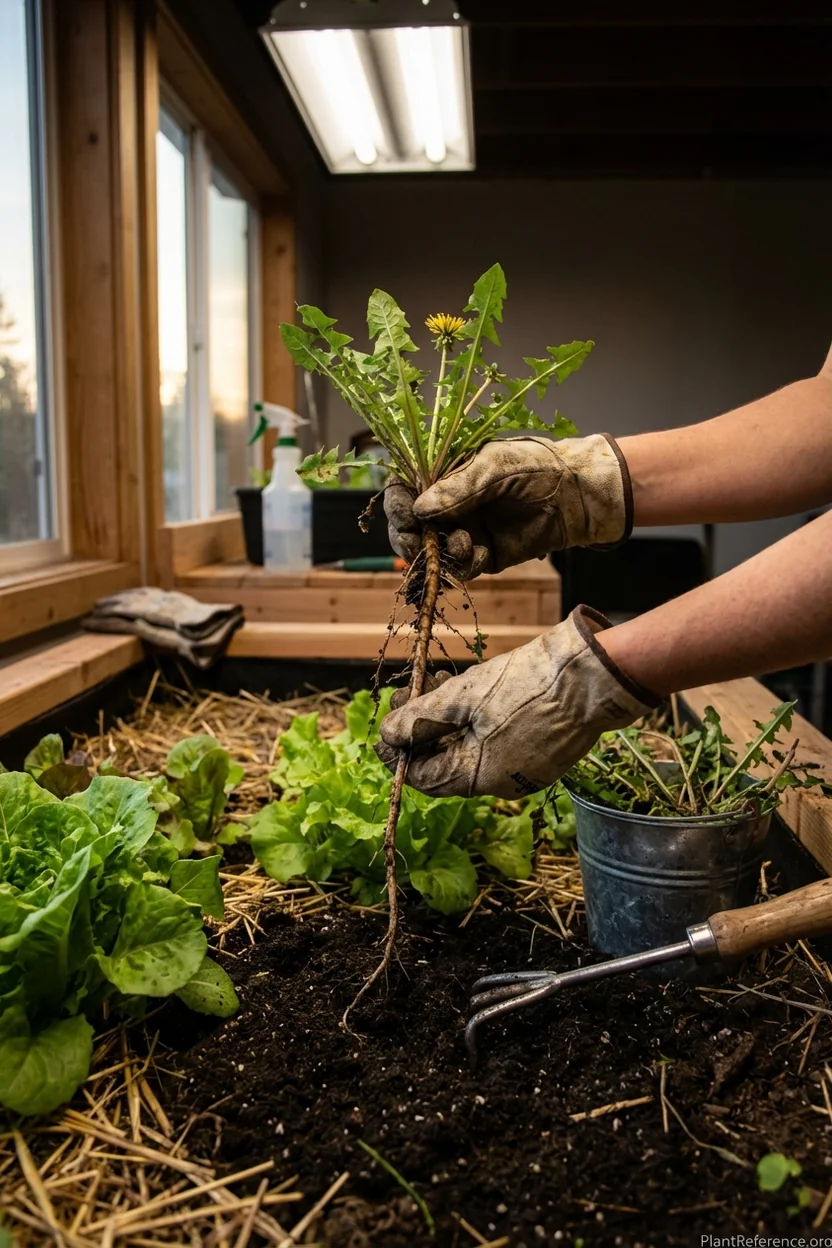
Proper pulling technique starts with loosening soil around the weed base with a hand weeder or old kitchen fork. Grasp the weed stem as close to soil level as possible, not up on the leaves. Pull straight up with steady pressure—jerking motions break stems and leave roots.
For taprooted weeds like dandelions, work the weeder 4-6 inches (10-15 cm) deep alongside the root, then angle under to lift the entire root system. These roots can extend 10 inches (25 cm) deep, so shallow pulling just encourages branching.
Tool selection improves efficiency and results. A long-handled dandelion weeder saves your back and provides better leverage. The forked end grabs roots while the blade cuts through soil. Hand weeders work for small areas, but invest in quality tools with comfortable grips for regular use.
Post-weeding care prevents immediate re-invasion. Fill holes left by large weeds with soil or compost to eliminate germination sites for new weed seeds. Apply fresh mulch to exposed areas immediately. Water pulled weeds out of the area completely—don't compost weeds with viable seeds or root pieces.
Organic Herbicide Options
Sometimes hand-pulling isn't practical, especially for large weed infestations or physical limitations. Organic herbicides provide targeted control without synthetic chemicals, but they require proper application and realistic expectations.
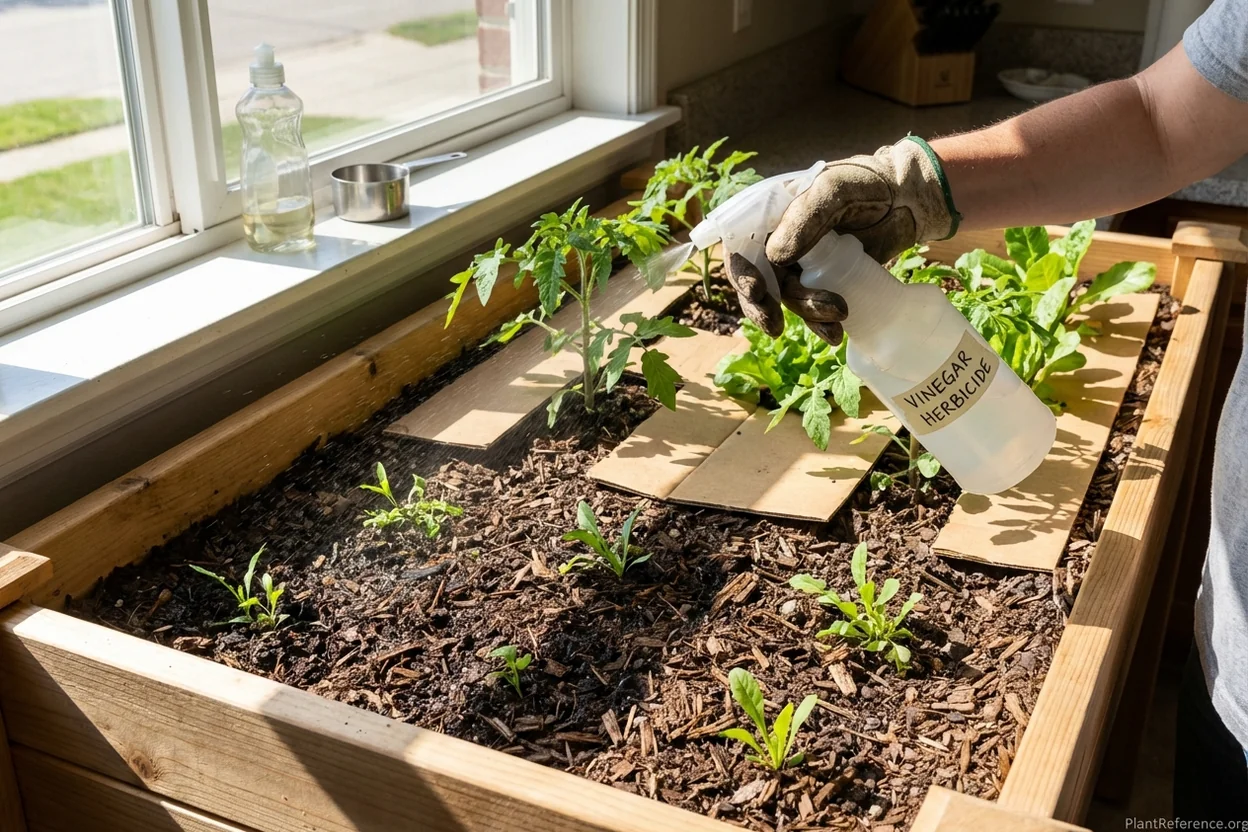
White vinegar solutions work on young, tender weeds through contact burn. Use 20-30% acetic acid concentration (stronger than grocery store vinegar). Add 1 tablespoon dish soap per quart as a surfactant to improve leaf coverage. Apply on sunny days when no rain is expected for 24 hours.
Vinegar only kills what it touches and doesn't affect roots, so perennial weeds regrow. You'll need repeated applications every 2-3 weeks until root reserves exhaust. It works best on annual weeds under 6 inches (15 cm) tall.
Corn gluten meal prevents seeds from germinating but doesn't kill established weeds. Apply in early spring before weed seeds sprout, typically when soil temperature reaches 55°F (13°C). Use 20 pounds per 1,000 square feet (9 kg per 93 sq m) for effective pre-emergent control.
Timing is critical with corn gluten—apply too late and it feeds growing weeds instead of preventing them. It also prevents your vegetable seeds from germinating, so only use in beds with transplants or established plants.
Boiling water provides instant kill for annual weeds and damages perennial root systems. Pour directly onto weed crowns and roots, soaking the root zone thoroughly. This method works well for weeds growing in cracks or along bed edges where selective spraying is difficult.
Be careful with boiling water near desirable plants—it kills everything it touches and can damage plant roots several inches away. Let treated areas cool completely before working in the soil.
Newspaper smothering eliminates large weed patches through light deprivation. Cover weedy areas with 8-10 layers of newspaper, wet thoroughly, and weight down with mulch. Leave in place for 4-6 months for complete kill of most weeds.
This method works well for converting weedy areas to planting beds or eliminating perennial grass invasions. The newspaper eventually decomposes, adding organic matter to the soil.
Managing Perennial Weed Invasion
Perennial weeds pose the biggest challenge in raised beds because they establish extensive root systems and spread aggressively. Managing them requires understanding their growth patterns and persistent, targeted control efforts.
Common perennial invaders include bindweed, quack grass, Canadian thistle, nutsedge, and dock. Each spreads differently and requires specific control strategies. Identifying them correctly determines your success rate.
Bindweed (also called morning glory) spreads through both seeds and extensive underground rhizomes. The roots can extend 20 feet (6 m) horizontally and 30 feet (9 m) deep. Pulling visible shoots weakens the plant gradually, but complete eradication takes 2-3 years of consistent effort.
Quack grass spreads through underground rhizomes that can regenerate from small fragments. Each piece of root can form a new plant, making mechanical removal tricky. The key is starving the root system by removing all top growth immediately when it appears.
Exhaustion strategy works on perennial weeds by depleting root energy reserves. Cut or pull all visible growth every 2-3 weeks throughout the growing season. Don't let any shoots develop leaves and start photosynthesis. This forces the plant to use stored root energy until reserves are depleted.
This method requires patience and consistency. Mark your calendar and stick to the schedule—missing even one removal cycle allows energy replenishment. Most perennial weeds succumb after 1-2 seasons of aggressive defoliation.
Root barrier installation prevents lateral spread into beds. Dig a trench 12-18 inches (30-45 cm) deep around affected bed areas. Install metal or thick plastic barriers vertically, leaving 2 inches (5 cm) above ground. This contains existing infestations and prevents new invasion.
Maintenance Schedule for Weed-Free Beds
Consistent maintenance prevents small weed problems from becoming major infestations. A regular schedule takes less time than sporadic intensive weeding sessions.
Weekly inspections during growing season catch weeds while they're manageable. Walk your beds every 7-10 days, looking specifically for new seedlings. Remove any weeds immediately—it takes 30 seconds now versus 30 minutes later.
Pay special attention to areas where mulch has settled or blown away. These bare spots become weed germination sites. Refresh mulch immediately when you spot gaps.
Monthly mulch maintenance keeps your primary defense system effective. Add 1-2 inches (2-5 cm) of fresh mulch to areas where decomposition has thinned coverage. Fluff existing mulch to prevent matting and maintain air circulation.
Check bed edges where mulch tends to scatter. Rake mulch back into place and add fresh material as needed. Edge maintenance prevents weeds from establishing footholds around bed perimeters.
Seasonal deep maintenance addresses problems before they establish. Early spring inspection identifies winter damage to barriers, mulch displacement, and emerging perennial weeds. Fall cleanup removes weed seeds and prepares beds for winter mulching.
Spring: Inspect and repair barriers, refresh mulch, apply pre-emergent treatments
Summer: Weekly weed patrols, monthly mulch refresh, spot treatments as needed
Fall: Remove seed-bearing weeds, heavy mulch application, barrier maintenance
Winter: Plan improvements, order materials, prepare tools for next season
Record keeping helps you identify problem areas and successful strategies. Note which beds require most attention, which weeds appear repeatedly, and which control methods work best. This information guides future prevention efforts and material purchases.
The goal is creating a system that maintains itself with minimal input. Good prevention pays dividends for years, while reactive control keeps you working harder every season.
Frequently Asked Questions
Reading about plants and recognising them are different skills. These three build the second.
- Daily PlantIdentify the day’s mystery plant from a close-up photograph.
- Keyed OutWork a dichotomous key, lead by lead, to name a hidden specimen.
- Name That PlantName a specimen from botanical clues dealt hardest first.
Free to play, no account needed
Dot grew up on a small farm in rural Virginia and has maintained a vegetable garden for decades. After retiring from teaching elementary school, she became a Master Gardener volunteer and spends her time mentoring new gardeners at community garden plots in Richmond. She's especially knowledgeable about heirloom varieties, seed saving, and traditional growing methods passed down from her grandmother. Dot's no-nonsense advice comes from extensive trial and error—she's seen every tomato disease, pest problem, and weather disaster imaginable. Her biggest pet peeve is gardeners who overcomplicate simple tasks. "Plants want to grow," she often says. "Your job is to not get in their way."