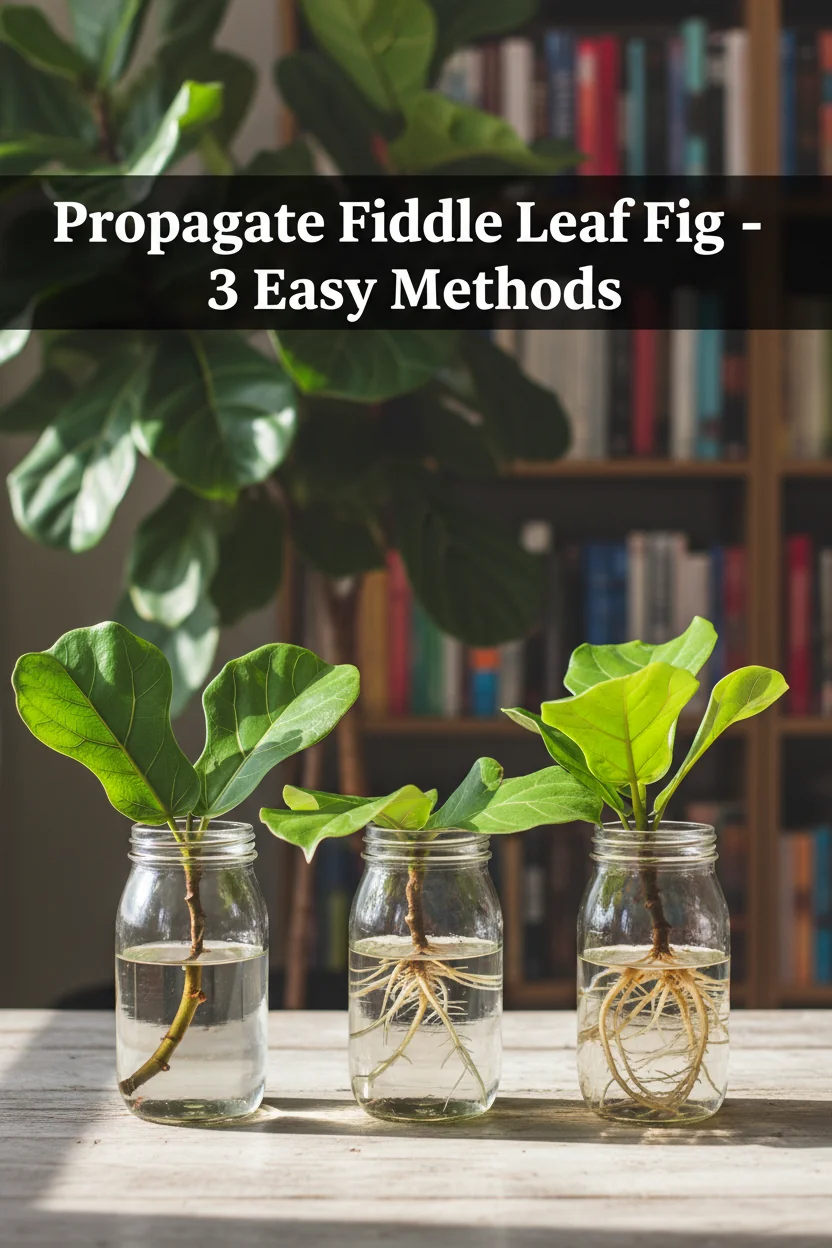
How to Propagate Fiddle Leaf Fig: 3 Easy Methods (2026)
Pets & Toxicity
Recorded toxicity for plants linked in this guide. An unknown status is not a safety assessment.
Toxic to pets: fiddle leaf figDetailsHide
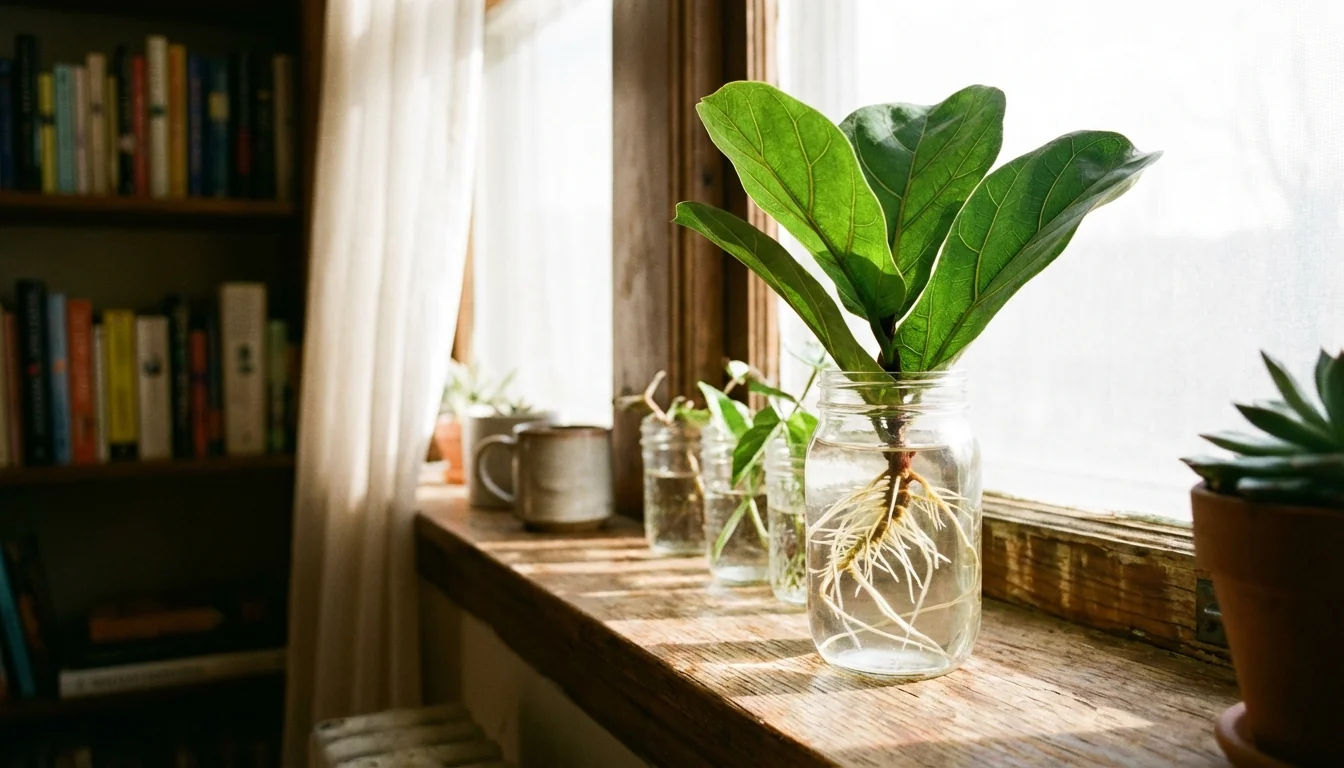
— Image © Plant Reference 2026
Want to multiply your fiddle leaf fig collection without spending $50-150 on new plants? Propagating fiddle leaf fig is surprisingly straightforward when you understand the science behind root development. This guide covers three proven propagation methods—water propagation, soil propagation, and air layering—with detailed timelines, troubleshooting advice, and the biological mechanisms that make each technique work.
Understanding Fiddle Leaf Fig Propagation
The fiddle leaf fig 🌿Ficus lyrata (FYE-kus lye-RAY-tuh) propagates through vegetative reproduction, meaning you can create genetically identical plants from stem cuttings or branches. This works because specialized cells in the cambium layer—the thin tissue between the bark and wood—can differentiate into root cells when separated from the parent plant and exposed to the right conditions.
When you cut a stem, the plant responds to this "wound" by activating auxins, natural plant hormones concentrated at the cut site. Auxins trigger cell division and differentiation, causing undifferentiated cells to transform into root initials (primordial root structures). These root initials develop into adventitious roots—roots that form from non-root tissue—over the course of several weeks.
Three factors determine propagation success:
Auxin concentration: Higher levels at the cut site speed root formation
Carbohydrate reserves: Stored energy in the stem fuels root development
Environmental conditions: Temperature, humidity, and light affect cellular metabolism
Understanding these mechanisms helps you optimize conditions for faster, more reliable rooting. The Fiddle Leaf Fig Care: The Complete Guide (2025) provides foundational care knowledge that applies equally to propagation success.
Best Time to Propagate Fiddle Leaf Fig
Timing dramatically impacts propagation success rates because cellular activity and hormone levels fluctuate seasonally.
Spring and early summer (March through July) offer the highest success rates for three biological reasons:
Peak auxin production: Plants produce maximum growth hormones during active growing season
Accelerated cell division: Warm temperatures (65-75°F / 18-24°C) increase metabolic rates and cell division speed
Energy reserves: Plants accumulate carbohydrates through increased photosynthesis, providing fuel for root development
Propagation during fall and winter faces significant challenges. Fiddle leaf figs enter dormancy when daylight hours decrease and temperatures drop, dramatically slowing metabolic processes. Auxin production decreases by 60-70%, and cell division rates drop to minimal levels. Cuttings taken during dormancy often sit for 8-12 weeks without root development, and many eventually rot from insufficient energy reserves.
Optimal propagation window: Late March through early July in most climates. This coincides with the period when your parent plant produces new growth—if you see new leaves emerging, the plant has sufficient energy reserves and hormone levels for successful propagation.
Temperature considerations matter more than calendar dates. Maintain 65-75°F (18-24°C) consistently for optimal rooting regardless of season. If you provide supplemental grow lights and maintain appropriate temperatures, you can propagate year-round with reasonable success, though spring/summer propagation still performs best.
Method 1: Water Propagation (Easiest for Beginners)
Water propagation offers the most beginner-friendly approach because you can monitor root development visually and adjust conditions immediately if problems arise. This method works through hydroponics—roots develop directly in water without soil medium.
Advantages of Water Propagation
Visual monitoring: Watch roots develop daily; identify problems before they become fatal
Lower failure rate: Water provides consistent moisture without risk of soil-borne pathogens
No specialized equipment: Requires only a jar, water, and a windowsill
Faster initial rooting: Roots often appear 7-10 days earlier than soil propagation
Disadvantages of Water Propagation
Transplant shock: Roots adapted to water struggle initially when moved to soil
Weaker root structure: Water roots develop fewer root hairs than soil-grown roots
Additional step required: Must transition cutting from water to soil eventually
Step-by-Step Water Propagation Instructions
Step 1: Select and prepare your cutting
Choose a healthy stem section with 2-3 leaves and at least one node (the bumpy area on the stem where leaves emerge). Avoid sections with brown spots, yellowing, or pest damage. The stem should be 4-6 inches (10-15 cm) long and pencil-thick or larger in diameter.
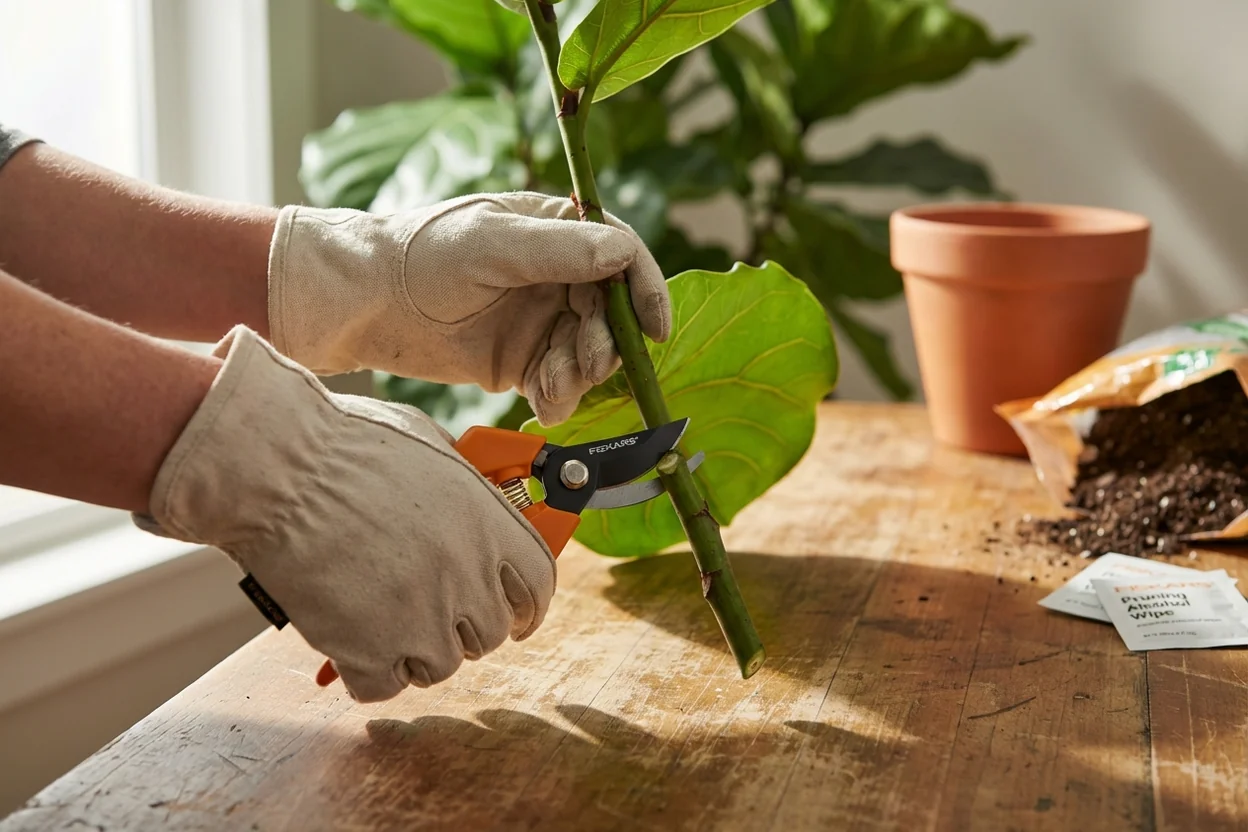
Clean your pruning shears with rubbing alcohol to prevent bacterial or fungal transfer. Make your cut at a 45-degree angle approximately 0.25 inches (0.6 cm) below a node using sharp, clean shears. The angled cut increases surface area for root emergence and prevents the cut end from sitting flat against the jar bottom, which can impede root development.
Remove any leaves from the bottom 2-3 inches (5-7.5 cm) of the stem. Submerged leaves rot quickly and contaminate the water with bacteria that can kill the cutting.
Step 2: Prepare your rooting container
Use a clear glass jar or vase so you can monitor root development and water quality. The container should be tall enough that the cutting remains upright without support. Fill the container with room-temperature filtered or distilled water, leaving the top 2-3 inches (5-7.5 cm) of stem and all leaves above the waterline.
Tap water works in most areas, but if your municipal water contains high chlorine or chloramine levels, let it sit uncovered for 24 hours to allow chemicals to dissipate. Fluoride in water doesn't affect rooting but can cause brown leaf tips over time.
Step 3: Provide optimal rooting conditions
Place the jar in bright indirect light—near an east or west-facing window works perfectly. The cutting needs 6-8 hours of light daily to maintain photosynthesis and produce the carbohydrates required for root development. Direct afternoon sun can overheat the water and damage developing roots, so use sheer curtains if necessary. Review Fiddle Leaf Fig Light Requirements: The Ultimate Guide for optimal light placement strategies.
Maintain room temperature between 65-75°F (18-24°C). Warmer temperatures accelerate root development, but temperatures above 80°F (27°C) can cause water to stagnate and develop algae or bacteria. Avoid placing cuttings near heating vents, air conditioners, or drafty windows where temperature fluctuations stress the cutting.
Step 4: Maintain water quality
Change the water every 5-7 days to prevent bacterial growth and maintain oxygen levels. Before changing, examine the water—it should remain clear. Cloudy water indicates bacterial contamination; if this occurs, change water immediately and rinse the jar thoroughly.
When changing water, gently rinse the stem under lukewarm running water to remove any slime or biofilm that may have developed. This biofilm harbors bacteria that can rot the cutting. Refill with fresh room-temperature water at the same level as before.
Step 5: Monitor root development
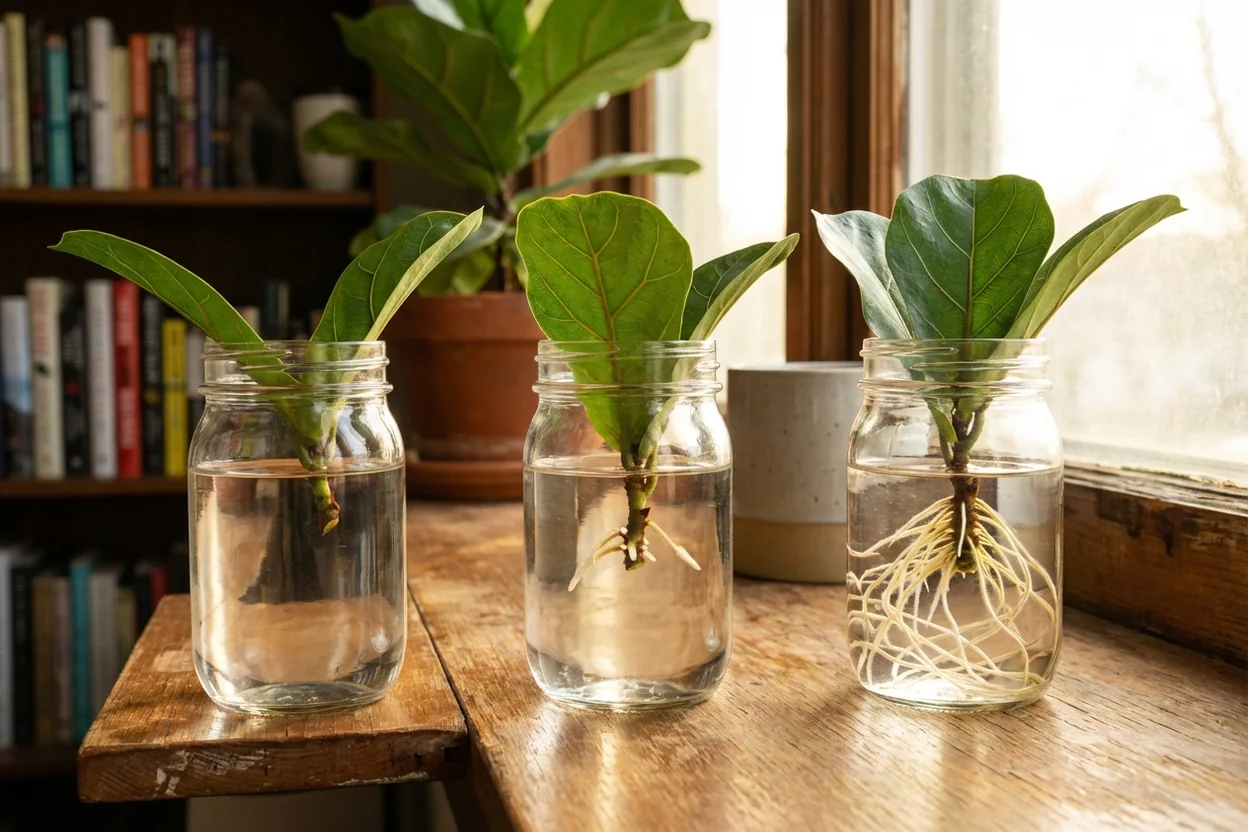
Expect to see small white bumps (root initials) forming along the submerged stem within 2-3 weeks. These bumps develop into white threadlike roots over the following 1-2 weeks. Roots typically reach 2-3 inches (5-7.5 cm) in length within 4-6 weeks total.
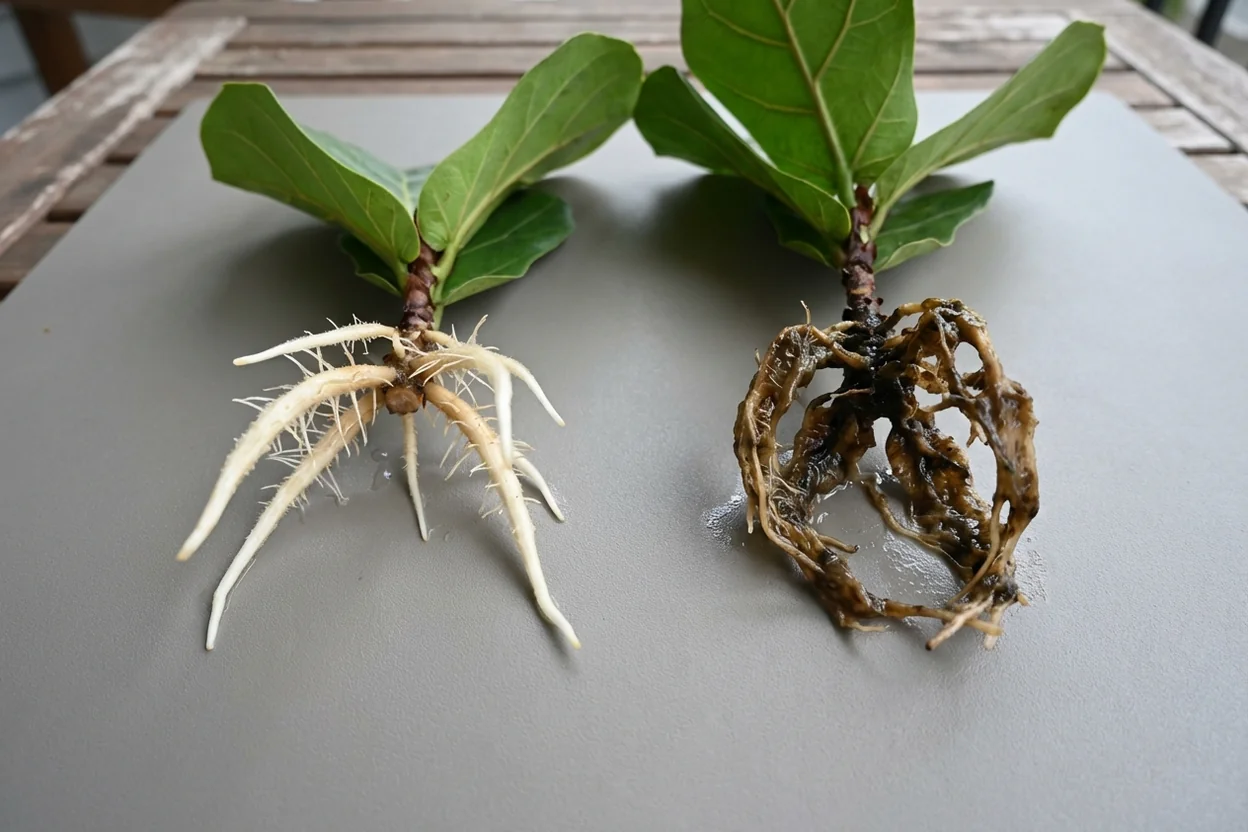
Healthy roots appear white or light tan and firm to the touch. Brown, mushy, or slimy roots indicate rot—remove affected roots immediately with sterile scissors and change the water. If rot persists, the cutting may not be viable.
Step 6: Transplant to soil
Once roots reach 3-4 inches (7.5-10 cm) in length, the cutting is ready for soil. Waiting longer produces a more established root system, but excessively long roots (6+ inches / 15+ cm) become fragile and prone to breakage during transplanting.
To minimize transplant shock, prepare a 6-inch (15 cm) pot with well-draining potting mix—the Best Soil for Fiddle Leaf Fig (Tested & Compared) article details ideal soil composition. Create a hole in the center of the soil deep enough to accommodate all roots without bending them.
Gently remove the cutting from water and immediately transfer to the prepared hole. Backfill with soil, pressing gently to eliminate air pockets around roots. Water thoroughly until water drains from the bottom, then place in the same light conditions where the cutting rooted.
Expect some leaf droop for the first 3-5 days as roots adapt from water to soil. This is normal. Maintain consistent moisture—don't let the soil dry completely during the first two weeks. After initial establishment, follow standard How to Water a Fiddle Leaf Fig (Never Kill Yours Again) guidelines.
Water Propagation Timeline
Week 1-2: No visible change; auxin accumulation and cell differentiation occurring internally
Week 3-4: Root initials emerge as white bumps; small roots begin developing
Week 5-6: Roots reach 2-3 inches (5-7.5 cm); continue water propagation
Week 7-8: Roots reach 3-4 inches (7.5-10 cm); transplant-ready
Week 9-10 (post-transplant): Root system adapts to soil; new leaf growth may begin
Method 2: Soil Propagation (Faster Establishment)
Soil propagation eliminates the water-to-soil transition step by developing roots directly in potting medium. While you sacrifice visual monitoring, this method produces stronger root systems with more root hairs—the microscopic structures responsible for water and nutrient absorption.
Advantages of Soil Propagation
Stronger root development: Roots develop more root hairs and branching in response to soil structure
No transplant shock: Roots never need to transition between environments
One-step process: No intermediate water stage required
Lower maintenance: Change water weekly vs. check soil every few days
Disadvantages of Soil Propagation
No visual monitoring: Can't observe root development; must wait for new growth to confirm success
Higher failure rate: Soil-borne fungi and bacteria increase risk of rot
Requires more attention: Must balance moisture—too wet causes rot, too dry prevents rooting
Step-by-Step Soil Propagation Instructions
Step 1: Prepare your cutting
Follow the same cutting preparation as water propagation—select a healthy 4-6 inch (10-15 cm) stem with 2-3 leaves and at least one node. Make a clean 45-degree cut below a node with sterilized pruning shears. Remove leaves from the bottom 2-3 inches (5-7.5 cm).
Step 2: Optional rooting hormone application
While not required, rooting hormone significantly improves success rates and speeds root development by 1-2 weeks. Dip the cut end in rooting hormone powder, tapping off excess. The rooting hormone section below provides detailed information on when and how to use these products effectively.
Step 3: Prepare the rooting container
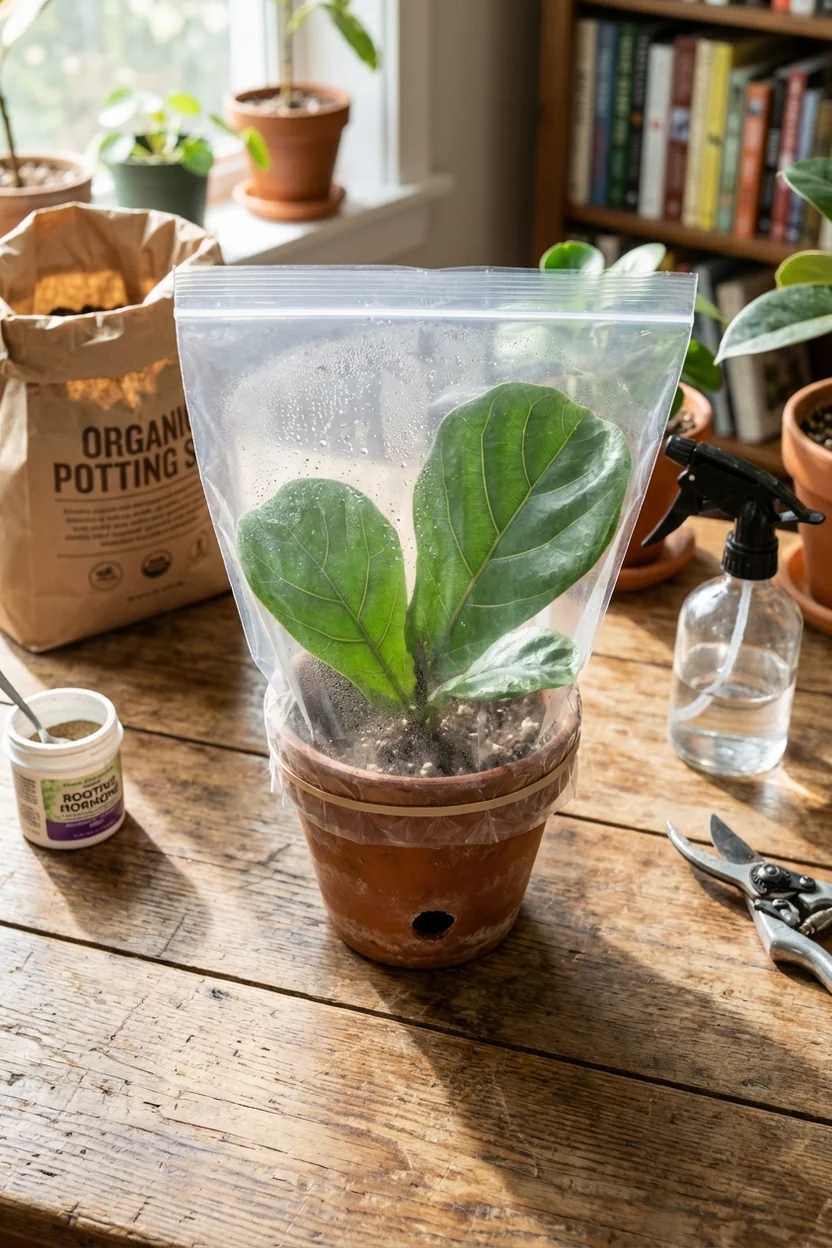
Use a 4-6 inch (10-15 cm) pot with drainage holes. Fill with a light, well-draining propagation mix—equal parts potting soil and perlite works well. Avoid heavy soil that retains too much moisture, which increases rot risk. Pre-moisten the soil until damp but not soggy.
Create a planting hole 2-3 inches (5-7.5 cm) deep in the center of the pot. The hole should accommodate the leafless section of stem without forcing it.
Step 4: Plant the cutting
Insert the prepared cutting into the hole, ensuring at least one node sits below the soil surface. Nodes have the highest concentration of meristematic cells capable of differentiating into roots, making them essential for root development.
Gently firm soil around the cutting to eliminate air pockets and provide support. The cutting should stand upright without additional support. If it leans, stake it temporarily with a small bamboo stick.
Step 5: Create humidity environment
High humidity (60-80%) dramatically improves soil propagation success by reducing transpiration stress while the cutting lacks roots to replace water loss. Create a humidity dome using a clear plastic bag or cut plastic bottle placed over the cutting. Ensure the dome doesn't touch leaves—contact promotes fungal growth.
Alternatively, place multiple cuttings in a large clear plastic storage container to create a self-contained propagation chamber. Remove the dome or bag for 10-15 minutes daily to allow air circulation and prevent fungal problems.
Step 6: Maintain optimal conditions
Place the pot in bright indirect light—same conditions as water propagation. Maintain 65-75°F (18-24°C) temperature consistently.
Check soil moisture every 2-3 days. The soil should feel like a wrung-out sponge—damp but not waterlogged. If the top inch feels dry, water lightly. If water pools on the surface or the pot feels heavy, skip watering. Overwatering is the leading cause of soil propagation failure.
Step 7: Monitor for root development
Unlike water propagation, you cannot observe root development directly. Instead, monitor for these success indicators:
New growth: A new leaf emerging indicates successful rooting (typically 6-10 weeks)
Resistance to gentle tugging: After 6-8 weeks, gently tug the stem—if you feel resistance, roots have developed
Perky leaves: Leaves remain firm and upright rather than drooping or wilting
If the cutting shows no new growth after 10-12 weeks, it may have failed. Gently remove it from soil and inspect—healthy roots appear white or tan, while rotted cuttings show brown, mushy stems.
Step 8: Reduce humidity gradually
Once new growth appears, begin acclimating the cutting to normal humidity levels. Remove the humidity dome for progressively longer periods over 7-10 days—start with 1 hour daily, then 2 hours, then 4 hours, until the dome is removed entirely.
This gradual transition allows the plant to adjust to lower humidity without shock. If leaves droop when the dome is removed, replace it and extend the acclimation period another week.
Soil Propagation Timeline
Week 1-3: No visible change; internal cell differentiation and root initial formation
Week 4-6: Roots developing underground; no external signs yet
Week 6-8: Roots becoming established; gentle tug test shows resistance
Week 8-10: New leaf growth begins—first visible sign of success
Week 10-12: Continue normal care; plant fully rooted and growing
Method 3: Air Layering (Highest Success Rate)
Air layering produces the highest success rates (90%+ vs. 60-70% for cutting methods) because the new plant develops roots while still attached to the parent plant, maintaining continuous access to water and nutrients. This technique creates a mature, well-rooted plant that experiences minimal shock when separated.
The tradeoff: air layering takes longer (8-12 weeks) and requires the parent plant to remain in place during rooting. However, for propagating a prized or expensive fiddle leaf fig where failure isn't acceptable, air layering offers the most reliable results.
Advantages of Air Layering
Highest success rate: 90%+ when done correctly; the new plant never experiences resource stress
Mature rooted plant: Produces a fully functional plant with established root system immediately upon separation
No transplant shock: Roots develop in the same environment where the plant will live
Works for woody stems: Can propagate thick, mature stems that often fail with cutting methods
Disadvantages of Air Layering
Longer process: Takes 8-12 weeks minimum vs. 6-8 weeks for cuttings
More complex: Requires specialized materials and careful technique
Parent plant immobilized: Can't move the parent plant during the rooting period
Visible on plant: The rooting site (wrapped in plastic) affects the plant's appearance temporarily
Step-by-Step Air Layering Instructions
Step 1: Select the stem section
Choose a healthy stem section at least 12 inches (30 cm) from the growing tip. The stem should be pencil-thick or thicker—thin stems lack sufficient stored energy for root development. Identify a spot where you'd like roots to form, typically where a leaf recently fell off, leaving a visible node.
Step 2: Wound the stem
Using a clean, sharp knife, make two parallel cuts around the stem circumference approximately 1-2 inches (2.5-5 cm) apart. Cut through the bark and cambium layer (the thin green layer beneath the bark) but not deeply into the wood—cuts should be 1-8 inch (3 mm) deep maximum.
Carefully peel away and discard the bark between the two cuts, exposing the light-colored wood beneath. This removes the phloem tissue that transports sugars downward, forcing carbohydrates to accumulate above the wound site. The accumulated carbohydrates and auxins trigger root formation.
Step 3: Apply rooting hormone (optional)
Dust the exposed wood with rooting hormone powder. While air layering works without rooting hormone, application speeds root development by 2-3 weeks and increases root density.
Step 4: Wrap with sphagnum moss
Soak a generous handful of sphagnum moss in water for 10-15 minutes, then squeeze out excess water until the moss is damp but not dripping. The moss should feel like a wrung-out sponge.
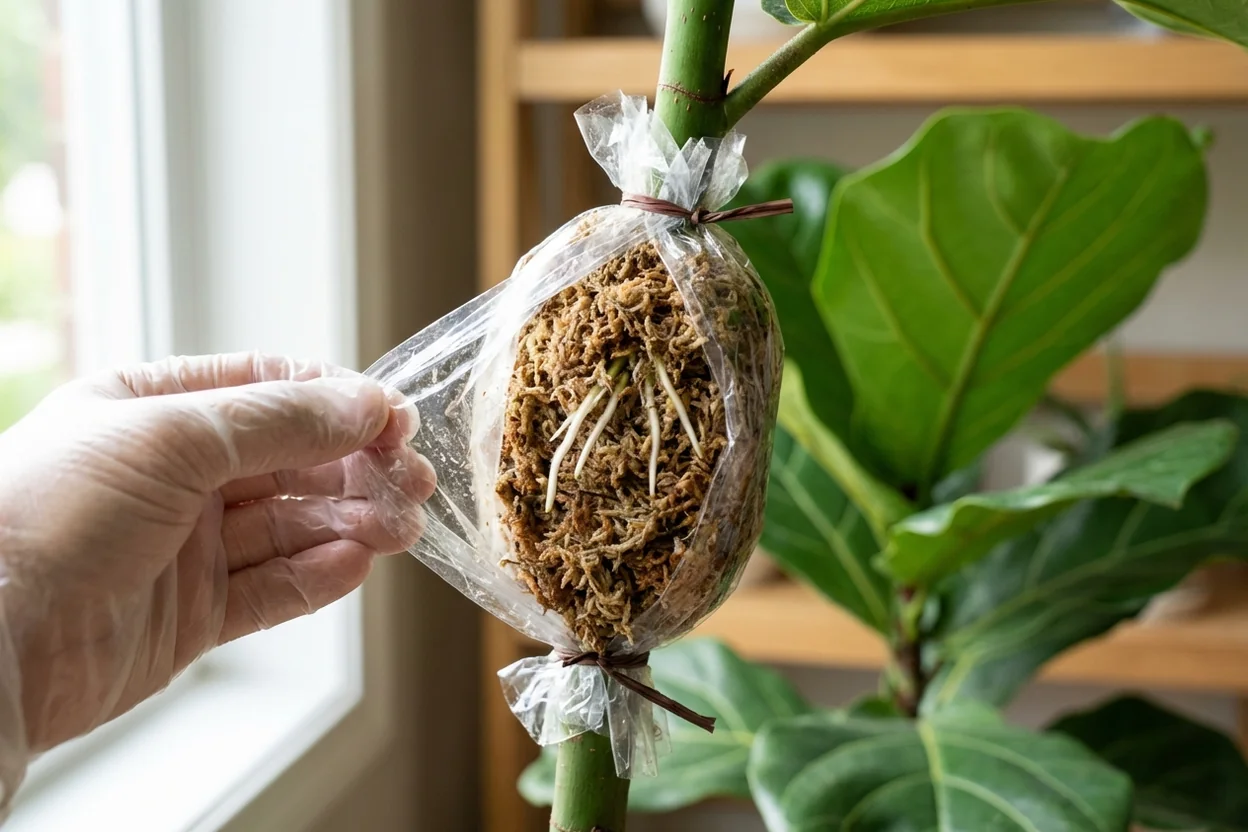
Pack the moist sphagnum moss around the wounded area, creating a 2-3 inch (5-7.5 cm) thick layer that completely covers the exposed wood. The moss provides moisture, oxygen, and a rooting medium for developing roots.
Step 5: Wrap with plastic
Wrap the moss-covered section with clear plastic wrap, creating an enclosed chamber. Secure the bottom of the plastic tightly with twist ties, garden tape, or string, creating a watertight seal. Leave the top slightly loose to allow some air circulation while maintaining high humidity.
The plastic retains moisture and creates a humid microenvironment that promotes root development. Use clear plastic so you can monitor root growth without disturbing the setup.
Step 6: Maintain the air layer
Check the moss moisture level weekly by gently squeezing the plastic—it should feel spongy and damp. If the moss dries out (feels light and crispy), carefully unwrap the top, add water with a spray bottle, and reseal.
Monitor for roots through the clear plastic. Healthy roots appear white and develop from the upper edge of the wound (above the removed bark section) within 6-10 weeks.
Step 7: Separate the new plant
When roots completely fill the moss ball and reach 3-4 inches (7.5-10 cm) in length (typically 8-12 weeks), the air layer is ready for separation. Using clean, sharp pruning shears, cut the stem completely through just below the lowest twist tie.
Remove the plastic wrap carefully, keeping the moss intact around the roots. The moss provides protection during transplanting and helps retain moisture around the fragile new roots.
Step 8: Plant the new specimen
Prepare a pot one size larger than the moss root ball—typically 6-8 inches (15-20 cm) diameter. Fill with well-draining potting soil. Create a hole large enough to accommodate the entire moss root ball without compressing it.
Place the new plant in the hole with the moss ball intact. Backfill with additional potting soil, gently firming around the moss to eliminate air pockets. Water thoroughly until water drains from the bottom.
Place in bright indirect light and maintain consistent soil moisture for the first 2-3 weeks while the roots extend beyond the moss into the surrounding soil. Once you see new growth, the plant has fully established and you can follow standard How to Repot a Fiddle Leaf Fig (Step-by-Step) care guidelines.
Air Layering Timeline
Week 1-2: Wound healing; callus tissue forms at cut edges
Week 3-4: Root initials develop from callus tissue; no visible roots yet
Week 5-7: White roots become visible through plastic, starting at upper wound edge
Week 8-10: Roots fill moss ball and reach 3-4 inches; ready for separation
Week 11-12 (post-separation): New plant establishes in pot; new leaf growth begins
Rooting Hormone: Do You Need It?
Rooting hormone contains synthetic auxins (typically indole-3-butyric acid or IBA) that mimic natural plant hormones responsible for root initiation. While fiddle leaf figs root successfully without hormone supplementation, using rooting hormone offers measurable benefits in both speed and success rates.
Scientific Evidence for Rooting Hormone Benefits
Research on Ficus species shows rooting hormone increases success rates by 15-25% and reduces rooting time by 10-14 days compared to untreated cuttings. The hormone works by:
Accelerating cell division: Higher auxin concentration at the cut site speeds up meristematic cell differentiation into root tissue
Increasing root density: Treated cuttings develop 30-40% more root initials than untreated cuttings
Reducing mortality: The antifungal agents in many rooting hormone products (captan or thiram) protect against rot during the vulnerable rooting period
When Rooting Hormone Provides Maximum Benefit
Rooting hormone offers the greatest advantage in these situations:
Fall or winter propagation: Compensates for lower natural auxin levels during dormancy
Woody or mature stems: Older stems have thicker bark that slows auxin transport; external application increases local concentration
Soil propagation: Where you cannot monitor root development visually, hormone improves odds of success
First-time propagators: Increases success likelihood, building confidence for future attempts
How to Use Rooting Hormone Correctly
Powder formulations (most common): Pour a small amount into a disposable container—never dip cuttings directly into the original bottle, which introduces moisture and contaminants. Dip the cut end 0.5-1 inch (1.25-2.5 cm) deep into the powder, then tap gently to remove excess. A light dusting is sufficient—excess powder can actually inhibit rooting.
Gel formulations: Apply a thin layer to the cut surface using a cotton swab or small brush. Gel adheres better than powder, particularly useful for air layering where the hormone must stick to vertical or upside-down surfaces.
Liquid formulations: Dilute according to package directions (concentrations vary by product). Soak the cut end for 3-5 seconds, then proceed with propagation. Liquid formulations provide the most uniform hormone distribution but expire faster once mixed.
Bottom Line on Rooting Hormone
For water propagation, rooting hormone provides minimal benefit—you can see if roots develop and adjust conditions immediately if problems arise. For soil propagation and air layering, where visual monitoring is impossible, rooting hormone significantly improves success odds and is worth the $8-15 investment, particularly for beginners.
Troubleshooting Common Propagation Problems
Problem: No Root Development After 8+ Weeks
Causes: Insufficient light, temperatures too low, dormant season propagation, cutting from unhealthy parent plant, or cut site dried out before rooting began
Solutions: Move to brighter location (directly in front of window if not already there). Verify temperature stays consistently 65-75°F (18-24°C)—use a thermometer rather than estimating. If propagating in fall or winter, consider waiting until spring or providing supplemental grow lights to extend "daylight" to 12-14 hours daily.
For water propagation, check if the water level dropped, exposing the cut end—dried tissue cannot initiate roots. For soil propagation, ensure moisture remains consistent without waterlogging.
If the cutting has been in water 12+ weeks with no root development, it likely won't succeed. Start with a fresh cutting from healthy growth on the parent plant during spring or summer.
Problem: Stem Rotting at Cut Site
Causes: Bacterial or fungal infection, water or soil too wet, insufficient air circulation, or cut made with dirty pruning tools
Solutions: Remove cutting from water or soil immediately. Cut away all brown, mushy, or slimy tissue until you reach healthy green tissue. Re-cut the stem at a 45-degree angle with sterilized shears, removing an additional 0.5-1 inch (1.25-2.5 cm) above the rot.
For water propagation, use fresh clean water and a sterilized container. Change water every 3-4 days instead of weekly. Add 1-2 drops of hydrogen peroxide per cup of water to inhibit bacterial growth (optional).
For soil propagation, use fresh sterile potting mix. Reduce watering frequency—soil should dry slightly between waterings. Remove humidity dome for 30-60 minutes daily to improve air circulation.
Problem: Leaves Turning Yellow or Dropping
Causes: Normal stress response to losing root system, insufficient light, or water quality issues (for water propagation)
Solutions: Some yellowing of the lowest leaf is normal—the cutting redirects resources to root development rather than maintaining all foliage. If all leaves yellow simultaneously, increase light exposure to improve photosynthesis.
For water propagation, if multiple leaves yellow, change to filtered or distilled water—tap water chemicals (chlorine, chloramine, fluoride) occasionally cause problems. Ensure the cutting receives 6-8 hours of bright indirect light daily.
One or two leaves dropping from a cutting with 3-4 leaves is acceptable. If all leaves drop, the cutting has likely failed—check for any root development, and if none exists after 6+ weeks, start with a fresh cutting.
Problem: Mold Growing on Soil or in Water
Causes: Excessive moisture, poor air circulation, or organic matter decomposing (in soil propagation)
Solutions: For soil propagation, remove humidity dome permanently and let soil dry to damp (not wet) before watering again. Scrape off visible mold from soil surface and dispose of it. Improve air circulation by placing a small fan nearby (not blowing directly on cutting). Mix cinnamon powder into the top layer of soil—cinnamon has antifungal properties that suppress mold growth.
For water propagation, change water immediately, rinse the cutting thoroughly under running water to remove any slime, and sterilize the container with diluted bleach (1:10 bleach to water), rinsing thoroughly before refilling. Use distilled water to reduce fungal spores.
Problem: Water Roots Breaking During Soil Transplant
Causes: Roots too long and fragile, or rough handling during transplant
Solutions: Prevention works better than fixing broken roots. Transplant when roots reach 3-4 inches (7.5-10 cm) rather than waiting for 6+ inch roots that become fragile.
During transplant, work quickly to minimize root exposure to air, which desiccates delicate root tissue. Fill the planting hole with water before inserting the cutting, allowing roots to float into position naturally rather than bending them.
If roots break during transplant, the plant usually survives but experiences setback of 2-3 weeks. Maintain higher humidity around the newly planted cutting for 7-10 days by placing a clear plastic bag over the entire plant to reduce transpiration stress while new roots regenerate.
Caring for Your New Fiddle Leaf Fig Plant
Once roots establish—whether from water, soil, or air layering—your propagated fiddle leaf fig requires the same care as mature plants, with a few temporary modifications during the first 8-12 weeks.
Immediate Post-Rooting Care (Weeks 1-4)
Light: Maintain bright indirect light (6-8 hours daily) but avoid direct sun, which can stress the developing plant. Keep in the same location where rooting occurred to minimize adjustment stress.
Water: Newly rooted plants need consistent moisture. For water-propagated cuttings recently moved to soil, check moisture daily and water when the top 1 inch (2.5 cm) feels dry—more frequently than you'd water mature plants. For soil-propagated plants, continue the "damp sponge" moisture level for 2-3 weeks, then transition to normal watering schedules.
Fertilizer: Do not fertilize during the first 6-8 weeks. The roots are too delicate to handle dissolved salts, and the plant focuses energy on root expansion rather than new growth. Premature fertilization causes root burn that sets back establishment.
Temperature and humidity: Maintain 65-75°F (18-24°C) consistently. If you used a humidity dome during propagation, continue it for 1-2 weeks post-transplant, gradually acclimating the plant to normal room humidity by removing the dome for progressively longer periods each day.
Transitional Care (Weeks 5-12)
Water: Begin transitioning to normal watering schedules—water when the top 2-3 inches (5-7.5 cm) of soil feels dry. The plant's expanding root system can now access moisture deeper in the pot.
Fertilizer: Once you observe new leaf growth (indicating the root system has expanded), begin fertilizing at half the recommended strength. Fertilize every 3-4 weeks during spring and summer with a balanced liquid fertilizer. See product recommendations below for specific formulations.
Repotting: Avoid repotting during the first 6-12 months unless the plant becomes severely root-bound. Young plants benefit from slight root confinement, which encourages vertical growth rather than excessive root sprawl.
Long-Term Care (After 12 Weeks)
Follow the comprehensive care guidelines in Fiddle Leaf Fig Care: The Complete Guide (2025), which covers mature plant requirements for light, water, fertilization, pruning, and seasonal adjustments. Your propagated plant will develop the same needs as its parent plant—the only difference is size.
Expect your propagated fiddle leaf fig to produce new leaves every 4-6 weeks during the growing season once fully established. Growth rate depends primarily on light intensity—plants receiving 10+ hours of bright indirect light daily can produce 8-12 new leaves annually, while plants in lower light may only produce 4-6 leaves.
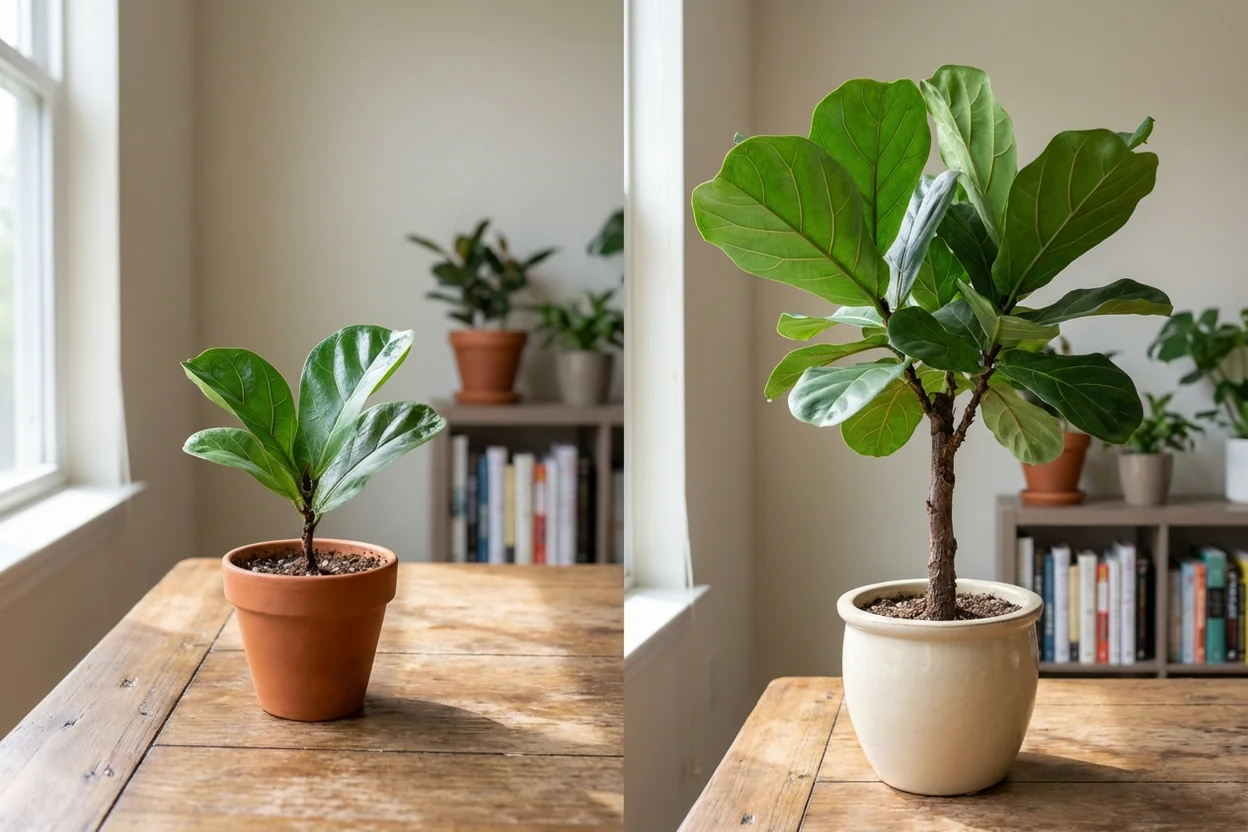
Within 2-3 years, your propagated cutting will develop into a mature specimen identical to what you'd purchase at a nursery for $50-150, except you'll have the satisfaction of growing it yourself from a single stem cutting.
Frequently Asked Questions
Reading about plants and recognising them are different skills. These three build the second.
- Daily PlantIdentify the day’s mystery plant from a close-up photograph.
- Keyed OutWork a dichotomous key, lead by lead, to name a hidden specimen.
- Name That PlantName a specimen from botanical clues dealt hardest first.
Free to play, no account needed
Amanda came to gardening through an unexpected route—after developing chronic pain from rheumatoid arthritis in her late 20s, she started researching adaptive gardening techniques that would allow her to continue growing plants without aggravating her condition. Now based in Minneapolis, she writes about accessible gardening, raised bed designs for people with mobility challenges, and ergonomic tools that reduce strain. Amanda completed a certificate in sustainable urban agriculture and volunteers with a nonprofit that builds accessible community gardens. She grows vegetables, herbs, and flowers in waist-high raised beds she designed herself. Her writing focuses on practical solutions that work for real people with real limitations—whether that's arthritis, limited mobility, or just a bad back.